

How to Unzip (extract) Files from a Zipped Folder in Windows 10
You can zip (compress) a file so that it takes up less space. This makes it easier to email or move the file. You can also zip multiple files into a single compressed folder. This makes it easier to share a group of files. To open a file that has been zipped, you need to unzip (extract) it first.
This tutorial will show you different ways on how to unzip (extract) files from a zipped folder in Windows 10.
If you zip or add EFS encrypted files to a zipped compressed folder, the encrypted files will no longer be encrypted in the ZIP folder or after theyre extracted from the ZIP folder.
For a Windows 11 version of this tutorial, see:
Unzip (extract) Files from ZIP Folder in Windows 11
Contents
- Option One: To Extract All Files from Zipped Folder using Context Menu
- Option Two: To Extract All Files from Zipped Folder using File Explorer Ribbon
- Option Three: To Extract a Specific File or Files from Zipped Folder
- Option Four: To Extract All Files from Zipped Folder in PowerShell
- Option Five: To Extract All Files from Zipped Folder in Command Prompt
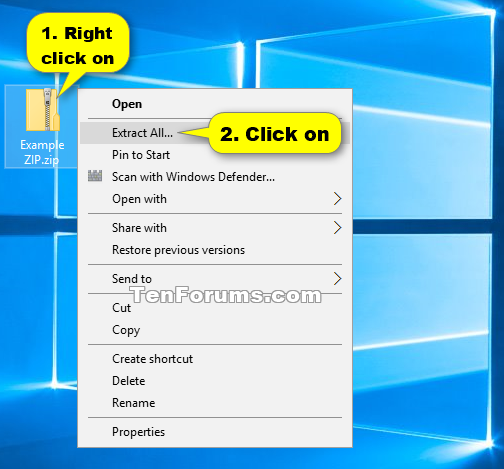
1 Right click or press and hold on the zipped folder, and click/tap on Extract All. (see screenshot below)
2 Browse to the folder location where you want to extract all contents in the zipped folder to, check or uncheck the Show extracted files when complete for what you want, and click/tap on Extract. (see screenshot below)
The default location will be the same location as the zipped folder.
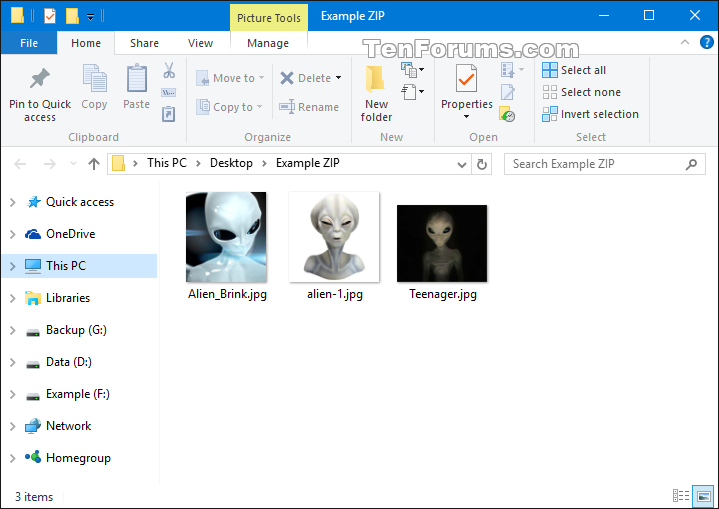
3 The files will now be extracted. (see screenshot below)
1 Open the zipped folder, click/tap on the "Compressed Folder Tools" Manage tab, and click/tap on the Extract all icon. (see screenshot below)
2 Browse to the folder location where you want to extract all contents in the zipped folder to, check or uncheck the Show extracted files when complete for what you want, and click/tap on Extract. (see screenshot below)
The default location will be the same location as the zipped folder.
3 The files will now be extracted. (see screenshot below)
1 Open the zipped folder.
2 Drag or copy the item(s) from the zipped folder to a new location.
1 Open PowerShell.
2 Type the command below into PowerShell, and press Enter. (see screenshot below)
Expand-Archive -Path "Full path of ZIP" -DestinationPath "Full path of folder to extract all"
Substitute Full path of ZIP in the command above with the actual full path of the .zip file.
Substitute Full path of folder to extract all in the command above with the actual full path of the folder you want to extract all contents of the .zip file to.
For example:Expand-Archive -Path "C:\Users\Tuffy\Desktop\test.zip" -DestinationPath "C:\Users\Tuffy\Desktop"
This option will not work if the ZIP file name has a space in it.
1 Open a command prompt.
2 Type the command below into the command prompt, and press Enter.
PowerShell -Command "Expand-Archive -LiteralPath 'Full path of ZIP' -DestinationPath 'Full path of folder to extract all'"
Substitute Full path of ZIP in the command above with the actual full path of the .zip file.
Substitute Full path of folder to extract all in the command above with the actual full path of the folder you want to extract all contents of the .zip file to.
For example:PowerShell -Command "Expand-Archive -LiteralPath 'C:\Users\Tuffy\Desktop\test.zip' -DestinationPath 'C:\Users\Tuffy\Desktop'"
That's it,
Shawn Brink
Related Tutorials
- How to Zip (compress) a File or Folder in Windows 10
- How to Add or Remove 'Extract All' Context Menu for ZIP Files in Windows
- How to Change Send to Compressed (zipped) Folder Icon in Windows
Unzip Files from Zipped Folder in Windows 10
-
New #1
Thanx for your very usefull tutorial. Your site is a reference for my Windows 10 stuff learning!!
But I have a question here.
In the Option Two, there is a series of suggested folders and a Extract Here option grayed. It would be quicker to select the folder to unzip from there than from the Extract All option. Why are they always grayed!?
-
New #2
Hello netuno, :)
The suggested folders will be grayed out until a file is selected in the opened .zip file.
Are you able to "Extract all" from the context menu? If not, then please post a screenshot showing the ribbon icon grayed out to see what the issue may be.
-
New #3
Thanx for your answer Brink! I saw it now. The folder turn selectable after a chose a file as you have said.
And yes, my context menu has the Extract All option!!
-
-
New #5
Something didn`t work
I followed the instructions for option 2 (I hope) but when I tried to install the specific file to the computer
I got a red dialogue box saying "The system cannot find the file specified".I`ve tried 2 or 3 times with the same result
what have I missed?
-
New #6
Hello Terry, :)
When you got the error message, was it for the location that the Browse window opened to? If so, you should be able to continue to Browse and select another location to extract to.
Are you able to do any of the other options to extract all files from the ZIP?
-
New #7
The files are in the folder I selected in option 2 so I`m not sure why they won`t install.
I tried option 1 but I don`t get the same diolgue box as in your screenshot, I`ve (hopefully)
attached a screenshot of the one I get with a right click.Click and hold doesn`t work either.

Last edited by Brink; 26 Sep 2016 at 13:57. Reason: Attached your uploaded image
-
-
Unzip Files from Zipped Folder in Windows 10
How to Unzip (extract) Files from a Zipped Folder in Windows 10Published by Shawn BrinkCategory: Customization
11 Aug 2022


 Quote
Quote

Tutorial Categories

Related Discussions
