

How to Add or Remove 'Turn off BitLocker' Context Menu from Drives in Windows
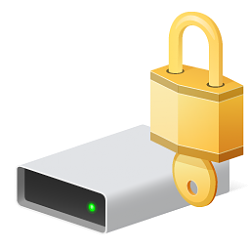
You can use BitLocker Drive Encryption to help protect your files on an entire drive. BitLocker can help block hackers from accessing the system files they rely on to discover your password, or from accessing your drive by physically removing it from your PC and installing it in a different one. You can still sign in to Windows and use your files as you normally would.
BitLocker can encrypt the drive Windows is installed on (the operating system drive) as well as fixed data drives (such as internal hard drives). You can also use BitLocker To Go to help protect all files stored on a removable data drive (such as an external hard drive or USB flash drive).
When you turn off BitLocker for a drive encrypted by BitLocker, it will completely decrypt the drive.
This tutorial will show you how to add or remove a Turn off BitLocker context menu for all fixed, OS, and removable drives encrypted by BitLocker for all users in Windows 7, Windows 8, and Windows 10.
You must be signed in as an administrator to be able to add, use, or remove the "Turn off BitLocker" context menu.
For Windows 7, BitLocker Drive Encryption is only available in the Windows 7 Professional and Windows 7 Enterprise editions.
For Windows 8/8.1, BitLocker Drive Encryption is only available in the Windows 8 Pro and Windows 8 Enterprise editions.
For Windows 10, BitLocker Drive Encryption is only available in the Windows 10 Pro, Windows 10 Enterprise, and Windows 10 Education editions.
Contents
- Option One: To Add Turn off BitLocker to Context Menu of Drives
- Option Two: To Remove Turn off BitLocker from Context Menu of Drives
EXAMPLE: "Turn off BitLocker" context menu when you right click on a drive
1 Click/tap on the Download button below to download the file below.
2 Save the .zip file to your desktop.
3 Unblock the .zip file.
4 Open the .zip file, and extract (drag and drop) the Add_Turn_off_Bitlocker_to_context_menu.reg and decrypt-bde.vbs files to your desktop.
5 Move the decrypt-bde.vbs file into the C:\Windows\System32 folder, and click/tap on Continue to approve. (see screenshot below)
6 Double click/tap on the Add_Turn_off_Bitlocker_to_context_menu.reg file to merge it.
7 When prompted, click/tap on Run, Yes (UAC), Yes, and OK to approve the merge.
8 You can now delete any remaining files on your desktop if you like.
This is the default setting.
1 Click/tap on the Download button below to download the file below.
2 Save the .reg file to your desktop.
3 Double click/tap on the downloaded .reg file to merge it.
4 When prompted, click/tap on Run, Yes (UAC), Yes, and OK to approve the merge.
5 You can now delete the downloaded .reg file if you like.
6 Open the C:\Windows\System32 folder, and delete the decrypt-bde.vbs file.
That's it,
Shawn Brink
Related Tutorials
- How to Turn On or Off BitLocker for Fixed Data Drives in Windows 10
- How to Turn On or Off BitLocker for Operating System Drive in Windows 10
- How to Turn On or Off BitLocker for Removable Data Drives in Windows 10
- How to Add or Remove Change BitLocker Password Context Menu in Windows 10
- How to Add or Remove Change BitLocker PIN Context Menu in Windows 10
- How to Add 'Lock Drive' to Context Menu of BitLocker Encrypted Drives in Windows 10
- How to Add or Remove 'Manage BitLocker' Context Menu from Drives in Windows
- How to Add or Remove Resume BitLocker Protection Context Menu in Windows 10
- How to Add 'Suspend BitLocker protection' to Context Menu of Drives in Windows
- How to Add or Remove 'Turn on BitLocker' Context Menu from Drives in Windows 10
- How to Add or Remove Unlock Drive Context Menu in Windows
Add or Remove Turn off BitLocker context menu in Windows
-
New #1
doesonly exist if a drive has been encrypted/gets created when a drive is encrypted?Code:[HKEY_CLASSES_ROOT\Drive\shell\decrypt-bde]
also does aever get created tantamount to its encrypt-bde counterpart?Code:[HKEY_CLASSES_ROOT\Drive\shell\decrypt-bde-elev]
trying to put together a comprehensive regfile and this is the last piece of the puzzle.
none of my pc's have the noted key(s) and google turned up jack and squat. Unsure if its old and deprecated, or its only created under certain circumstances. If its the latter - I'll obviously be adding it/them to my regfile :)
-
-
New #3
oooh now i see. the context menu entry not being there is the default anyways. so it will only be there if added by an individual as a customization.
i dont use bitlocker, but you never know - so want to have my ducks in a row :)
as always, thank you for being a priceless resource <3
-
-
New #5
Hey Shawn, I think I asked before, but is there a limit on the number of items allowed in the context menu?
And as usual, you're surely turning my registry into Brink's corner
-
-
-
-
-
New #9
Hmmm... oddly it's not being added...

Could in be conflicting with one of my other items there?
Add or Remove Turn off BitLocker context menu in Windows
How to Add or Remove 'Turn off BitLocker' Context Menu from Drives in WindowsPublished by Shawn BrinkCategory: Customization
12 Nov 2021


 Quote
Quote

Tutorial Categories

Related Discussions
