

How to Delete System Restore Points in Windows 10
System protection (if turned on) is a feature that allows you to perform a system restore that takes your PC back to an earlier point in time, called a system restore point. This can be handy if your PC isn't working well and you recently installed an app, driver, or update.
Each restore point contains the necessary information needed to restore the system to the chosen state. Restore points are automatically generated when you install a new app, driver, or Windows update, and generated when you create a restore point manually. Restoring wont affect your personal files in your %UserProfile% folder, but it will remove apps, drivers, and updates installed after the restore point was created.
When you get a new large or feature update for Windows 10, all restore points will automatically get deleted in the process of the update since the old restore points will be incompatible with the new Windows Update.
See also:
- System Restore | Microsoft Docs
- Monitored File Name Extensions | Microsoft Docs (Files with these extensions are monitored by System Restore.)
- Restoring the System | Microsoft Docs ("To restore a system, System Restore undoes file changes made to monitored files, recapturing the file state at the time of the selected restore point.")
This tutorial will show you how to delete all or specific system restore points for drives in Windows 10.
You must be signed in as an administrator to be able to delete a system restore point.
Restore points are stored in the hidden protected OS System Volume Information folder in the root directory of each drive you have system protection turned on.
Contents
- Option One: To Delete All System Restore Points for a Drive in System Protection Settings
- Option Two: To Delete All System Restore Points but the most Recent Restore Point in Disk Cleanup
- Option Three: To Delete All or Specific System Restore Points in Command Prompt
- Option Four: To Delete Individual System Restore Points in CCleaner
- Option Five: To Delete System Image Restore Points in Command Prompt at Boot
1 Do step 2, step 3, or step 4 below for how you would like to open System.
2 Open the Win+X Quick Link menu, click/tap on System, and go to step 5 below.
3 Open the Control Panel (icons view), click/tap on the System icon, and go to step 5 below.
4 Open the Control Panel (icons view), click/tap on the Recovery icon, click/tap on the Configure System Restore link, and go to step 6 below. (see screenshot below)
5 Click/tap on the System protection link on the left side. (see screenshot below)
Starting with Windows 10 build 20161, you will need to click/tap on About on the left side, and click/tap on the System protection link instead.
6 If prompted by UAC, click/tap on Yes.
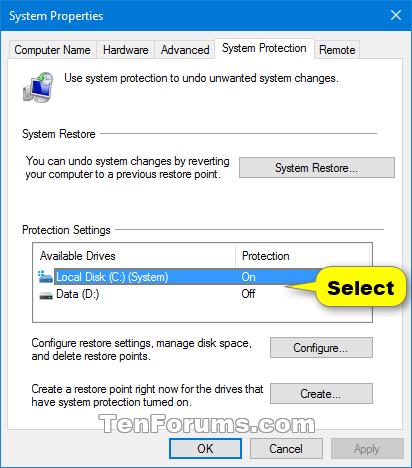
7 Under Protection Settings, select a drive (ex: C: ) that you want to delete all restore points from, and click/tap on the Configure button. (see screenshot below)
8 Click/tap on Delete. (see screenshots below)
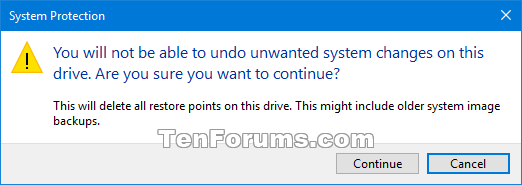
9 Click/tap on Continue to confirm. (see screenshot below)
10 Click/tap on Close when finished. (see screenshot below)
11 You will notice that the Current Usage of the selected drive will now be 0 bytes. (see screenshots below)
1 Use step 7 in OPTION ONE of the tutorial below to delete restore points from a selected disk.
How to Open and Use Disk Cleanup in Windows 10
1 Open an elevated command prompt.
2 Copy and paste thevssadmin list shadowscommand into the elevated command prompt, and press Enter.
This will list all shadow copies (restore points) on all drives. You will see the volume drive letter and shadow copy ID number for each one. You will need this information for the steps below.
3 Do step 4 (all), step 5 (all on drive), step 6 (oldest on drive), or step 7 (shadow copy ID) below for how you would like to delete restore points.
A) Copy and paste the command below you want to use into the elevated command prompt, press Enter, and go to step 8 below. (see screenshot below)
(Prompts Y/N to confirm before deleting)
vssadmin delete shadows /all
OR
(Delete without prompting)
vssadmin delete shadows /all /quiet
A) Type the command below you want to use in the elevated command prompt, press Enter, and go to step 8 below. (see screenshots below)
(Prompts Y/N to confirm before deleting)
vssadmin delete shadows /For=(drive letter): /all
OR
(Delete without prompting)
vssadmin delete shadows /For=(drive letter): /all /quiet
Substitute (drive letter) in the commands above with the drive letter you want. This will be listed as Original Volume: (x: ) from step 2 above.
For example:
vssadmin delete shadows /For=C: /all
OR
vssadmin delete shadows /For=C: /all /quiet
A) Type the command below you want to use into the elevated command prompt, press Enter, and go to step 8 below. (see screenshots below)
(Prompts Y/N to confirm before deleting)
vssadmin delete shadows /For=(drive letter): /oldest
OR
(Delete without prompting)
vssadmin delete shadows /For=(drive letter): /oldest /quiet
Substitute (drive letter) in the commands above with the drive letter you want. This will be listed as Original Volume: (x: ) from step 2 above.
For example:
vssadmin delete shadows /For=C: /oldest
OR
vssadmin delete shadows /For=C: /oldest /quiet
A) Type the command below into the elevated command prompt, press Enter, and go to step 8 below. (see screenshot below)
vssadmin delete shadows /Shadow={Shadow Copy ID}
Substitute Shadow Copy ID in the commands above with the actual Shadow Copy ID number of the restore point you want to delete from step 2 above.
For example:vssadmin delete shadows /Shadow={3e351030-9ebd-428c-9ff3-86dca40a7f96}
8 When finished, you can close the elevated command prompt if you like.
This option will allow you to remove up to all restore points, but not the most recent restore point.
1 If you have not already, download and install the free CCleaner program.
2 Open CCleaner.
3 Click/tap on Tools on the left side, and click/tap on System Restore in the Tools menu. (see screenshot below step 4)
4 Select one or more listed restore points you want to delete, and click/tap on Remove. (see screenshot below)
You can press and hold the CTRL key and click/tap on restore points to be able to select more than one randomly.
5 Click/tap on OK to confirm. (see screenshot below)
6 When finished, you can close CCleaner if you like.
This option was provided by our member Bree.
That's it,
Shawn
Related Tutorials
- How to Enable or Disable System Restore in Windows 7, Windows 8, and Windows 10
- How to Enable or Disable System Restore Configuration in Windows 7, Windows 8, and Windows 10
- How to Delete System Image Restore Point from System Restore in Windows 10
- How to Create a System Restore Point in Windows 10
- How to See List of All Available System Restore Points in Windows
- How to Add a 'Create Restore Point' Context Menu in Windows 10
- How to Make a 'Create System Restore Point' Shortcut in Windows 10
- How to Turn On or Off System Protection for Drives in Windows 10
- How to Do a System Restore of Windows 10
- How to Undo a System Restore in Windows 10
- How to Change System Protection Maximum Storage Size for Drive in Windows 10
- How to Create System Protection shortcut in Windows 10
- How to Automatically Create System Restore Point at Startup in Windows 10
- How to Automatically Create System Restore Point on Schedule in Windows 10
- How to Change System Restore Point Creation Frequency in Windows 10
- How to Add System Protection Context Menu in Windows 10
Delete System Restore Points in Windows 10
-
New #1
Cannot delete Shadow Copies
Hi, is OK if I post to this Tut?
I noticed some problems clearing old Restore points this morning.
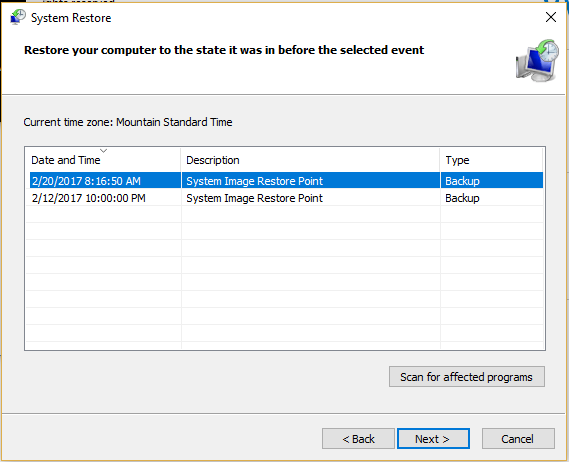
vssadmin list shadows & vssadmin delete shadows /all

Two Shadow copies created on 2/12/17 & 2/20/17 than I cannot remove. "Snapshots were found, but they were outside of your context. Try removing them with the backup application which created them."
Isn't that System Restore?
They are the only two restore points left. Not sure why this began on 2/12/17. Any thoughts?
Thank youLast edited by dogpark; 24 Feb 2017 at 14:44.
-
New #2
Hello dogpark, :)
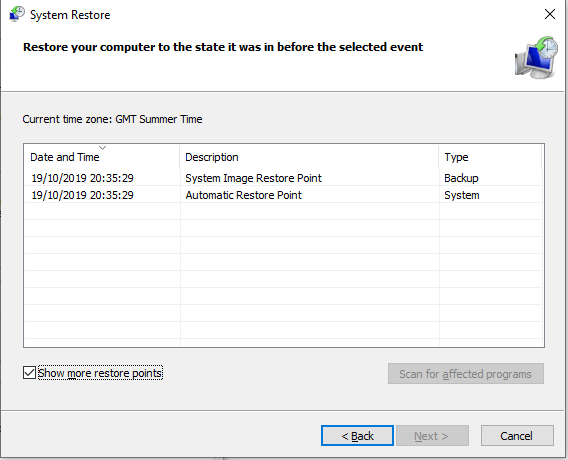
Those would be restore points from a created system image. Basically, those will only be deleted when the appropriate system image for each one has been deleted.
You can do so by selecting Keep only the latest system image and minimum space used by backup option when managing space for Windows Backup below.
Windows Backup - Manage Space in Windows 10
-
New #3
Hi Brink,
I thought perhaps it might have something to do with Windows Backup but have always had the Manage Windows Backup disk space option set to: Keep only the recent system image.
I deleted all the restore points for D: (backup drive) thru System Protection. Don't believe System Restore has ever been on for D: drive. Even tho doing this indicates the Restore points have been successfully deleted the 3.52 GB value always remains.

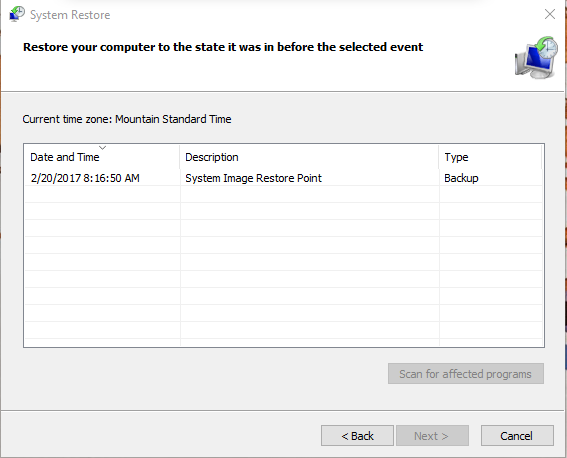
Then I reran the vssadmin list shadows & vssadmin delete shadows /all

All is good?? - there is only one backup in System Restore now.
I had to go thru a few gyrations this morning to clear the normal Restore Points I found another poster suggesting almost identical problem = System restore - weird behavior. Thought may be symptom of a larger issue.
Thank you for your assistance once again.
-
New #4
That looks good to me for keeping the latest system image set.
It won't hurt anything (other than using more space) if you wanted to have more than one system image available in case needed.
-
-
New #6
Hmm...
Well I deleted the last Windows backup, ran another and?? Not sure what I did but the Manage Windows Backup disk space now says:
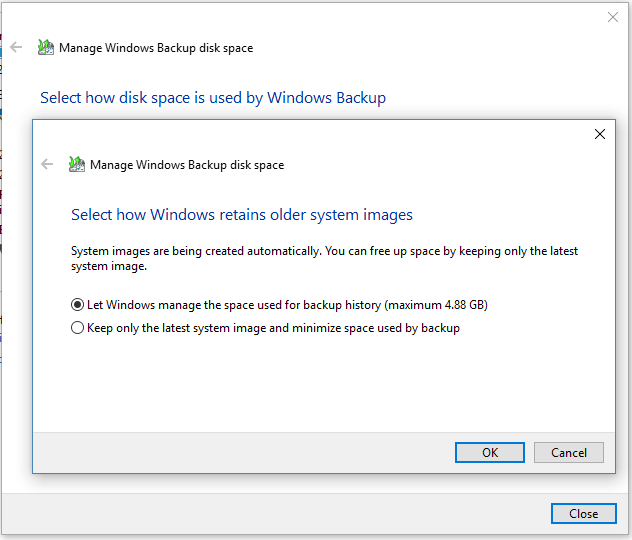
Two hours ago I verified the checked circle did read "Keep only the latest system image"? That explains the additional 5GB, somehow I altered that setting. Chalk it up to operator error. OH well, if you don't break it?
Sorry for wasting your time.
Thank you
-
-
New #8
Hi There.. Great post.. however it says "will show you how to delete all or specific system restore points ".. But i ONLY shows how to delete ALL (or all except very latest) .. I want to SELECTIVELY delete (e.g. keep the last 2 or 3).. How do I do that.. anyone know?
Thanks, Keith
-
-
New #9
Hello Keith, and welcome to Ten Forums. :)
Step 7 in Option Three and Option Four allows you to delete specific restore points. Option Four is easier to use.

Delete System Restore Points in Windows 10
How to Delete System Restore Points in Windows 10Published by Shawn BrinkCategory: Performance & Maintenance
05 Mar 2021


 Quote
QuoteTutorial Categories

Related Discussions
