

How to Add or Remove Optimize Drives context menu in Windows 10
Information
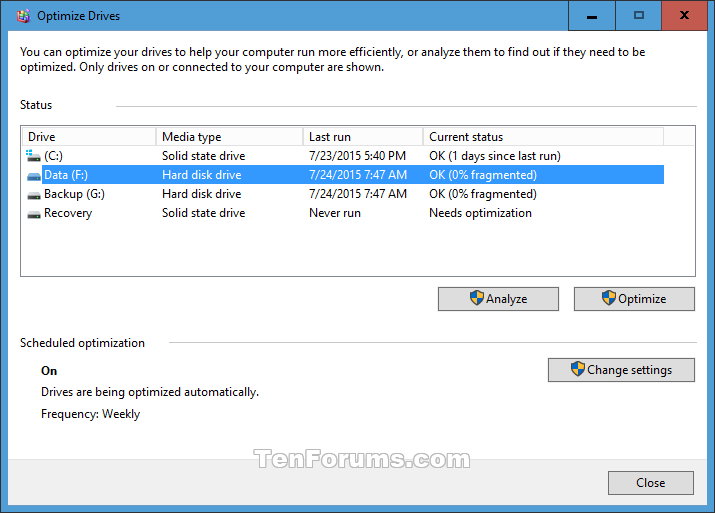
One of the best ways you can improve your PC's performance is by optimizing the drive. Windows includes features to help optimize the different types of drives that PCs use today. No matter which type of drive your PC uses, Windows automatically chooses the optimization that's right for your drive.
By default, Optimize Drives, previously called Disk Defragmenter, runs automatically on a weekly schedule at the time set in automatic maintenance. But you can also optimize drives on your PC manually.
See also: The real and complete story - Does Windows defragment your SSD? | SCOTT HANSELMAN
This tutorial will show you how to add or remove Optimize Drives to the context menu of all drives for all users in Windows 10.
You must be signed in as and administrator to be able to add or remove the Optimize Drives context menu.
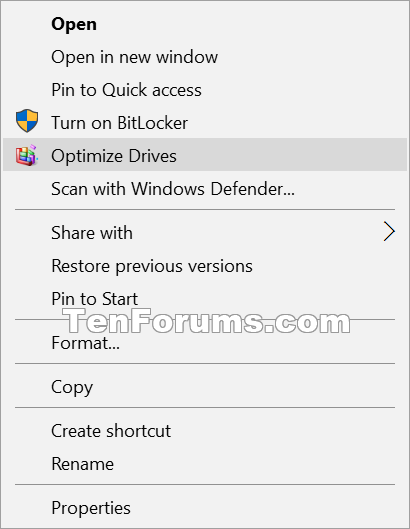
EXAMPLE: Optimize Drives context menu
Here's How:
1. Do step 2 (add) or step 3 (remove) below for what you would like to do.
A) Click/tap on the Download button below to download the file below, and go to step 4 below.
Add_Optimize_Drives_to_context_menu.reg
Download
NOTE: This is the default setting.
A) Click/tap on the Download button below to download the file below, and go to step 4 below.
Remove_Optimize_Drives_from_context_menu.reg
Download
4. Save the .reg file to your desktop.
5. Double click/tap on the downloaded .reg file to merge it.
6. If prompted, click on Run, Yes (UAC), Yes, and OK to approve the merge.
7. You can now delete the downloaded .reg file if you like.
That's it,
Shawn
Related Tutorials
- How to Optimize and Defragment Drives in Windows 10
- How to Change Schedule Settings for Optimize Drives in Windows 10
Optimize Drives context menu - Add or Remove in Windows 10

Optimize Drives context menu - Add or Remove in Windows 10
How to Add or Remove Optimize Drives context menu in Windows 10Published by Shawn BrinkCategory: Customization
30 Jun 2019


 Quote
QuoteTutorial Categories

Related Discussions
