

How to Add or Remove Child Member for Microsoft Family Group in Windows 10
A family group helps families stay connected and keeps kids safer on Windows 10, Xbox One devices, and Android devices running Microsoft Launcher. It's free, and it's one of the many benefits of having a Microsoft account. With the settings on family.microsoft.com, you can get reports on a child's activity, set screen time limits, check on a child's location, limit which websites and games they can access, and require your approval to purchase from the Microsoft Store.
Once you set up your family group, you can add or remove child and adult members.
Once they accept the invitation, you can do things like schedule events on your family calendar, receive activity reports (child), and set screen time limits (child).
If the person you're adding is already part of another family, they'll first need to be removed from that family.
To remove a member from your Microsoft family, you must have an adult account.
Adults in the family can manage family settings online, and changes will be applied to any Windows 10 PC, Windows 10 Mobile device, and Xbox One devices, and Android devices running Microsoft Launcher the child signs in to with the same Microsoft account.
You must be an adult in the family to be able to add another adult to your family group.
If your PC is joined to a domain, family features might not be available. Check with your system admin.
See also:
- What is a Microsoft family group? | Microsoft Account Support
- Microsoft account | Your family
- Parental consent and Microsoft child accounts | Microsoft Account Support
- Add members to your Microsoft family | Microsoft Account Support
- Remove members from your Microsoft family | Microsoft Account Support
- Windows 10 Tip: Did your child get a new laptop? Help keep them safe | Windows Experience Blog
This tutorial will show you how to add or remove a child member for your Microsoft family group online and in Windows 10.
Contents
- Option One: Add a Child Member to your Family Group in Settings
- Option Two: Add a Child Member to your Family Group at Microsoft Family Online
- Option Three: Remove a Child Member from your Family Group at Microsoft Family Online
- Option Four: Remove Yourself as a Child Member from your Family Group at Microsoft Family Online
EXAMPLE: Microsoft Store | Your Family, Connected
If the child you want to add already has a local account on your PC, then you will need to switch the local account to a Microsoft account first.
1 As an adult in the family, open Settings in Windows 10, and click/tap on the Accounts icon.
2 Click/tap on Family & other users on the left side, and click/tap on Add a family member under Your family on the right side. (see screenshot below)
3 Select (dot) Add a child, type in their Microsoft account email address to send the invite to, and click/tap on Next. (see screenshot below)
If the child doesn't have a Microsoft account, then click/tap on the The person I want to add doesn't have an email address link to create a Microsoft account for them.
4 Click/tap on Confirm. (see screenshot below)
5 The invitation to join your family group has now been sent. Click/tap on Close. (see screenshot below)
6 The added child will need to click/tap on Join in the sent email or notification, and click/tap on Join the family at the Microsoft Family website. (see screenshots below)
This invitation will expire in 14 days if not accepted by then.


7 Whenever the child accepts the family invitation, the child, you (adult), and all other adults in your family group will get a notification in Windows 10 and an email notification. (see screenshots below)


8 Adults in the family can manage family settings for any child in the family group.
If the child you want to add already has a local account on your PC, then you will need to switch the local account to a Microsoft account first.
1 As an adult in the family, go to the Microsoft Family website, and sign in with your Microsoft account if not already.
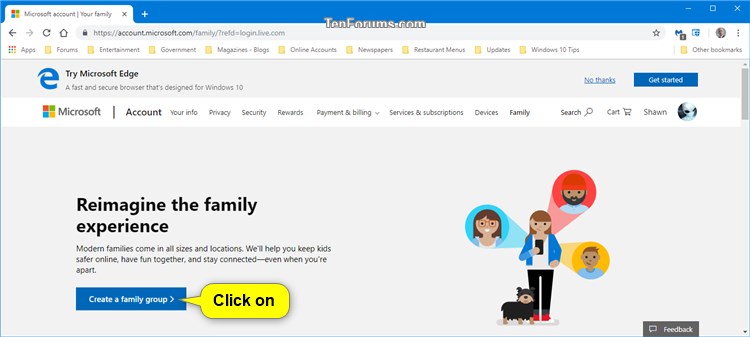
2 If you haven't already set up your family group, click/tap on the Create a family group button, and go to step 4. (see screenshot below)
3 Click/tap on the Add a family member link. (see screenshot below)
4 Select (dot) Child, type in their Microsoft account email address to send the invite to, enter the characters, and click/tap on Send invite. (see screenshot below)
5 Click/tap on Done. (see screenshot below)
6 The added child will need to click/tap on Join in the sent email or notification, and click/tap on Join the family at the Microsoft Family website. (see screenshots below)
This invitation will expire in 14 days if not accepted by then.
7 Whenever the child accepts the family invitation, the child, you (adult), and all other adults in your family group will get a notification in Windows 10 and an email notification. (see screenshots below)
8 Adults in the family can manage family settings for any child in the family group.
1 Do step 2 or step 3 below for how you would like to manage your family settings online.
2 As an adult in the family, go to the Microsoft Family website, and sign in with your Microsoft account if not already, and go to step 4 below.
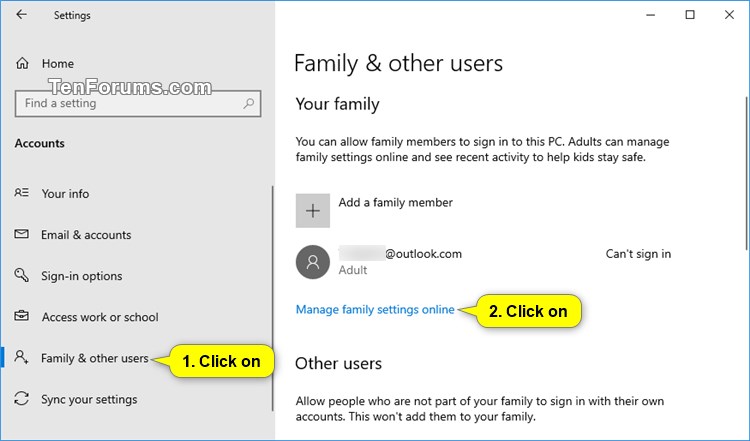
3 Open Settings in Windows 10, click/tap on the Accounts icon, click/tap on Family & other users on the left side, click/tap on the Manage family settings online link, and go to step 4 below. (see screenshot below)
4 Click/tap on Remove from family group in the More options drop down menu under the child you want to remove from your family group. (see screenshot below)
5 Click/tap on Remove to confirm. (see screenshot below)
6 The child you removed, you (adult), and all other adults in your family group will get a notification in Windows 10 and an email notification. (see screenshots below)


1 As an adult in the family, go to the Microsoft Family website, and sign in with your Microsoft account if not already.
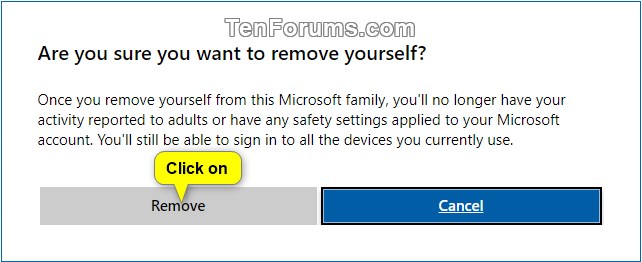
2 Click/tap on the Leave family group link under your child account. (see screenshot below)
3 Click/tap on Remove to confirm. (see screenshot below)
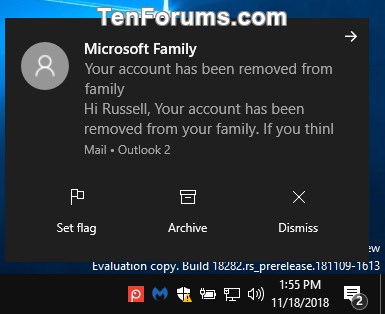
4 You (child) and all other adults in the family group will get a notification in Windows 10 and an email notification. (see screenshots below)
That's it,
Shawn
Related Tutorials
- How to Create and Set Up Your Microsoft Family Group
- How to Add a Local Account or Microsoft Account in Windows 10
- How to Add or Remove an Adult Account for Your Microsoft Family in Windows 10
- How to Manage Microsoft Family Settings for Child in Windows 10
- How to Manage Activity Reporting Settings for Child in your Microsoft Family
- How to Allow or Block Family Member from using a PC in Windows 10
- How to Find Your Child in Microsoft Family on a Map
- How to Add Money to Account of Family Child for Purchase & Spending in Windows Store
- How to Turn On or Off Ask a Parent before buying stuff in Microsoft Store for Microsoft Family Child Member
- How to Manage Web Browsing Restriction Settings for Child in your Microsoft Family
- How to Manage Apps, Games and Media Content Restrictions of Child Member in Microsoft Family Group
- How to Manage Screen Time Settings for Child in your Microsoft Family
- Hide or Show Family Options in Windows Defender Security Center in Windows 10
- How to See Devices Connected to Account of Microsoft Family Child Member
- How to Set App and Game Limits of Microsoft Family Child on Windows 10, Xbox One, and Android
Add or Remove Child Member for Microsoft Family Group in Windows 10

Add or Remove Child Member for Microsoft Family Group in Windows 10
How to Add or Remove Child Member for Microsoft Family Group in Windows 10Published by Shawn Brink
04 May 2020


Tutorial Categories

Related Discussions
