

How to Change User Rights Assignment Security Policy Settings in Windows 10
User Rights Assignment policies govern the methods by which a user can log on to a system. User rights are applied at the local device level, and they allow users to perform tasks on a device or in a domain. User rights include logon rights and permissions. Logon rights control who is authorized to log on to a device and how they can log on. User rights permissions control access to computer and domain resources, and they can override permissions that have been set on specific objects.
Each group in Windows has its own default rights and permissions. When a user is a member of a group, the user will be assigned the rights and permissions of the group.
This tutorial will show you how to change User Rights Assignment security policy settings to control users and groups ability to perform tasks in Windows 10.
You must be signed in as an administrator to change User Rights Assignment.
If you remove a user or group from a user right policy, then that user or group will no longer be able to perform the policy on the local PC.
If you add a user or group to a user right policy, then that user or group will now be able to perform the actions of the policy on the local PC.
Contents
- Option One: To Add Users and Groups for User Rights Assignment in Local Security Policy
- Option Two: To Remove Users and Groups for User Rights Assignment in Local Security Policy
- Option Three: To Add and Remove Users and Groups for User Rights Assignment in Command Prompt
Local Security Policy is only available in the Windows 10 Pro, Enterprise, and Education editions.
All editions can use Option Three below.
1 Press the Win + R keys to open Run, type secpol.msc into Run, and click/tap on OK to open Local Security Policy.
2 Expand open Local Policies in the left pane of Local Security Policy, and click/tap on User Rights Assignment. (see screenshot below step 3)
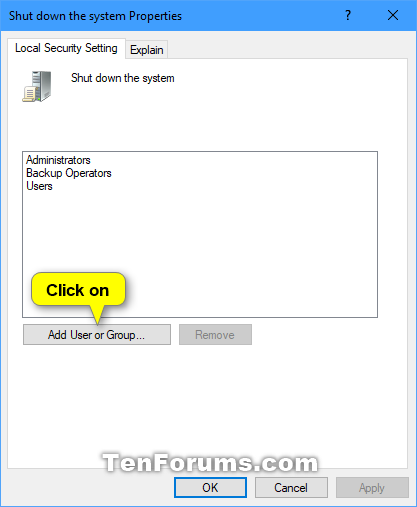
3 In the right pane of User Rights Assignment, double click/tap on the policy (ex: "Shut down the system") you want to add users and/or groups to. (see screenshot below)
4 Click/tap on the Add User or Group button. (see screenshot below)
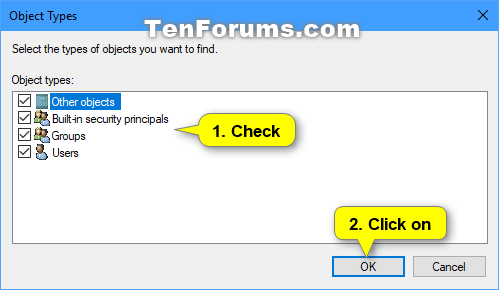
5 Click/tap on the Object Types button. (see screenshot below)
6 Check all the boxes for Object types, and click/tap on the OK. (see screenshot below)
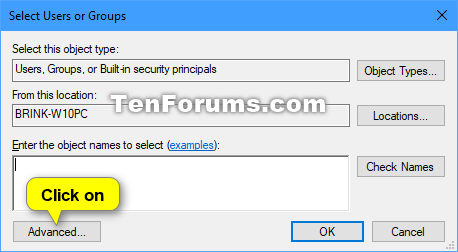
7 Click/tap on the Advanced button. (see screenshot below)
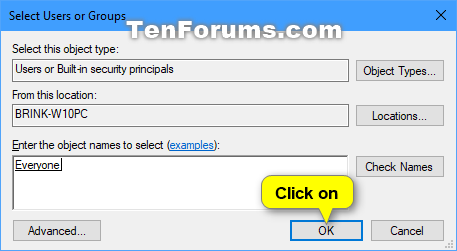
8 Click/tap on the Find Now button, select the name of the user or group (ex: "Everyone") you want to add, and click/tap on OK. (see screenshot below)
If you like, you can press and hold the Ctrl key to select more than one user and/or group.
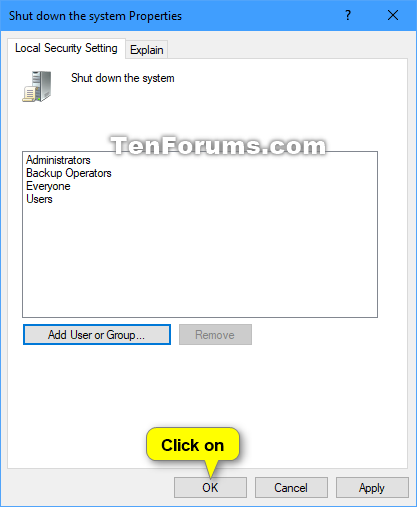
9 Click/tap on OK. (see screenshot below)
10 Click/tap on OK. (see screenshot below)
11 When finished, you can close Local Users and Groups if you like.
Local Security Policy is only available in the Windows 10 Pro, Enterprise, and Education editions.
All editions can use Option Three below.
1 Press the Win + R keys to open Run, type secpol.msc into Run, and click/tap on OK to open Local Security Policy.
2 Expand open Local Policies in the left pane of Local Security Policy, and click/tap on User Rights Assignment. (see screenshot below step 3)
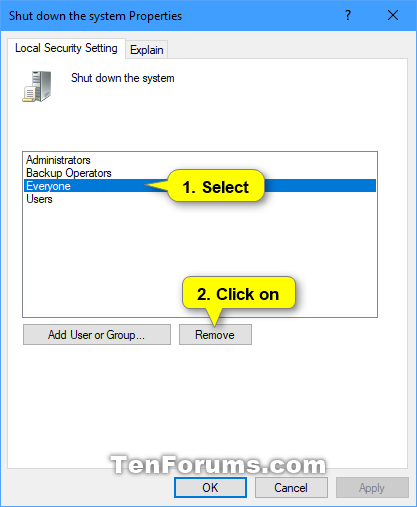
3 In the right pane of User Rights Assignment, double click/tap on the policy (ex: "Shut down the system") you want to remove users and/or groups from. (see screenshot below)
4 Select the user or group (ex: "Everyone") you want to remove, and click/tap on the Remove button. (see screenshot below)
If you like, you can press and hold the Ctrl key to select more than one user and/or group.
5 Click/tap on OK. (see screenshot below)
6 When finished, you can close Local Security Policy if you like.
1 If you haven't already, you will need to do the following below before continuing on to step 2 below.
A) Download the ntrights.exe file below from the Windows Server 2003 Resource Kit Tools.
B) Save the ntrights.zip file to your desktop, and unblock it.
C) Open the ntrights.zip file, copy or move the ntrights.exe file into your C:\Windows\System32 folder, and click/tap on Continue to approve.
2 Open an elevated command prompt.
3 Type the command below you want to use into the elevated command prompt, and press Enter. (see screenshots below)
(Add user or group to user rights policy)
ntrights +r ConstantName -u "User or Group"
OR
(Remove user or group from user rights policy)
ntrights -r ConstantName -u "User or Group"
Substitute ConstantName in the command above with the actual constant name (ex: "SeShutdownPrivilege") from the table below for the user rights assignment security policy (ex: "Shut down the system") you want to add or remove a user or group.
Substitute User or Group in the command above with the actual name of the user or group (ex: "Everyone") you want to add or remove for the policy.
For example:ntrights -r SeShutdownPrivilege -u "Everyone"
4 When finished, you can close the elevated command prompt if you like.
That's it,
Shawn
Related Tutorials
- How to Add or Remove Users from Groups in Windows 10
- How to Change Owner of File, Folder, Drive, or Registry Key in Windows 10
- How to Allow or Prevent Users and Groups to Change Time in Windows 10
- How to Allow or Prevent Users and Groups to Shut down System in Windows 10
- How to Allow or Prevent Users and Groups to Change Time Zone in Windows 10
- How to Allow or Prevent Users and Groups to Sign in Locally to Windows 10
- How to Deny Users and Groups to Sign in Locally to Windows 10
- How to Allow or Prevent Users and Groups to Log on with Remote Desktop in Windows 10
- How to Deny Users and Groups to Log on with Remote Desktop in Windows 10
- How to Allow or Prevent Users and Groups to Create a Pagefile in Windows 10
Change User Rights Assignment Security Policy Settings in Windows 10
-
New #1
Using Windows Server 2003 Resource Kit Tools What command would you use for lockpagesinmemory and increase scheduling priority ?
- - - Updated - - -
Sorry Brink I understand. If I would have read your tutorial instead of skimming I wouldn't of asked that question. Thanks again Brink
-
-
New #3
does Increasing Scheduling Priority have any effect on Win32PrioritySeperation?Last edited by smirk24; 06 Dec 2022 at 21:48.
-
New #4
I'm trying to learn what I can about "Increase a process working set" but I can't seem to find to much in depth information about it?
-
New #5
Hello mate,
Hope this below helps some.
https://learn.microsoft.com/en-us/wi...ss-working-set
-
New #6
-
New #7
It's referring to the paging file (aka: virtual memory). The working set of a process is the set of memory pages currently visible to the process in physical RAM. The minimum and maximum working set sizes affect the virtual memory paging behavior of a process.
Here's some more details below, but it's pretty technical.
https://learn.microsoft.com/en-us/wi...ss-working-set
https://learn.microsoft.com/en-us/wi...ry/working-set
https://learn.microsoft.com/en-us/wi...workingsetsize
-
New #8
According to my generated performance report LockPagesInMemory really helped lowering my disk usage among other drops in other parts of my hardware.
After enabling LockPagesInMemory is there other modifications that works with LockPagesInMemory? Or after LockPagesInMemory is enabled then your done and windows takes care of the rest?
Before LockPagesInMemory
CPU Idle 6 % Low CPU load.
Disk Normal 225 /sec
Disk I/O is between 100 and 500 (read/write) per second on disk 1. Reads 90.4/sec + Writes 134.9/sec
Memory Idle 8 % 30045 MB Available.
After LockPagesInMemory is enabled
CPU Idle 4 % Low CPU load.
Disk Idle 64 /sec
Disk I/O is less than 100 (read/write) per second on disk 1. Reads 52.4/sec + Writes 11.7/sec
Memory Idle 6 % 30522 MB Available.
-
-
New #9
I'm trying to setup a application server and I've been reading about LockPagesInMemory and how it benefits sql applications. After enabling LockPagesInMemory are there any settings afterwards that need to be changed if I am using windows 10 pro?

Change User Rights Assignment Security Policy Settings in Windows 10
How to Change User Rights Assignment Security Policy Settings in Windows 10Published by Shawn BrinkCategory: User Accounts
26 Feb 2021


 Quote
Quote
Tutorial Categories

Related Discussions
