

How to Change Time to Display List of Operating Systems in Boot Options at Startup in Windows 10
If you have more than one operating system installed on your PC, then you will have 30 seconds by default to choose an operating system to run before the default operating system runs automatically.
See also: Changing the Boot Menu Time-out | Microsoft Hardware Dev Center
This tutorial will show you how to change the boot menu time-out for how long to wait to display the list of operating systems at startup before the default operating system runs automatically in Windows 10.
Contents
- Option One: To Change Display OS Timeout in Advanced Startup Options
- Option Two: To Change Display OS Timeout in Startup and Recovery
- Option Three: To Change Display OS Timeout in System Configuration (msconfig)
- Option Four: To Change Display OS Timeout in Command Prompt
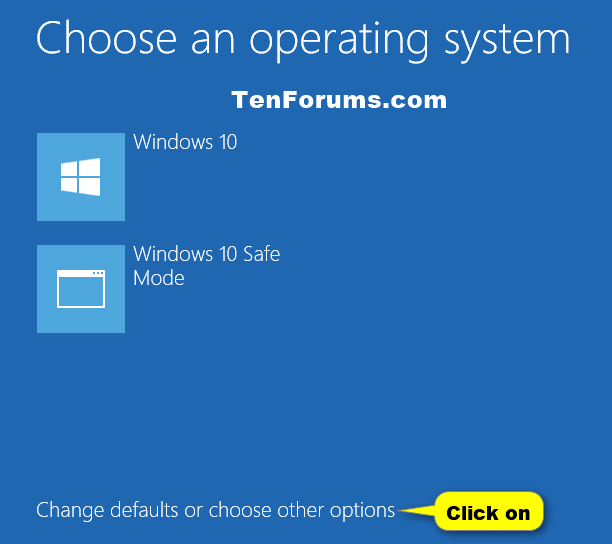
EXAMPLE: "Choose an operating system" at startup timeout
1 While at startup, or after booting to advanced startup options, click/tap on the Change defaults or choose other options link at the bottom. (see screenshot below)
2 Click/tap on Change the timer. (see screenshot below)
3 Choose how long (5 minutes, 30 seconds, or 5 seconds) you would like to wait before the default OS runs automatically at startup. (see screenshot below)
4 Click/tap on back button. (see screenshot below)
5 Click/tap on the OS you want to run. (see screenshot below)
1 Open the Control Panel (icons view), and click/tap on the System icon.
2 Click/tap on the Advanced system settings link on the left, and close the System window. (see screenshot below)
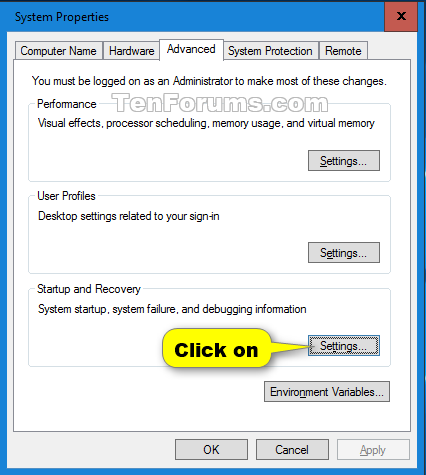
3 Click/tap on the Settings button under Startup and Recovery. (see screenshot below)
4 Check the Time to display list of operating systems box, enter or select (arrows) how many seconds (0-999) for what you want, and click/tap on OK. (see screenshot below)
To have no timeout period and instantly run the default OS at startup, you could either enter 0 (zero) or uncheck the Time to display list of operating systems box.
5 Click/tap on OK. (see screenshot below step 3)
1 Press the Win + R keys to open the Run dialog, type msconfig into Run, and click/tap on OK to open System Configuration.
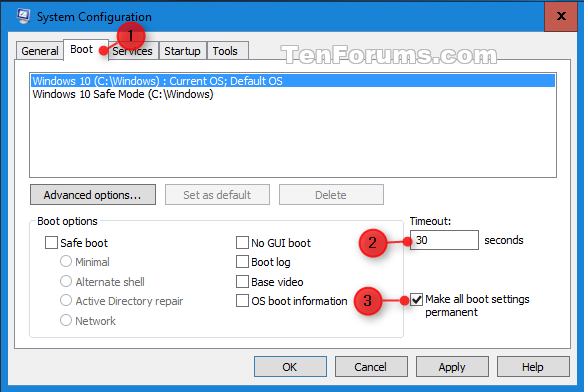
2 Click/tap on the Boot tab, enter how many seconds (3-999) in Timeout for what you want, check the Make all boot settings permanent box, and click/tap on OK. (see screenshot below)
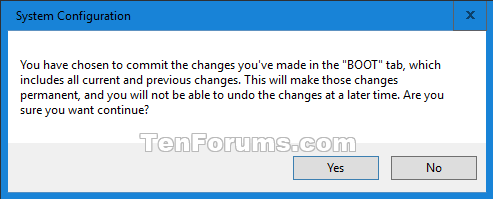
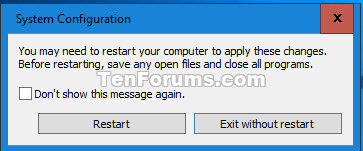
3 Click/tap on Yes to confirm. (see screenshot below)
4 When ready, click on the Restart button to apply. (see screenshot below)
This will restart the computer immediately. Be sure to save and close anything open that you do not want to lose first.
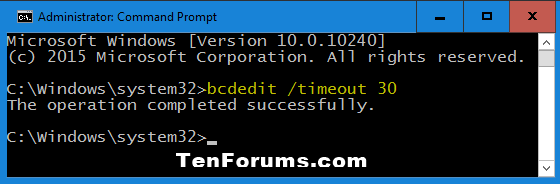
1 Open an elevated command prompt or a command prompt at boot.
2 Type the command below into the command prompt, and press Enter. (see screenshot below)
bcdedit /timeout ###
Substitute ### in the command above for how many seconds (0 to 999) you want.
Using 0 seconds will have no timeout period and instantly run the default OS at startup.
That's it,
Shawn
Related Tutorials
- How to Dual Boot Windows 10 with Windows 7 or Windows 8
- How to Remove and Uninstall Windows 7, Windows 8, or Windows 10 from Dual Boot PC
- How to Add Safe Mode to Boot Options in Windows 10
- How to Choose a Default Operating System to Run at Startup in Windows 10
- How to Change Operating System Name in Boot Options at Startup in Windows 10
- How to Change Display Order of Boot Loader Entries on Boot Options Menu at Startup in Windows
- How to Delete Boot Loader Entry on Boot Menu at Startup in Windows
- How to Add System Configuration (msconfig) to Control Panel in Windows
Change Time to Display Operating Systems at Startup in Windows 10
-
New #1
It should be OK to turn this off (Option 2, #4-unchecked the box) if you only have W10 installed?
-
New #2
Hello Penny,
You can safely uncheck the box if you like, but it doesn't actually get applied unless you have more than one OS in the boot entry.

Change Time to Display Operating Systems at Startup in Windows 10
How to Change Time to Display List of Operating Systems in Boot Options at Startup in Windows 10Published by Shawn BrinkCategory: Installation & Upgrade
17 Apr 2020


 Quote
QuoteTutorial Categories

Related Discussions
