

How to Change or Restore Default Location of Screenshots Folder in Windows 10
When you take a screenshot in Windows 10 by pressing the Win + Print Screen keys, the screenshot is saved into the C:\Users\<username>\Pictures\Screenshots (%UserProfile%\Pictures\Screenshots) folder by default.
If you like, you can change the default location of this Screenshots folder to where you want to have your screenshots saved to by default instead.
This tutorial will show you how to change or restore the default location of the Screenshots folder for your account in Windows 10.
Contents
- Option One: To Change Default Location of Screenshots Folder in Properties
- Option Two: To Restore Default Location of Screenshots Folder in Properties
- Option Three: To Restore Default Location of Screenshots Folder using a BAT file
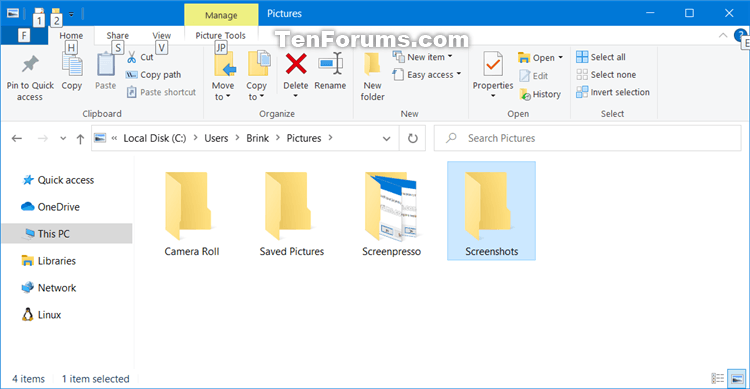
EXAMPLE: Screenshots folder default location in File Explorer
1 If you haven't already, you will need to create a new folder named Screenshots at the location (ex: "D:" ) you want to move your Screenshots folder to.
2 In File Explorer (Win+E), copy and paste shell:screenshots into the address bar, and press Enter to open the current location of the Screenshots folder.
3 Right click or press and hold on an empty area in the Screenshots folder, and click/tap on Properties. (see screenshot below)
4 Click/tap on the Location tab, and click/tap on the Move button. (see screenshot below)
5 Browse to and select the Screenshots folder at the location (ex: "D:\Screenshots" ) from step 1, and click/tap on Select Folder. (see screenshot below)
6 Click/tap on OK to apply. (see screenshot below)
7 Click/tap on Yes to move all the files from the old location to the new location. (see screenshot below)
1 Open File Explorer (Win+E), copy and paste shell:screenshots into the address bar, and press Enter to open the current location of the Screenshots folder.
2 Right click or press and hold on an empty area in the Screenshots folder, and click/tap on Properties. (see screenshot below)
3 Click/tap on the Location tab, and click/tap on the Restore Default button. (see screenshot below)
4 Click/tap on OK to apply. (see screenshot below)
5 If the Screenshots folder does not exist at this default location, click/tap on Yes to create it. (see screenshot below)
6 Click/tap on Yes to move all files from the old location to the new location. (see screenshot below)
7 After a brief moment, your Screenshots folder will be restored to its default location (ex: "C:\Users\Brink\Pictures\Screenshots").
1 Click/tap on the Download button below to download the BAT file below.
Restore_Screenshots_folder_default_location.bat
Download
Contents of .bat file for reference:
Code:taskkill /f /im explorer.exe timeout /t 2 /nobreak >nul if not exist "%UserProfile%\Pictures\Screenshots" mkdir "%UserProfile%\Pictures\Screenshots" reg add "HKCU\SOFTWARE\Microsoft\Windows\CurrentVersion\Explorer\User Shell Folders" /v "{B7BEDE81-DF94-4682-A7D8-57A52620B86F}" /t REG_EXPAND_SZ /d %%USERPROFILE%%"\Pictures\Screenshots" /f attrib +r -s -h "%USERPROFILE%\Pictures\Screenshots" /S /D timeout /t 1 /nobreak >nul start explorer.exe
2 Save the .bat file to your desktop or where you like.
3 Unblock the .bat file, and run the .bat file.
4 You will now notice your screen temporarily go black as a command prompt opens and closes as explorer is restarted to apply the registry changes.
5 Copy any files you wanted from the incorrect Screenshots folder location into the now restored default C:\Users\<username>\Pictures\Screenshots folder location.
6 If you like, you can delete the incorrect Screenshots folder (not restored default folder).
7 When finished, you can delete the downloaded .bat file if you like.
That's it,
Shawn
Related Tutorials
- How to Restore Default Location of Your Personal Folders in Windows 10
- How to Take a Screenshot in Windows 10
- How to Reset the Screenshot Index Counter in Windows 10
- How to Turn On or Off Auto Save Screenshots to OneDrive in Windows 10
- How to Change or Restore Default Location of Camera Roll Folder in Windows 10
- How to Change or Restore Default Location of Saved Pictures Folder in Windows 10
Change or Restore Default Location of Screenshots Folder in Windows 10
-
New #1
Help
Need help on this. Default location has been changed. But when I screen save it creates a picture folder under my used name and screen shots are saved at some unknown location. Changing default location under properties dose not work. Screen shot ignores it and follows some other commands.
-
-
New #3
Reply
Tried to change save location of Screen Shots. Screen shots save where ever it wanted to regardless of the change. What I finally had to do was research how to get rid of camera and saved folders. Found answer deleted registry keys for both, changed pictures in documents folder to pictures2, copy picture folder form under user name to documents/pictures2. (this merged the 2 folders), then I changed the documents pictures2 to pictures and that fixed the problem. Screen shots was always suppose to be saved in pictures/documents but something in the screen shot program made it create a new pictures folder under the user name. When I cut and pasted this to picture2 the screen shot programed followed to the location it was supposed to be save at. Until then it saved it self where it wanted 2. ,
-
-
New #5
Incorrect
Folders had not been moved by mistake Windows 10 program refused to except the changes made by your bat files and other info until it was forced to. I forced it for sure

Change or Restore Default Location of Screenshots Folder in Windows 10
Published by Shawn BrinkCategory: Customization08 Sep 2020


 Quote
Quote
Tutorial Categories

Related Discussions
