

How to Download a Recovery Image for a Surface Device
Normally, your Surface comes with Windows recovery info that allows you to refresh it or reset it to its factory condition.
If you are having trouble with the recovery options on your Surface, you can download the recovery image files you need to get your Surface working again.
A downloaded recovery drive image lets you recover or reset your Surface to its factory settings and can help you troubleshoot and fix problems with your Surface device.
If your Surface is not working and you don't have another Windows 10 device that you can use to download the factory recovery image, it may be possible to contact Microsoft to have a USB recovery drive mailed to you.
From any Windows 10 computer, you can downloaded the recovery image files for your Surface device and create a recovery drive with them.
See also:
- Download a recovery image for your Surface | Surface Support
- Creating and using a USB recovery drive for Surface | Surface Support
- Restore or reset Surface for Windows 10 | Surface Support
This tutorial will show you how to download a recovery image for a Surface device and use it to create a bootable USB recovery drive in Windows 10.
EXAMPLE: Recover your Surface Device
Here's How:
1 Go to the Download a recovery image for your Surface site at Microsoft on any computer.
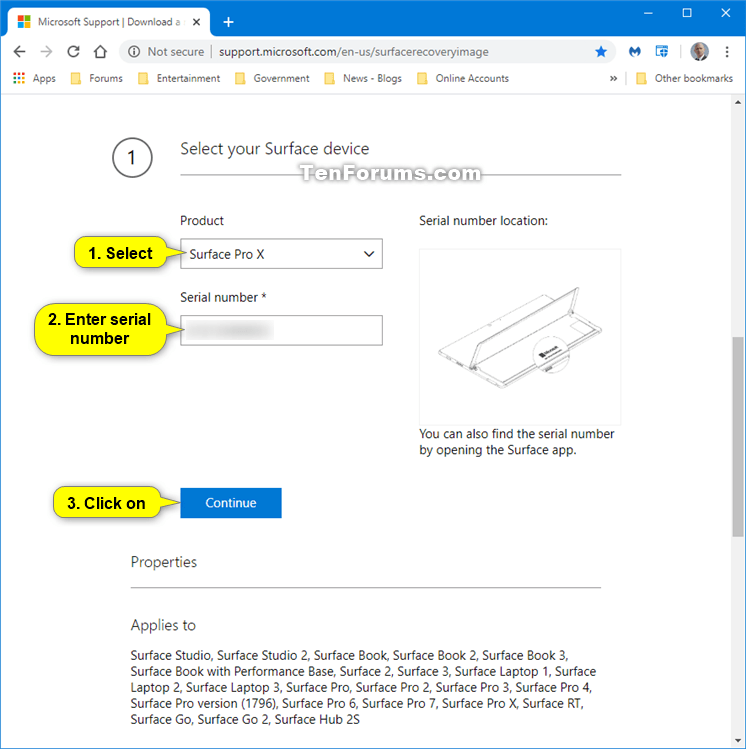
2 Scroll down to the Select your Surface device section on the site, select your Surface device (ex: Surface Pro X) in the Product drop menu, enter the Serial number for your Surface device, and click/tap on Continue. (see screenshot below)
3 Click/tap on the Download recovery image link. (see screenshot below)
4 In the Save As dialog, select the location (ex: Desktop) where you want to save the ZIP file at, and click/tap on Save. (see screenshot below)
This ZIP file will be around 6.71 GB in size.
5 Unblock the downloaded ZIP file.
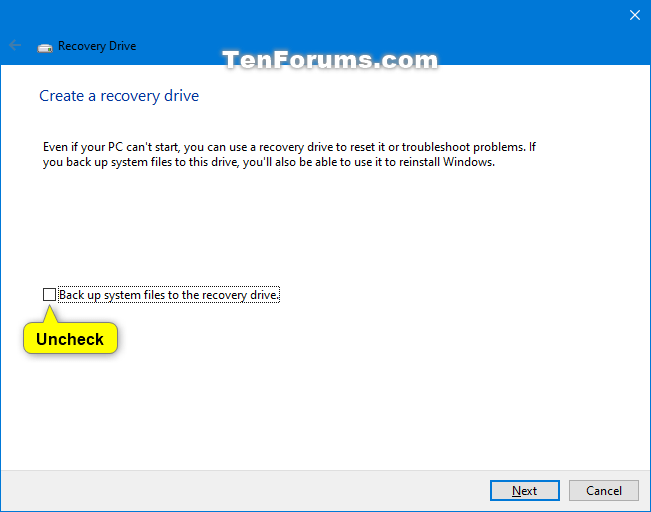
6 On any Windows 10 computer, create a recovery drive with the Back up system files to the recovery drive box unchecked. (see screenshot below)
For Surface RT and Surface 2, your USB drive should be at least 8 GB in size. For all other Surface models, your USB drive should be at least 16 GB.
7 When finished creating the recovery drive, open the downloaded ZIP file, select all contents inside the ZIP file, and select Copy (Ctrl+C). (see screenshot below)
8 Open the USB recovery drive, and Paste (Ctrl+V) the contents of the ZIP file to the drive. (see screenshot below)
It will take a while to finish copying all files from inside the ZIP to the USB recovery drive.
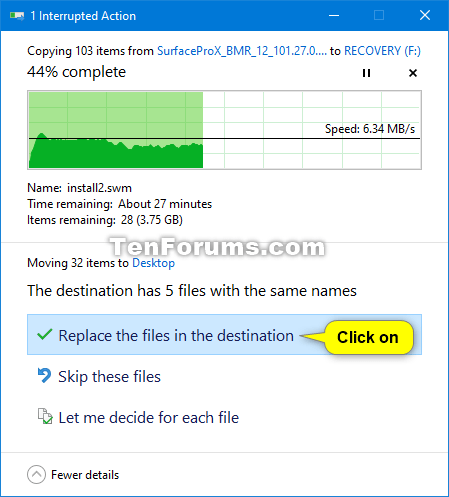
9 If prompted to replace any files or folders while copying files from the ZIP to the recovery drive, check the Do this for all current items box (if available), and click/tap on Yes or Replace the files in the destination. (see screenshots below)

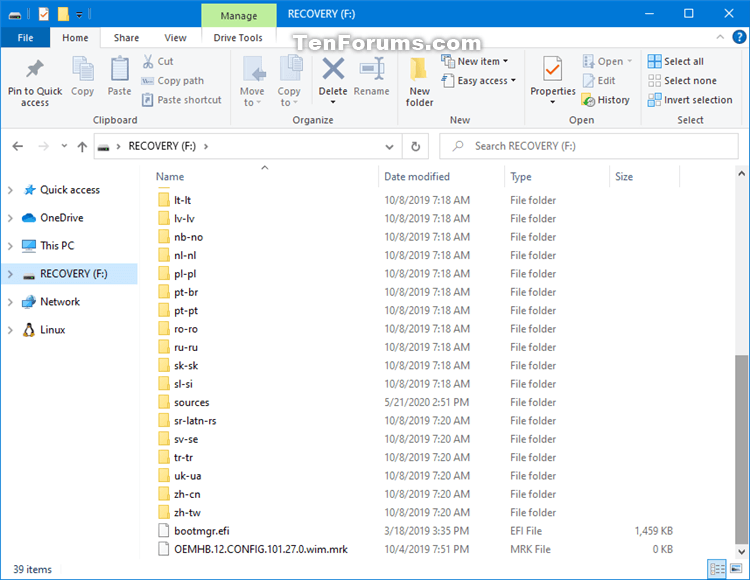
10 When finished copying all files from inside the ZIP to the USB recovery drive, you will now have a bootable USB recovery drive for your Surface device. (see screenshot below)
That's it,
Shawn
Related Tutorials
- How to Reset Windows 10
- How to Refresh Windows 10
- How to Do a Repair Install of Windows 10 with an In-place Upgrade
- How to Clean Install Windows 10
- How to Start Fresh with Clean up-to-date Installation of Windows 10
- How to Download Official Windows 10 ISO file from Microsoft
- How to Create Bootable USB Flash Drive to Install Windows 10 from
- How to Create a Bootable USB Recovery Drive in Windows 10
- How to 'Recover from a drive' to Reset Windows 10
- How to Boot from a USB Flash Drive in Windows 10
How to Download a Recovery Image for a Surface Device
-
New #1
How do you then boot to it?
Also, why are you having Windows place those two folders onto the USB when you're going to overwrite them with the ones from the Surface image?
Does something else take place during the creation of the "recovery drive"? Are their special hidden files not shown that have to do with making the USB bootable to the Surface?
In other words, why not simply extract the contents of the image to the USB directly?
Confused.
-
New #2
Hello mate,
Creating the recovery USB Drive makes it bootable.
You then update the USB with the Surface recovery image as per the steps.
Afterwards, you should be able to boot from the USB as usual below, and perform a reset of Windows 10 with the Surface recovery image.
Boot from USB Drive on Windows 10 PC
-
New #3
"Also, why are you having Windows place those two folders onto the USB when you're going to overwrite them with the ones from the Surface image?
Does something else take place during the creation of the "recovery drive"? Are their special hidden files not shown that have to do with making the USB bootable to the Surface?
In other words, why not simply extract the contents of the image to the USB directly?"
I actually succeeded and the Surface is up to 20H2, but still no KB. An issue since 2017 or earlier & MS chooses to ignore it, btw.
I wouldn't buy a Surface for anything.

How to Download a Recovery Image for a Surface Device
Published by Shawn BrinkCategory: Installation & Upgrade22 Oct 2020


 Quote
QuoteTutorial Categories

Related Discussions
