

How to Change Default Profile in Windows Terminal app in Windows 10
The Windows Terminal is a modern, fast, efficient, powerful, and productive terminal application for users of command-line tools and shells like Command Prompt, PowerShell, and WSL. Its main features include multiple tabs, panes, Unicode and UTF-8 character support, a GPU accelerated text rendering engine, and custom themes, styles, and configurations.
Starting with Windows 10 build 21337, Windows Terminal is now an inbox app.
Windows Terminal uses Windows PowerShell as the default shell profile when you open the Windows Terminal app.
See also:
This tutorial will show you how to change the default shell profile to use when you open the Windows Terminal app for your account in Windows 10.
Here's How:
1 Open the Windows Terminal app.
2 Click/tap on the down arrow button on the top bar, and click/tap on Settings Ctrl + , (comma). (see screenshot below)
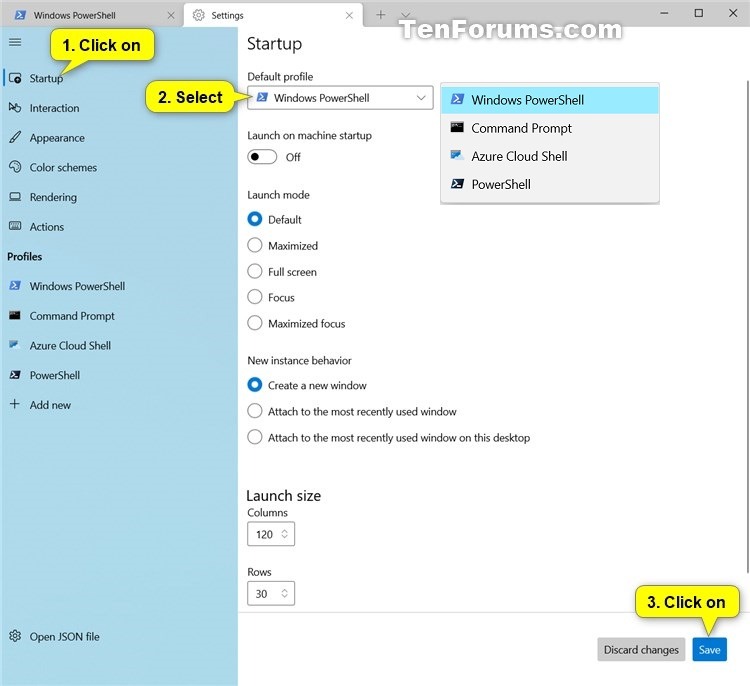
3 Click/tap on Startup in the left pane. (see screenshot below)
4 Select the shell profile (ex: "Windows PowerShell") you want in the Default profile drop menu.
5 Click/tap on Save at the bottom right.
6 You can now close the Settings tab or Windows Terminal if you like.
That's it,
Shawn Brink
Related Tutorials
- How to Add and Remove Profiles in Windows Terminal app in Windows 10
- How to Hide or Show Profile from Dropdown in Windows Terminal app in Windows 10
- How to Change Default Terminal Application in Windows 10
How to Change Default Profile in Windows Terminal app in Windows 10
-
New #1
Thanks, Shawn. I was running all over, trying to find a way to choose between Command Prompt and Power Shell in the WinX menu, when all I was offered was Windows Terminal. Searched for Windows Terminal here on 11 Forum, your tutorial came up, and the explanation you gave supplied all of the answers I needed. I now have the new Terminal set to open in Command Prompt, and I now know how to switch to Power Shell when I need that. Learning, learning, learning. (And liking Windows 11 more with every passing hour at the keyboard.)
-

How to Change Default Profile in Windows Terminal app in Windows 10
Published by Shawn BrinkCategory: Apps & Features26 May 2021


 Quote
Quote
Tutorial Categories

Related Discussions
