

How to Enable or Disable DNS over HTTPS (DoH) Secure DNS in Google Chrome
When you type a web address or domain name into your address bar (example:www.tenforums.com ), your browser sends a request over the Internet to look up the IP address for that website.
Traditionally, this request is sent to servers over a plain text connection. This connection is not encrypted, making it easy for third-parties to see what website youre about to access.
DNS-over-HTTPS (DoH) works differently. It sends the domain name you typed to a DoH-compatible DNS server using an encrypted HTTPS connection instead of a plain text one. This prevents third-parties from seeing what websites you are trying to access.
DNS over HTTPS (DoH) is a protocol for performing remote Domain Name System (DNS) resolution via the HTTPS protocol. A goal of the method is to increase user privacy and security by preventing eavesdropping and manipulation of DNS data by man-in-the-middle attacks by using the HTTPS protocol to encrypt the data between the DoH client and the DoH-based DNS resolver. Encryption by itself does not protect privacy, encryption is simply a method to obfuscate the data. As of March 2018, Google and the Mozilla Foundation started testing versions of DNS over HTTPS.
Starting with Google Chrome 78, you can enable DNS-over-HTTPS via a new Secure DNS lookups command line flag.
Starting with Google Chrome 83, DNS-over-HTTPS is enabled by default.
Secure DNS can be configured to use your current ISP's service if available (default), another provider from a list, or a custom provider.
See also:
- A safer and more private browsing experience with Secure DNS | Chromium Blog
- More intuitive privacy and security controls in Chrome | Upgraded security with Enhanced Safe Browsing protection and Secure DNS
This tutorial will show you how to enable or disable DNS over HTTPS (DoH) secure DNS in Google Chrome for your account in Windows 7, Windows 8, or Windows 10.
Windows 10 will improve user privacy with DNS over HTTPS
Here's How:
1 Open Google Chrome.
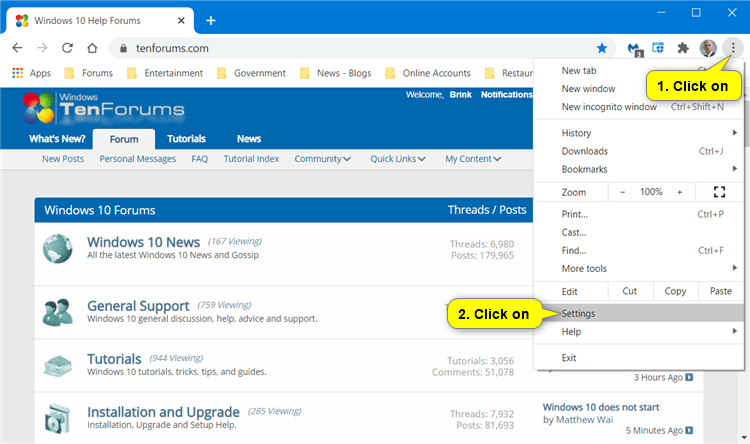
2 Click/tap on the Customize and control Google Chrome (3 dots) button at the top right, and click/tap on Settings. (see screenshot below)
3 Click/tap on Privacy and security in the left pane, and click/tap on Security under Privacy and security in the right pane. (see screenshot below)
4 Do step 5 (turn on) or step 6 (turn off) below for how you want to use secure DNS in Google Chrome.
A) Under the Advanced section, turn on Use secure DNS. (see screenshot below)
B) Perform one of the following actions below depending on which DNS provider you want to use for secure DNS in Google Chrome: (see screenshots below)
Secure DNS can be configured to use your current ISP's service if available (default), another provider from a list, or a custom provider.
- Select (dot) With your current service provider, and go to step 7 below.
- Select the DNS provider (ex: "Cloudflare (1.1.1.1)") you want to use in the With drop menu, select (dot) With, and go to step 7 below.
- Select Custom in the With drop menu, type the DNS address in the Enter custom provider box, select (dot) With, and go to step 7 below.


A) Under the Advanced section, turn off Use secure DNS, and go to step 7 below. (see screenshot below)
7 You can now close the Settings - Security tab if you like.
That's it,
Shawn
Related Tutorials
- How to Enable or Disable DNS over HTTPS (DoH) in Firefox
- How to Change IPv4 and IPv6 DNS Server Address in Windows
- How to Enable or Disable DNS over HTTPS (DoH) in Microsoft Edge
How to Enable or Disable DNS over HTTPS (DoH) in Google Chrome
-
New #1
Also available in Firefox -about:preferences#general > Network Settings > Enable DNS over HTTPS
-
New #2
You beat me to the punch for the new tutorial below.

How to Enable or Disable DNS over HTTPS (DoH) in Firefox
-
New #3
Note you don't see this option if the fix used below is used to stop the Chrome software reporter tool running. The validation page only works for me using the Cloudfare DNS settings - but the Ping time of c. 100ms is slower than my ISP's Ping time (Virgin Media).
Does anyone know when the Encrypted SNI feature will be available in Chrome?
In Regedit. go to HKEY_LOCAL_MACHINE\SOFTWARE\Policies\Google\Chrome. Create the Google & Chrome keys if they don't exist. Select Chrome key and in right-side pane, right-click and select "New -> DWORD (32-bit) Value" option. Set the new DWORD name as ChromeCleanupEnabled. Again create a new DWORD and set its name to ChromeCleanupReportingEnabled. Set both DWORD values to 0.Last edited by Steve C; 30 Nov 2019 at 09:01.
-
New #4
Just a quick follow up, with Chrome v83 this is an official browser setting (not just a flag):
-
-
New #6
For reference, for me it's located under: Settings > Privacy and security > Security > Advanced security
Otherwise it might be a server-side rollout (I know Google is fond of those)
edit: I checked on a different computer and the setting was located at the bottom of: Settings > Privacy and security > MoreLast edited by jeffrey; 10 Jul 2020 at 13:10.
-
-
-
-
New #9
From Google -
If you are signed in to Chrome, this data is temporarily linked to your Google Account. We do this so that when an attack is detected against your browser or account, Safe Browsing can tailor its protections to your situation. In this way, we can provide the most precise protection without unnecessary warnings. After a short period, Safe Browsing anonymizes this data so it is no longer connected to your account.
You can opt in to this mode by visiting Privacy and Security settings > Security > and selecting the “Enhanced protection” mode under Safe Browsing. It will be rolled out gradually in M83 on desktop platforms, with Android support coming in a future release. Enterprise administrators can control this setting via the SafeBrowsingProtectionLevel policy.

How to Enable or Disable DNS over HTTPS (DoH) in Google Chrome
Published by Shawn BrinkCategory: Browsers & Email12 Dec 2020


 Quote
Quote
Tutorial Categories

Related Discussions
