

How to Turn On or Off Sync for Profile in Microsoft Edge Chromium
Microsoft has adopted the Chromium open source project in the development of Microsoft Edge on the desktop to create better web compatibility. This new Microsoft Edge runs on the same Chromium web engine as the Google Chrome browser, offering you best in class web compatibility and performance.
The new Chromium based Microsoft Edge is supported on all versions of Windows 7, Windows 8.1, Windows 10, Windows Server (2016 and above), Windows Server (2008 R2 to 2012 R2), and macOS.
You can sign in to a profile in Microsoft Edge with your Microsoft account or your work/school account.
Signing into Microsoft Edge with a Microsoft account allows you to sync your browsing data across all your signed-in versions of Microsoft Edge. You may sync your favorites, settings, form fill data (addresses and more), passwords, extensions, and collections. You must allow permission to turn on sync in Microsoft Edge, and each synced data type may be turned on or off individually. Favorites includes any tabs you previously set aside in the legacy version of Microsoft Edge, which sync along with the rest of your favorites. Deleted or modified favorites or other data from one signed-in version of Microsoft Edge sync to all other signed-in versions of Microsoft Edge where sync is turned on.
For sync to function, additional device connectivity and configuration data necessary to provide the sync experience, such as the name of your device, make and model, is sent. The data may be deleted from the Microsoft device dashboard. To manage your synced favorites, go to edge://favorites. To manage all other data types, go to edge://settings/profiles.
All synced data is encrypted in transit over HTTPS when transferred between the browser and Microsoft servers. The synced data is also stored in an encrypted state in Microsoft servers. Sensitive data types such as addresses and passwords are further encrypted on the device before being synced. If you are using a work or school account, all data types are further encrypted before being synced using Microsoft Information Protection. All other synced data types are stored until you delete the data, the account is deleted, or the account becomes inactive. An account ID is attached to all synced data, as the ID is necessary to perform sync across multiple devices.
InPrivate and Guest mode browsing data does not sync to your Microsoft account. However, favorites created during InPrivate sessions are synced across your signed-in versions of Microsoft Edge where sync is turned on.
Starting with Microsoft Edge 81.0.413.0, you can now sign in to Microsoft Edge and turn on sync to see your info across your computer, phone, and other devices.
Sync for history and open tabs is now available in the latest Dev and Canary versions of Microsoft Edge.
See also:
- Sign in to sync Microsoft Edge across devices | Microsoft Edge Support
- Sync | Microsoft Edge Privacy Whitepaper | Microsoft Docs
This tutorial will show you how to turn on or off sync and change sync settings for a profile in the Chromium based Microsoft Edge.
Contents
- Option One: Turn On Sync for a Profile in Microsoft Edge
- Option Two: Change Sync Settings for a Profile in Microsoft Edge
- Option Three: Turn Off Sync for a Profile in Microsoft Edge
- Option Four: Enable or Disable Sync in Microsoft Edge for All Users using a REG file
1 Open Microsoft Edge.
2 Click/tap on the Settings and more (Alt+F) 3 dots menu icon, and click/tap on Settings. (see screenshot below)
3 Click/tap on Profiles on the left side. If you are not already using the profile you want to turn on sync, click/tap on the Switch button on the right side for the profile you want to turn on sync. (see screenshot below)
If you do not see a left pane, then either click/tap on the 3 bars menu button towards the top left OR widen the horizontal borders of the Microsoft Edge window until you do.
4 Click/tap on Sync. (see screenshot below)
5 Click/tap on Turn on sync. (see screenshot below)
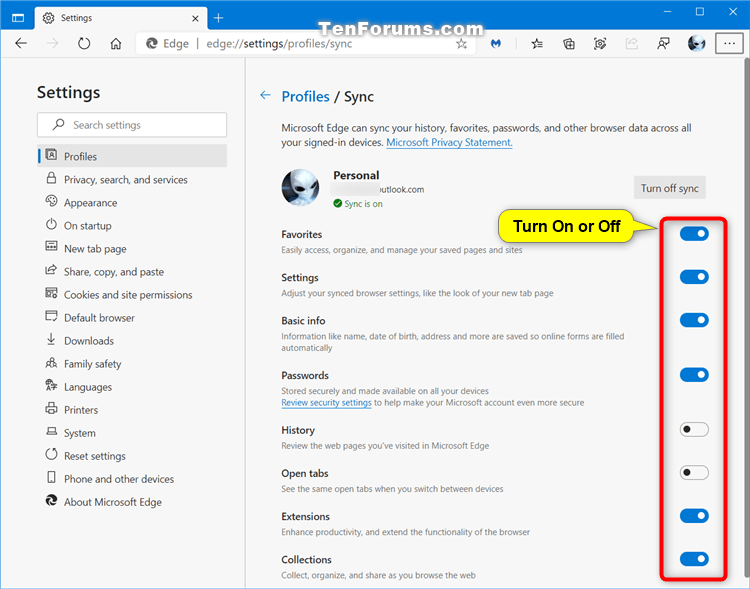
6 Turn on (default) or off the individual sync items you want for this profile, and click/tap on Confirm when finished to apply. (see screenshot below)
7 You can now close the Settings tab if you like.
1 Open Microsoft Edge.
2 Click/tap on the Settings and more (Alt+F) 3 dots menu icon, and click/tap on Settings. (see screenshot below)
3 Click/tap on Profiles on the left side. If you are not already using the profile you want to change sync settings, click/tap on the Switch button on the right side for the profile you want to change sync settings. (see screenshot below)
If you do not see a left pane, then either click/tap on the 3 bars menu button towards the top left OR widen the horizontal borders of the Microsoft Edge window until you do.
4 Click/tap on Sync. (see screenshot below)
5 Turn on (default) or off the individual sync items you want for this profile. (see screenshot below)
6 When finished, you can now close the Settings tab if you like.
1 Open Microsoft Edge.
2 Click/tap on the Settings and more (Alt+F) 3 dots menu icon, and click/tap on Settings. (see screenshot below)
3 Click/tap on Profiles on the left side. If you are not already using the profile you want to turn off sync, click/tap on the Switch button on the right side for the profile you want to turn off sync. (see screenshot below)
If you do not see a left pane, then either click/tap on the 3 bars menu button towards the top left OR widen the horizontal borders of the Microsoft Edge window until you do.
4 Click/tap on Sync. (see screenshot below)
5 Click/tap on Turn off sync. (see screenshot below)
6 You can now close the Settings tab if you like.
You must be sign in as an administrator to do this option.
This option uses the SyncDisabled policy to enable or disable data synchronization in Microsoft Edge. This policy also prevents the sync consent prompt from appearing.
If sync is disabled using this option, it will disable and override Option One and Option Two.
The downloadable .reg files below will add and modify the DWORD value in the registry key below.
HKEY_LOCAL_MACHINE\SOFTWARE\Policies\Microsoft\Edge
SyncDisabled DWORD
(delete) = Default enabled
1 = Always disabled
1 Do step 2 (enable) or step 3 (disable) below for what you would like to do.
This is the default setting.
A) Click/tap on the Download button below to download the file below, and go to step 4 below.
Enable_Sync_in_Microsoft_Edge.reg
Download
This step will force the Sync setting in Option One to always be turned off without users being able to change this setting.
A) Click/tap on the Download button below to download the file below, and go to step 4 below.
Disable_Sync_in_Microsoft_Edge.reg
Download
4 Save the .reg file to your desktop.
5 Double click/tap on the downloaded .reg file to merge it.
6 When prompted, click/tap on Run, Yes (UAC), Yes, and OK to approve the merge.
7 If Microsoft Edge is currently open, then close and reopen Microsoft Edge to apply.
8 You can now delete the downloaded .reg file if you like.
That's it,
Shawn Brink
Related Tutorials
- How to Enable or Disable Reset Sync in Microsoft Edge Chromium
- How to Reset Sync in Microsoft Edge Chromium
- How to Backup and Restore Everything in Microsoft Edge in Windows
- How to Completely Reset Microsoft Edge Chromium to Default in Windows
- How to Enable or Disable Add Profile in Microsoft Edge Chromium
- How to Add a Profile in Microsoft Edge Chromium
- How to Switch Between Profiles in Microsoft Edge Chromium
- How to Sign in and Sign out of Profile in Microsoft Edge Chromium
- How to Change Default Profile to Open External Links in Microsoft Edge Chromium
- How to Turn On or Off Automatic Profile Switching in Microsoft Edge Chromium
How to Turn On or Off Sync for Profile in Microsoft Edge Chromium

How to Turn On or Off Sync for Profile in Microsoft Edge Chromium
Published by Shawn BrinkCategory: Browsers & Email29 Dec 2020


 Quote
QuoteTutorial Categories

Related Discussions
