Windows 10 user and group management can be done in Settings > Accounts. In addition, user management can be done using Command Prompt, PowerShell, and in Local Users and Groups (lusrmgr.exe, not available in Home edition).
The easiest method to manage Windows 10 user accounts and groups is to do it in Windows Admin Center (WAC).
This tutorial will show how to manage users and groups in WAC.
To install and setup Windows Admin Center, see tutorial: Windows Admin Center - Centrally manage all your Windows 10 PCs
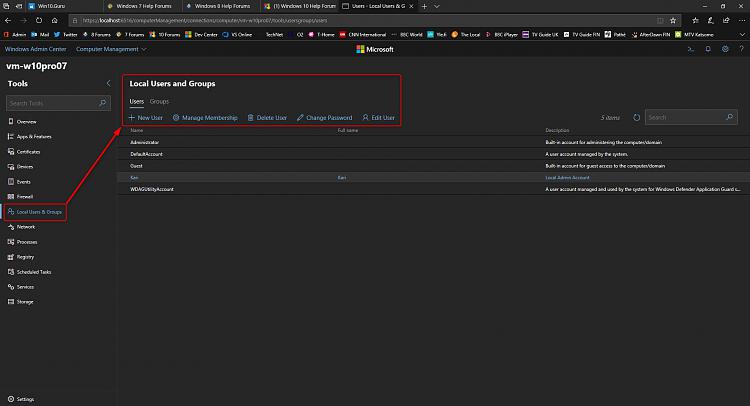
1.1 Run WAC, open your PC by clicking its name. Select Local Users & Groups:
(Click to enlarge.)
1.2 On main pane, you will see list of current user accounts. Select a user, and select action from menu list. To add a user account, click New user, enter username, password and confirm password (required). All other information is optional:
Notice that name (user profile name) and full name (display name) don't have to be the same. Name is what system uses for that user's profile and profile folder, full name is how user is shown in sign-in screen, Settings app and so on.
1.3 As is default in Windows, new accounts are always standard account. You cannot create a Microsoft account in WAC; if you want to add a user with Microsoft account, create the account as local, and when user signs in first time, he / she can switch to Microsoft account.
The profile and profile folder will remain as set in WAC, when user switches to Microsoft account. Nice workaround to avoid sometimes really strange 5 character acronyms used for profile if account is created as Microsoft account.
1.4 To change account type or add user to other groups, click Manage Membership and select groups this user should belong. Unselect a group to remove user from selected group:
1.5 Select Delete User to completely remove a local or Microsoft account user from computer.
Notice that you cannot delete system accounts (Administrator, DefaultAccount, Guest, WDAGUtilityAccount):
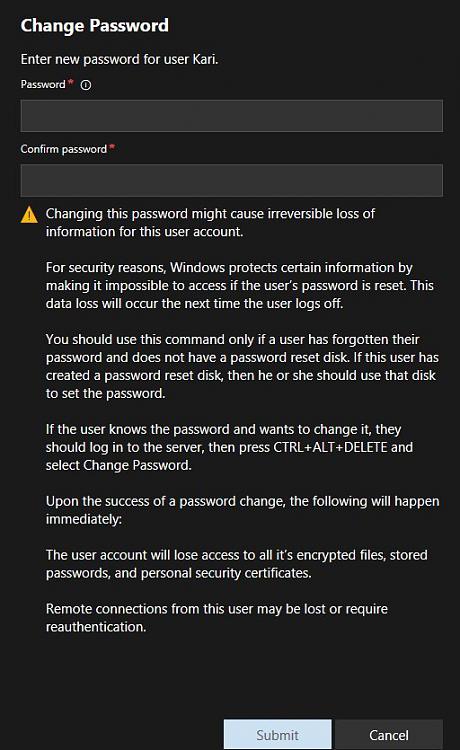
1.6 Use Change Password only to change passwords for built-in admin and local accounts! Microsoft account passwords should be changed online at https://account.microsoft.com
1.7 Edit user only allows to change user's full (display) name and account description:
Existing accounts cannot be disabled / enabled in WAC.
2.1 On main pane, select Groups to see a list of all current user groups. Select a group to see members of that group on Details pane:
2.2 You can add or remove users in groups on Details pane, basically the same action than when managing user membership in step 1.4
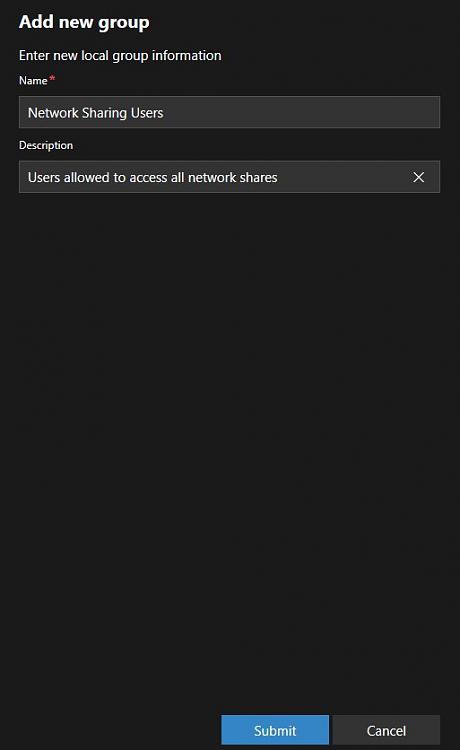
2.3 You can create any number of new groups. A practical example: Let's say you want some shared network resources on your home network only to be available to selected users. You can create a group for this purpose:
2.4 When group has been created, add selected users to it:
It's now easy to share a network drive only with this group:
That's it this time!
Kari
Windows Admin Center - Manage Users and Groups

Windows Admin Center - Manage Users and Groups
How to use Windows Admin Center to manage users and groups in Windows 10Published by Kari "Kalsarikänni" FinnCategory: User Accounts
15 Sep 2019
Tutorial Categories


Related Discussions


