

How to Add and Remove Internet Time Servers in Windows
Your PC's clock is used to record the time whenever you create or modify files on your PC. You can change the clock's time and time zone.
You can synchronize your PC's clock with an Internet time server. This means that the clock on your PC is updated to match the clock on the time server, which can help ensure that the clock's time on your PC is accurate. Your clock is typically automatically updated once a week and needs to be connected to the Internet for the synchronization to occur.
Windows includes a list of available Internet time servers to select from by default, but you can add and remove time servers you want from this list.
This tutorial will show you how to add and remove Internet time servers (NTP server) used to synchronize your clock in Windows 7, Windows 8, and Windows 10.
You must be signed in as an administrator to add or remove an Internet time server.
- Option One: Add Internet Time Server in Control Panel
- Option Two: Add Internet Time Server in Registry Editor
- Option Three: Remove Internet Time Server in Registry Editor
EXAMPLE: List of available time servers in Windows
1. Open the Control Panel (icons view), and click/tap on the Date and Time icon.
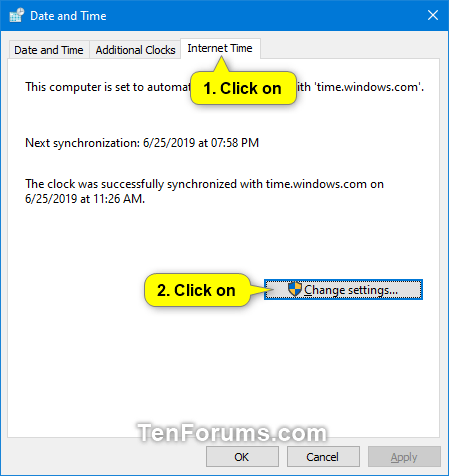
2. Click/tap on the Internet Time tab, and click/tap on the Change settings button. (see screenshot below)
If your PC is on a domain, then you will not have an Internet Time tab. Your clock will automatically synchronize with the domain controller instead.
3. Check the Synchronize with an Internet time server box. (see screenshot below)
4. Type the time server (ex: "time-a.nist.gov") you want to add, and click/tap on OK.
A list of the Simple Network Time Protocol (SNTP) time servers that are available on the Internet
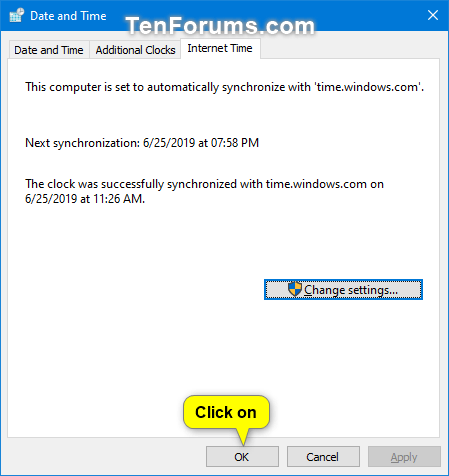
5. Click/tap on OK, and close the Control Panel if you like. (see screenshot below)
1. Press the Win+R keys to open Run, type regedit into Run, and click/tap on OK to open Registry Editor.
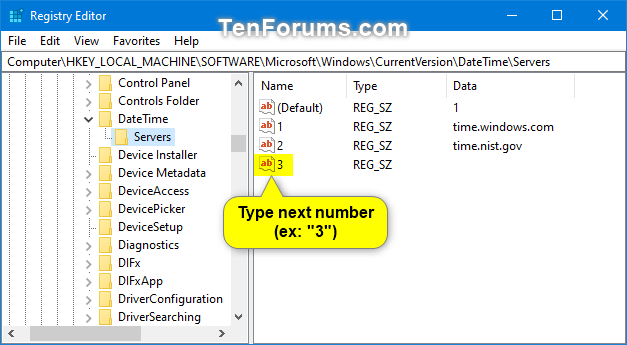
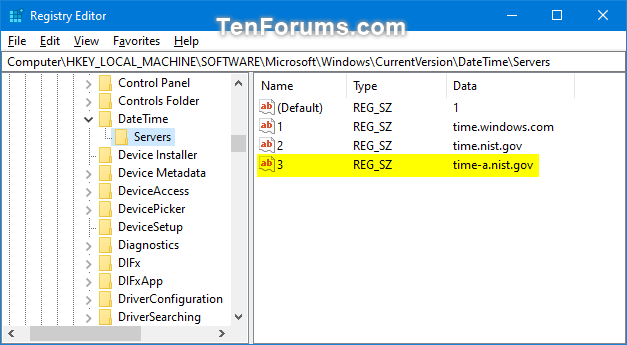
2. Navigate to the key below in the left pane of Registry Editor. In the right pane, make note of the string value numbers to see the next number (ex: "3") in the sequence you will need to create. (see screenshot below)
HKEY_LOCAL_MACHINE\SOFTWARE\Microsoft\Windows\CurrentVersion\DateTime\Servers
3. In the right pane of the Servers key, right click or press and hold on an empty area, click/tap on New, and click/tap on String Value. (see screenshot below)
4. Type the next number (ex: "3") in the sequence for the name of this new string value, and press Enter. (see screenshot below)
5. Type the time server (ex: "time-a.nist.gov") you want to add for this string value number (ex: "3"), and click/tap on OK.
A list of the Simple Network Time Protocol (SNTP) time servers that are available on the Internet
6. When finished adding time servers, you can close Registry Editor. (see screenshot below)
7. The added time server(s) will now be available in the list to select as the default Internet Time Server.
1. Change the default Internet Time Server to be a time server other than the one you want to remove.
2. Press the Win+R keys to open Run, type regedit into Run, and click/tap on OK to open Registry Editor.
3. Navigate to the key below in the left pane of Registry Editor. (see screenshot below step 4)
4. In the right pane of the Servers key, right click or press and hold on the string value number (ex: "3") of the time server (ex: "time-a.nist.gov") you want to remove, and click/tap on Delete. (see screenshot below)
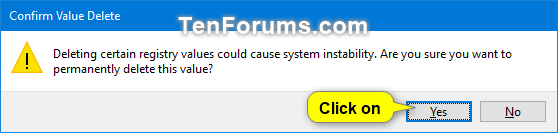
5. Click/tap on Yes to confirm. (see screenshot below)
6. When finished removing time servers, you can close Registry Editor.
That's it,
Shawn
Related Tutorials
- How to Synchronize Clock with an Internet Time Server in Windows 10
- How to Change Internet Time Server in Windows
- How to Change the Time in Windows 10
- How to Change the Time Zone in Windows 10
- How to Create a Sync Clock Time shortcut in Windows 10
Add and Remove Internet Time Servers in Windows
Add and Remove Internet Time Servers in Windows
How to Add and Remove Internet Time Servers in WindowsPublished by Shawn BrinkCategory: General Tips
18 Sep 2019


Tutorial Categories

Related Discussions
