

How to Delete Hyper-V Virtual Machine in Windows 10
Hyper-V enables running virtualized computer systems on top of a physical host. These virtualized systems (aka: guests) can be used and managed just as if they were physical computer systems, however they exist in a virtualized and isolated environment.
If you like, you can delete a Hyper-V virtual machine to remove it from the Hyper-V Manager.
When you delete a Hyper-V virtual machine, it deletes the virtual machine's configuration file, but does not delete any virtual hard drives (.vhdx). If the virtual machine has any checkpoints (aka: snapshots), these are deleted and merged into the virtual hard disk files after the virtual machine is deleted.
This tutorial will show you how to delete a Hyper-V virtual machine on your Windows 10 PC.
- Option One: Delete Hyper-V Virtual Machine in Hyper-V Manager
- Option Two: Delete Hyper-V Virtual Machine in PowerShell
1. Open Hyper-V Manager (virtmgmt.msc).
2. Select the Hyper-V virtual machine (ex: "Windows 7 Ultimate") you want to delete, and perform one of the following actions: (see screenshot below)
- Press the Del key.
- Click/tap on Delete in the Actions pane on the far right.
- Right click or press and hold on the virtual machine, and click/tap on Delete.
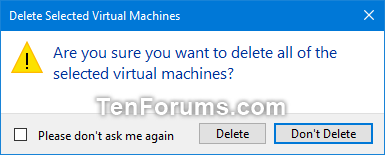
3. When prompted, click/tap on Delete to confirm. (see screenshot below)
4. When finished, you can close the Hyper-V Manager if you like.
To see more usage options for the Remove-VM command, see: Remove-VM
1. Open an elevated PowerShell.
2. TypeGet-VMinto the elevated command prompt, and press Enter. Make note of the Hyper-V virtual machine name (ex: "Windows 7 Ultimate") you want to delete. (see screenshot below)
3. Type the command below into the elevated PowerShell, and press Enter. (see screenshot below)

Remove-VM "<VM name>" -Force"
For example:Remove-VM "Windows 7 Ultimate" -Force"
4. When finished, you can close the elevated PowerShell if you like.
That's it,
Shawn
Related Tutorials
- How to Setup and Use Hyper-V in Windows 10 for OS Virtualization
- How to Rename Hyper-V Virtual Machine in Windows 10
- How to Quick Create a New Hyper-V Virtual Machine
- How to Export Hyper-V Virtual Machines in Windows 10
- How to Import Hyper-V Virtual Machines in Windows 10
- How to Move Hyper-V Virtual Machine in Windows 10
- How to Create Shortcut of Hyper-V Virtual Machine in Windows 8 and 10
- How to Use Local Devices and Resources on Hyper-V Virtual Machine in Windows 10
- How to Add or Remove a Physical Hard Disk for Hyper-V Virtual Machine
- How to Add Hyper-V Manager to Control Panel in Windows 10
Delete Hyper-V Virtual Machine in Windows 10

Delete Hyper-V Virtual Machine in Windows 10
How to Delete Hyper-V Virtual Machine in Windows 10Published by Shawn BrinkCategory: Virtualization
19 Apr 2020


Tutorial Categories

Related Discussions
