

How to Add, Delete, and Change Speech Recognition Profiles in Windows 10
When you set up Speech Recognition in Windows 10, it lets you control your PC with your voice alone, without needing a keyboard or mouse.
Using only your voice, you can open menus, click buttons and other objects on the screen, dictate text into documents, and write and send emails. Just about anything you do with your keyboard and mouse can be done with only your voice.
Speech Recognition profiles store information about how to recognize your voice. You can add and change profiles to recognize a different voice or a different noise environment.
Speech Recognition is only available for the following languages: English (United States, United Kingdom, Canada, India, and Australia), French, German, Japanese, Mandarin (Chinese Simplified and Chinese Traditional), and Spanish.
See also:
This tutorial will show you how to add, delete, and change Speech Recognition profiles to recognize a different voice or a different noise environment for your account in Windows 10.
- Option One: Add a Speech Recognition Profile
- Option Two: Change Speech Recognition Profile
- Option Three: Delete a Speech Recognition Profile
1. Open the Control Panel (icons view), and click/tap on the Speech Recognition icon.
2. Click/tap on the Advanced speech options link on the left side. (see screenshot below)
3. In the Speech Recognition tab, click/tap on the New button in the Recognition Profiles section. (see screenshot below)
4. Type a name you want for this profile, and click/tap on OK. (see screenshot below)
5. Select the type of microphone you have connected, and click/tap on Next. (see screenshot below)
6. Click/tap on Next when ready to set up your microphone. (see screenshot below)
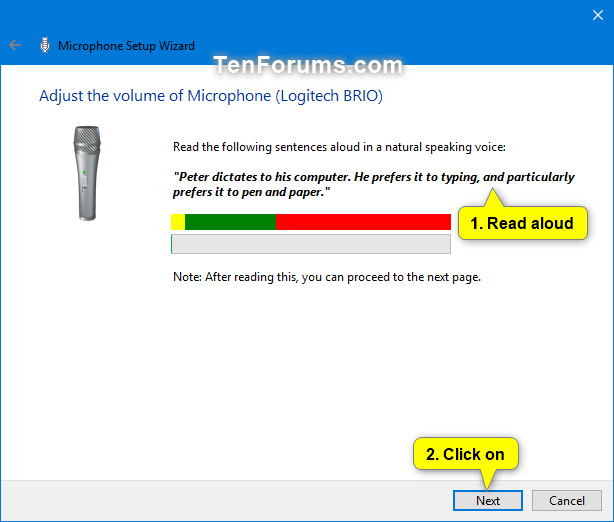
7. Read aloud the sentence, and click/tap on Next. (see screenshot below)
8. Click/tap on Finish. (see screenshot below)
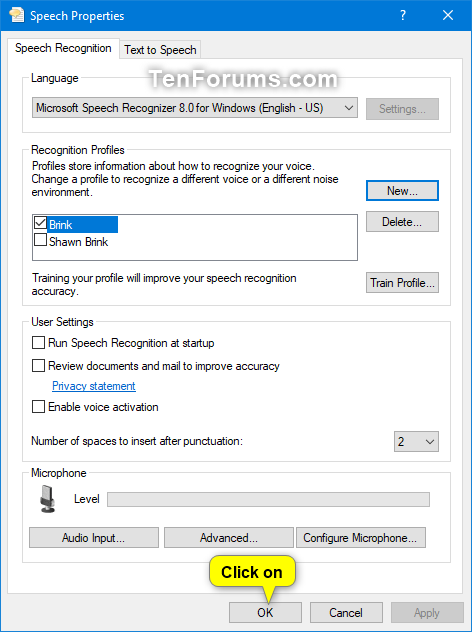
9. Click/tap on OK to apply. (see screenshot below)
1. Open the Control Panel (icons view), and click/tap on the Speech Recognition icon.
2. Click/tap on the Advanced speech options link on the left side. (see screenshot below)
3. In the Speech Recognition tab, check the profile (ex: "Shawn Brink") in the Recognition Profiles section you want to use, and click/tap on OK. (see screenshot below)
1. Open the Control Panel (icons view), and click/tap on the Speech Recognition icon.
2. Click/tap on the Advanced speech options link on the left side. (see screenshot below)
3. In the Speech Recognition tab, check the profile (ex: "Brink") in the Recognition Profiles section you want to remove, and click/tap on Delete. (see screenshot below)
If Speech Recognition is currently running and using the profile you want to delete, then you will need to close Speech Recognition before trying to delete the profile.
4. Click/tap on Yes to confirm. (see screenshot below)
5. Click/tap on OK to apply. (see screenshot below)
6. If you get the Could not delete profile error message below, then you will need to click/tap on OK, close Speech Recognition, and start over at step 2 to delete this profile. (see screenshot below)
That's it,
Shawn
Related Tutorials
- How to Set Up Speech Recognition in Windows 10
- How to Start Speech Recognition in Windows 10
- How to Create a Start Speech Recognition Shortcut in Windows 10
- How to Add Start Speech Recognition Context Menu in Windows 10
- How to Change Speech Recognition Language in Windows 10
- How to Enable or Disable Run Speech Recognition at Startup in Windows 10
- How to Enable or Disable Document Review for Speech Recognition in Windows 10
- How to Enable or Disable Voice Activation for Speech Recognition in Windows 10
- How to Add, Delete, Prevent, and Edit Speech Recognition Dictionary Words in Windows 10
Add, Delete, and Change Speech Recognition Profiles in Windows 10

Add, Delete, and Change Speech Recognition Profiles in Windows 10
How to Add, Delete, and Change Speech Recognition Profiles in Windows 10Published by Shawn BrinkCategory: Apps & Features
09 Jan 2020


Tutorial Categories

Related Discussions
