

How to Crop Image in Windows 10 Photos app
The Photos app included in Windows 10 is a universal app that allows you to enjoy, organize, edit, and share all your digital memories. It brings together photos and videos from all your devices, enhances them to make great photos even better, and organizes them into beautiful albums for you.
The Photos app will also includes a cropping feature that allows you remove unwanted outer areas from an image.
See also: Edit photos and videos in Windows 10 | Windows Support
This tutorial will show you how to crop an image using the Photos app in Windows 10.
Here's How:
1 Open an image you want to crop in the Photos app.
2 Click/tap on the Edit & Create button on the toolbar and click/tap on Edit (Ctrl+S). (see screenshots below)
You can also right click or press and hold on the image, click/tap on Edit & create, and click/tap on Edit.

3 Click/tap on the Crop and rotate button. (see screenshot below)
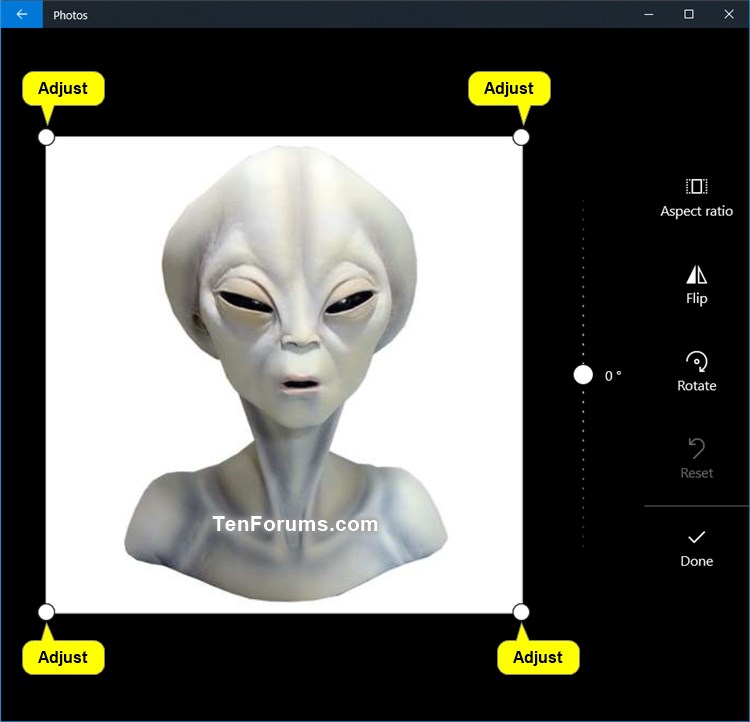
4 Adjust (drag) the corner dots to select the area of the image you want to crop. (see screenshot below)
5 When finished, click/tap on the Done button. (see screenshot below)
6 Click/tap on Save or Save a copy (Ctrl+S) for what you want to do. (see screenshot below)
Save = Save your edits and replace the original file.
Save a copy = Save edits as a new file. The original file will not be affected.
7 You can now close the Photos app if you like.
That's it,
Shawn
Related Tutorials
- How to Sign in and Sign out of Photos app with Microsoft Account in Windows 10
- How to Resize Image in Windows 10 Photos app
- How to Add 3D Effects to Images and Videos in Windows 10 Photos app
- How to Add or Remove Favorites in Photos app in Windows 10
- How to Add and Remove Folders in Photos app in Windows 10
- How to Turn On or Off Show OneDrive Cloud-only Content in Windows 10 Photos app
- How to Turn On or Off Hardware Accelerated Video Encoding in Windows 10 Photos app
- How to Turn On or Off Linked Duplicates in Windows 10 Photos app
- How to Search for Similar Images on Bing in Windows 10 Photos app
Crop Image in Windows 10 Photos app

Crop Image in Windows 10 Photos app
How to Crop Image in Windows 10 Photos appPublished by Shawn BrinkCategory: Apps & Features
29 Mar 2020


Tutorial Categories

Related Discussions
