

How to Specify when Storage Sense Automatically Make OneDrive Files On-Demand Online-only in Windows 10
OneDrive Files On-Demand is available starting with Windows 10 build 16215 and OneDrive app build 17.3.7064.1005 or later.
OneDrive Files On-Demand helps you access all your files in OneDrive without having to download all of them and use storage space on your device.
When you turn on Files On-Demand, youll see all your files in File Explorer and get new information about each file. New files created online or on another device appear as online-only files, which dont take up space on your device. When youre connected to the Internet, youll be able to use the files like every other file on your device.
Youll know that Files On-Demand is turned on if you see the status icons next to your files in File Explorer:
Online-only files dont take up space on your computer. You see a cloud icon for each online-only file in File Explorer, but the file doesnt download to your device until you open it. You cant open online-only files when your device isnt connected to the Internet.
When you open an online-only file, it downloads to your device and becomes a locally available file. You can open a locally available file anytime, even without Internet access. If you need more space, you can change the file back to online. Just right-click the file and select Free up space.
Only files that you mark as Always keep on this device have the green circle with the white check mark. These files download to your device and take up space, but theyre always there for you even when youre offline.
See also: OneDrive Files On-Demand and Storage Sense for Windows 10 | Microsoft Office
Starting with Windows 10 build 17692, Storage Sense picks up a new skill adding the ability to automatically make any downloaded Files On-Demand online-only if you havent used them in a certain number of days.
Starting with at least Windows 10 build 18282, you can now configure a group policy to specify when Storage Sense (if turned on or enabled) will automatically make any downloaded files from OneDrive Files On-Demand as online-only for all users.
Content flagged as Always keep on this device will not be affected.
This tutorial will show you how to specify when Storage Sense will make any downloaded OneDrive Files On-Demand online-only if they havent been used in a specified number of days for your account or all users in Windows 10.
Contents
- Option One: Specify when Storage Sense Automatically Make OneDrive Files On-Demand Online-only for Current User in Settings
- Option Two: Specify when Storage Sense Automatically Make OneDrive Files On-Demand Online-only for Current User in Registry Editor
- Option Three: Specify when Storage Sense Automatically Make OneDrive Files On-Demand Online-only for All Users in Local Group Policy Editor
- Option Four: Specify when Storage Sense Automatically Make OneDrive Files On-Demand Online-only for All Users in Registry Editor
1 Open Settings, and click/tap on the System icon.
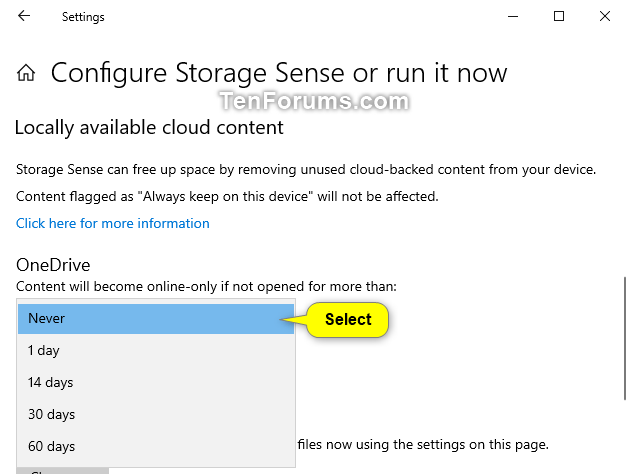
2 Click/tap on Storage on the left side, and click/tap on the Configure Storage Sense or run it now link under Storage on the right side. (see screenshot below)
3 Under the Locally available cloud content section, select Never, 1 day, 14 days, 30 days (default), or 60 days in the OneDrive drop menu for what you want. (see screenshot below)
This setting will only be available if you have OneDrive Files On-Demand turned on.
4 You can now close Settings if you like.
1 Press the Win + R keys to open Run, type regedit into Run, and click/tap on OK to open Registry Editor.
2 Navigate to the key below in the left pane of Registry Editor. (see screenshot below)
HKEY_CURRENT_USER\Software\Microsoft\Windows\CurrentVersion\StorageSense\Parameters\StoragePolicy\OneDrive!S-1-5-21-788078031-2691013130-2060433956-1001!Personal|901DDE64673783B7!132
The part highlighted in red in the key above will be unique for each user. It is the SID of the current user.
This registry key will only be available if you made a change using Option One at least one time.
3 Do step 4 (Never) or step 5 (specify days) below for what you would like to do.
A) In the right pane of the OneDrive!SID!Personal|901DDE64673783B7!132 key, double click/tap on the 02 DWORD to modify it. (see screenshot below step 2)
B) Type 0 (number), and click/tap on OK. (see screenshot below)
C) In the right pane of the OneDrive!SID!Personal|901DDE64673783B7!132 key, double click/tap on the 128 DWORD to modify it. (see screenshot below step 2)
D) Type 0 (number), click/tap on OK, and go to step 6 below. (see screenshot below)
A) In the right pane of the OneDrive!SID!Personal|901DDE64673783B7!132 key, double click/tap on the 02 DWORD to modify it. (see screenshot below step 2)
B) Type 1, and click/tap on OK. (see screenshot below)
C) In the right pane of the OneDrive!SID!Personal|901DDE64673783B7!132 key, double click/tap on the 128 DWORD to modify it. (see screenshot below step 2)
D) Select (dot) Decimal, type 1, 14, 30 (default), or 60 for how many days you want, click/tap on OK, and go to step 6 below. (see screenshot below)
6 You can now close Registry Editor if you like.
This option is only available starting with at least Windows 10 build 18282.
You must be signed in as an administrator to do this option
If specified, this option will override Option One and Option Two for all users on the computer.
The Local Group Policy Editor is only available in the Windows 10 Pro, Enterprise, and Education editions.
All editions can use Option Four.
1 Open the Local Group Policy Editor.
2 Navigate to the key below in the left pane of the Local Group Policy Editor. (see screenshot below)
Computer Configuration\Administrative Templates\System\Storage Sense
3 In the right pane of Storage Sense in Local Group Policy Editor, double click/tap on the Configure Storage Cloud Content dehydration threshold policy to edit it. (see screenshot above)
4 Do step 5 (specify) or step 6 (default) below for what you would like to do.
A) Select (dot) Enabled, enter a number between 0 to 365 for how may days you want, click/tap on OK, and go to step 7 below. (see screenshot below)
Entering 0 will be for never.
A) Select (dot) Not Configured or Disabled, click/tap on OK, and go to step 7 below. (see screenshot below)
Not Configured is the default setting.
7 When finished, you can close the Local Group Policy Editor if you like.
This option is only available starting with at least Windows 10 build 18282.
You must be signed in as an administrator to do this option
If specified, this option will override Option One and Option Two for all users on the computer.
1 Press the Win + R keys to open Run, type regedit into Run, and click/tap on OK to open Registry Editor.
2 Navigate to the key below in the left pane of Registry Editor. (see screenshot below)
HKEY_LOCAL_MACHINE\SOFTWARE\Policies\Microsoft\Windows\StorageSense
If you do not have the StorageSense key, right click on the Windows key, click/tap on New, click/tap on Key, type StorageSense for the name, and press Enter.
3 Do step 4 (specify) or step 5 (default) below for what you want to do.
A) In the right pane of the StorageSense key, double click/tap on the ConfigStorageSenseCloudContentDehydrationThreshold DWORD to modify it. (see screenshot below step 2)
If you do not have a ConfigStorageSenseCloudContentDehydrationThreshold DWORD, right click on an empty area in the right pane of the StorageSense key, click/tap on New, click/tap on DWORD (32-bit) Value, type ConfigStorageSenseCloudContentDehydrationThreshold for the name, and press Enter.
B) Select (dot) Decimal, enter a number between 0 to 365 for how may days you want, click/tap on OK, and go to step 6 below. (see screenshot below)
Entering 0 will be for never.
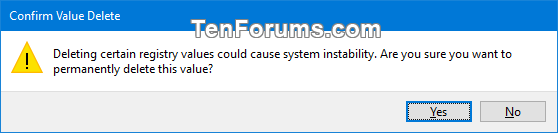
A) In the right pane of the StorageSense key, right click on the ConfigStorageSenseCloudContentDehydrationThreshold DWORD, and click/tap on Delete. (see screenshot below step 2)
B) Click/tap on Yes to confirm, and go to step 6 below. (see screenshot below)
6 You can now close Registry Editor if you like.
That's it,
Shawn
Related Tutorials
- How to Enable or Disable Storage Sense to Automatically Free Up Space in Windows 10
- How to Turn On or Off OneDrive Files On-Demand in Windows 10
- Mark OneDrive Files as Always keep on this device for Offline Use in Windows 10
- How to Free Up Space from Locally Available OneDrive Files in Windows 10
- How to Turn On or Off Storage Sense to Automatically Free Up Space in Windows 10
- How to Enable or Disable Storage Sense to Delete Temporary Files in Windows 10
- How to Specify when to Run Storage Sense in Windows 10
- How to Specify when Storage Sense Delete Files in Downloads Folder in Windows 10
Automatically Make OneDrive Files On-Demand Online-only in Windows 10
-
New #1
I turned on Files on Demand but my I see no mention of locally available could content under Settings. I'm on v 17134.228.
-
-
New #3
-
-
-
New #6
Doesn't seem to work for me on Win 10 Pro 1903: I've set to free up OneDrive space after 1 day of unused file (online only) but when I check my local pc OneDrive subdirs I see same files are still physically on the disk after many days and they have the green checkmark (not full green - keep them local -).
-
New #7
Hello hexaae,
Just to verify, do you have Storage Sense turned on?
When using OneDrive files on demand, any files marked as Always keep on this device will not be affected by Storage Sense. You might check to make sure they are not checked as Always keep on this device.
-
New #8
Sure it's all set correctly. I have OneDrive 2019 (Build 19.103.0527.0003):

-
-
New #9
As a test, click on the Clean now button under Free up space now in Storage Sense to see if it will apply your OneDrive setting. If it does, then there may be something preventing Storage Sense from automatically running when scheduled.
 Free Up Disk Space Now with Storage Sense in Windows 10
Automatically Make OneDrive Files On-Demand Online-only in Windows 10
How to Specify when Storage Sense Automatically Make OneDrive Files On-Demand Online-only in Windows 10Published by Shawn BrinkCategory: Apps & Features
03 Jul 2020


 Quote
Quote


Tutorial Categories

Related Discussions
