

How to Add Task View Context Menu in Windows 10
Windows 10 introduces a new feature called Task View. Task View is a virtual desktop manager that allows you to quickly switch between all of your open apps on multiple desktops. Create custom additional desktops to group apps for productivity, entertainment, or whatever you choose. This makes multitasking and organizing your opened apps much easier.
Starting with Windows 10 build 17063, Timeline is now available in Task View. It can be difficult to get back to stuff you were working on in the past. You might sometimes forget which site or app you were using or where you saved a file. Now you can finally close apps without worryingwith Timeline, you can get right back to where you left off.
Timeline introduces a new way to resume past activities you started on this PC, other Windows PCs, and iOS/Android devices. Timeline enhances Task View, allowing you to switch between currently running apps and past activities.
This tutorial will show you how to add or remove Task View and Timeline to the context menu when you right click on the desktop or folder background for all users in Windows 10.
While you must be signed in as an administrator to add or remove the context menu, all users can use the context menu.
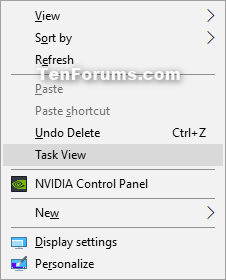
EXAMPLE: Task View context menu and Task View
Here's How:
1. Do step 2 (add) or step 3 (remove) below for what you would like to do.
A) Click/tap on the Download button below to download the file below, and go to step 4 below.
Add_Task_View_context_menu.reg
Download
This is the default setting.
A) Click/tap on the Download button below to download the file below, and go to step 4 below.
Remove_Task_View_context_menu.reg
Download
4. Save the .reg file to your desktop.
5. Double click/tap on the downloaded .reg file to merge it.
6. When prompted, click/tap on Run, Yes (UAC), Yes, and OK to approve the merge.
7. You can now delete the downloaded .reg file if you like.
That's it,
Shawn
Related Tutorials
- How to Create Task View Shortcut in Windows 10
- How to Hide or Show Task View Button on Taskbar in Windows 10
- How to Open Task View in Windows 10
- How to Switch Between Open Apps in Windows 10
- How to Turn On or Off Hover to Select Desktops in Task View in Windows 10
- How to Open and Use Timeline in Windows 10
- How to Enable or Disable Timeline in Windows 10
- How to Turn On or Off Timeline Suggestions in Windows 10
- How to Hide or Show Task View Button on Taskbar in Windows 10
- How to Enable or Disable Collect Activity History in Windows 10
- How to Turn On or Off Collect Activity History in Windows 10
- How to Clear Your Activity History in Windows 10
Add Task View Context Menu in Windows 10

Add Task View Context Menu in Windows 10
How to Add Task View Context Menu in Windows 10Published by Shawn BrinkCategory: Customization
20 Aug 2019

Tutorial Categories

Related Discussions
