

How to Open and Use Steps Recorder in Windows
Steps Recorder (called Problems Steps Recorder in Windows 7), is a program that helps you troubleshoot a problem on your device by recording the exact steps you took when the problem occurred. You can then post or send this record to a support professional to help them diagnose the problem.
Steps Recorder doesnt record text that you type (such as a password), except for function and shortcut keys.
Some programs, like a full-screen game, might not be captured accurately.
This tutorial will show you how to open and use Steps Recorder to record and save steps on your computer in Windows 7, Windows 8, and Windows 10.
Here's How:
1 Press the Win + R keys to open Run, type psr into Run, and click/tap on OK to open Steps Recorder.
2 In Steps Recorder, click/tap on the down arrow next to the Help button, and click/tap on Settings. (see screenshot below)
3 Change any settings you want, and click/tap on OK to apply. (see screenshot below)
Any settings you adjust here are temporarythey go back to the defaults when you close and reopen Steps Recorder.
Output location - If you don't want to be prompted for a location and file name every time you save a file, select Browse to set a default location and file name.
Enable screen capture - Select No if you don't want to capture screen shotsfor example, if the screen might reveal personal information that you dont want to share. The app will still record a text description of your steps.
Number of recent screen captures to store - The default is 25 screens, so if you need to record more than that, increase this number.
4 When ready to record, click/tap on the Start Record button or press the Alt+A keys. (see screenshot below)
5 Go through the steps you want to record or to reproduce the problem youre trying to diagnose. You can Pause Record (Alt+U) and Resume Record (Alt+S) the recording at any time. (see screenshots below)

6 If you like while recording, you can click/tap on Add Comment (Alt+C), use your mouse to select the part of the screen that you want to comment on, type your comment, and then click/tap on OK. (see screenshot below)
7 When you are finished recording, click/tap on Stop Record (Alt+O). (see screenshot below)
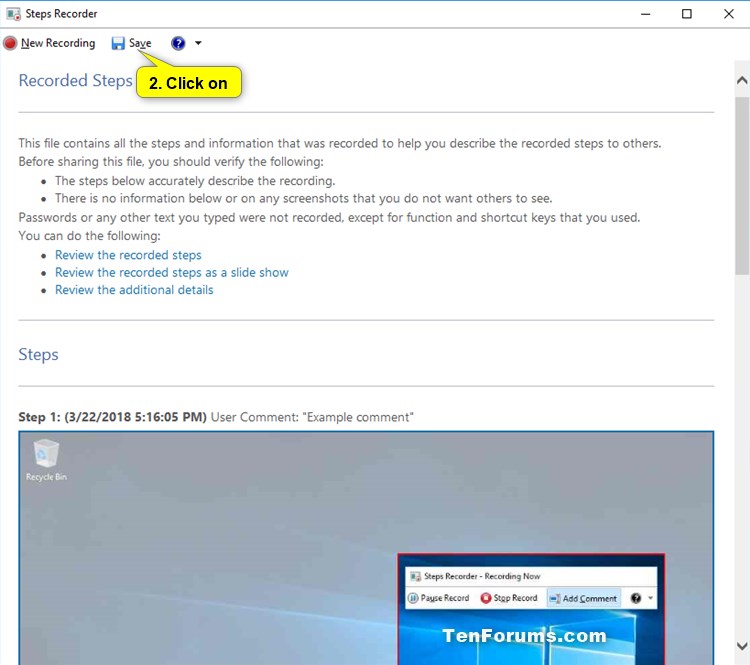
8 If you didn't specify a Output location in step 3, then review the record of the steps you followed to make sure it shows what you want it to show.
A) Click/tap on the Save button when ready. (see screenshot below)
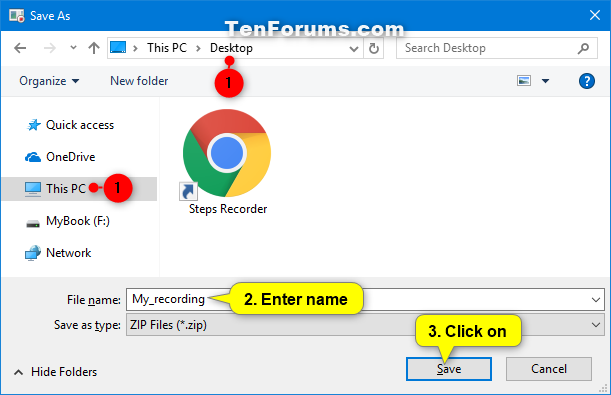
B) Navigate to where you want to save the .zip file, type a name you want for the .zip file, and click/tap on Save.
The .zip file will contain your recording as a .mht file.
9 You can now close Steps Recorder if you like.
10 You can now post or attach and send this .zip file to the person helping you troubleshoot the problem on your PC.
That's it,
Shawn Brink
Related Tutorials
- How to Enable or Disable Steps Recorder in Windows
- How to Upload and Post Screenshots and Files at Ten Forums
- How to Take a Screenshot in Windows 10
- How to Take a Screenshot with Screen Snip in Windows 10
- How to Record and Take Screenshots with Game Bar in Windows 10
Open and Use Steps Recorder in Windows
-
New #1
I am a senior with progressive macular degeneration and have just been told about Windows Steps Recorder. I think this post will be a wonderful assist in helping me learn how to use WSR properly so that I can create my own Windows 10 "user manual" for the video tutorials posted on YouTube are not helpful to me as I cannot make out the images and the presenters go too quickly for me to follow. Thank you, Shawn!
-
-
New #3
Unfortunately, the last statement in the tutorial, "It can be viewed in any web browser." is not correct. The resulting zipfile contains a .mht file, which, AFAIK, can be viewed *only* in MS Internet Explorer. Neither MS Edge nor Firefox will display the screenshots in the recording.
-
-
New #5
How to open/edit Steps Recorder files
Especially now that MSIE is considered obsolete! MS Word works fairly well in Web View. Here are a few references I found useful:
html - What is the best way of editing .mht(web archive) files? - Stack Overflow
MHT File Extension - What is an .mht file and how do I open it?
Article - How to open MHT (MIME HTML)...
https://www.techwalla.com/articles/h...open-mht-files
What's an MHT File and How Do You Open One?Last edited by rsbrux; 18 Oct 2021 at 00:27. Reason: added workaround references
-
New #6
Steps Recorder has been deprecated: Deprecated features in Windows 11 and Windows 10 for November 2023
-
-
-
-
New #9
@Brink - I cannot remember what tool you guys (@Kari) use to record screen to create tutorials - how much is it?
None of MS's pathetic suggestions below are anything like Steps Recorder. Video Recorder apps are nothing like step recorders.
"For screen recording, we recommend the Snipping Tool, Xbox Game Bar, or Microsoft Clipchamp."
Open and Use Steps Recorder in Windows
How to Open and Use Steps Recorder in WindowsPublished by Shawn BrinkCategory: Apps & Features
17 Oct 2021


 Quote
Quote

Tutorial Categories

Related Discussions
