

How to Enable or Disable Windows Defender Exploit Protection Settings in Windows 10
Starting with Windows 10 build 16232, you can now audit, configure, and manage Windows system and application exploit mitigation settings (EMET EOL) right from the Windows Security app.
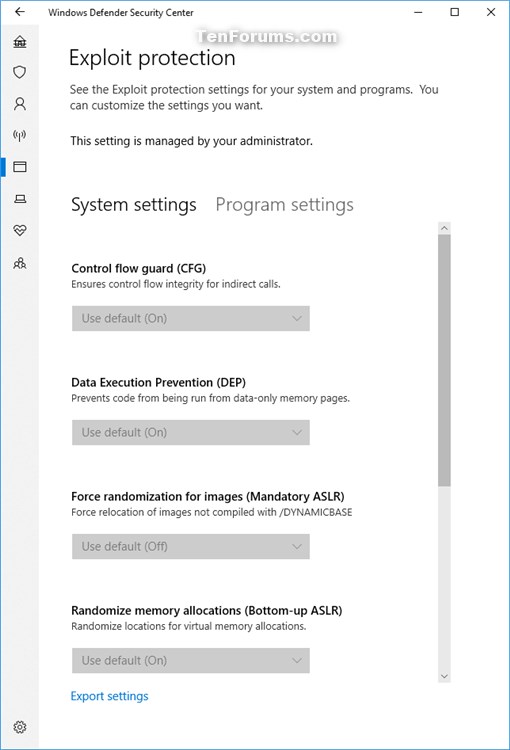
Exploit protection is built into Windows 10 to help protect your device against attacks. Out of the box, your device is already set up with the protection settings that work best for most people.
Exploit protection is part of Windows Defender Exploit Guard. Exploit protection helps protect devices from malware that use exploits to spread and infect. It consists of a number of mitigations that can be applied at either the operating system level, or at the individual app level.
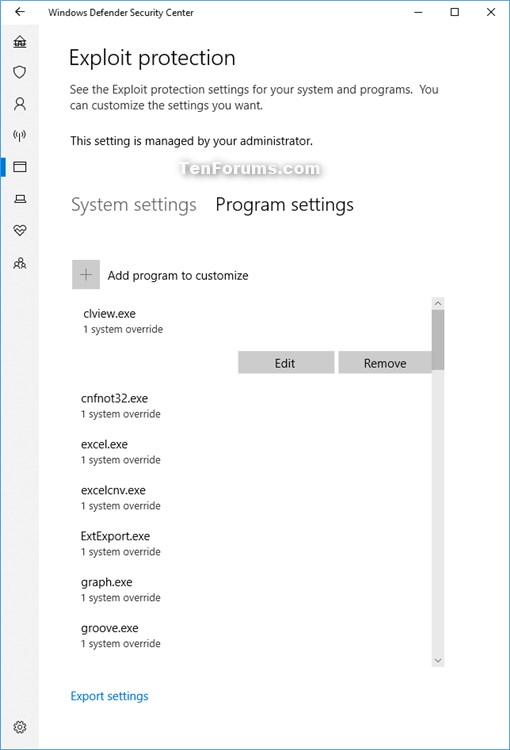
You configure these settings using the Windows Defender Security Center on an individual machine, and then export the configuration as an XML file as a backup and that you can deploy to other machines. When you export the settings, all settings for both app-level and system-level mitigations are saved. This means you don't need to export a file from both the System settings and Program settings sections - either section will export all settings.
For more information, see also:
- Use Windows Defender Exploit Guard to protect your network | Microsoft Docs
- Apply mitigations to help prevent attacks through vulnerabilities | Microsoft Docs
- Enable or disable specific mitigations used by Exploit protection | Microsoft Docs
- Deploy Exploit protection mitigations across your organization | Microsoft Docs
This tutorial will show you how to enable or disable the ability to change Exploit protection settings in Windows Security in Windows 10.
You must be signed in as an administrator to enable or disable Exploit protection settings.
- Option One: Enable or Disable Windows Defender Exploit Protection Settings in Local Group Policy Editor
- Option Two: Enable or Disable Windows Defender Exploit Protection Settings using a REG file
EXAMPLE: Exploit protection settings disabled (grayed out) in Windows Defender Security Center
The Local Group Policy Editor is only available in the Windows 10 Pro, Enterprise, and Education editions.
All editions can use Option TWO below.
1. Open the Local Group Policy Editor.
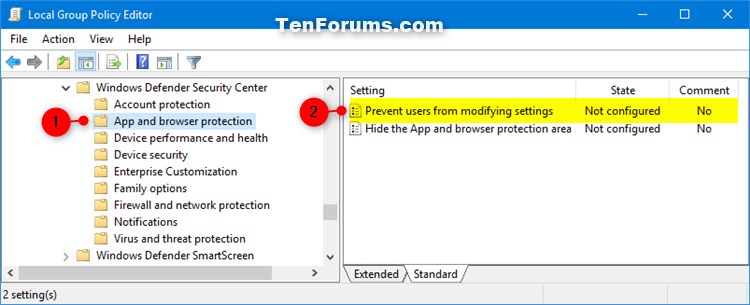
2. In the left pane of Local Group Policy Editor, navigate to the location below. (see screenshot below)
Computer Configuration\Administrative Templates\Windows components\Windows Defender Security Center\App and browser protection
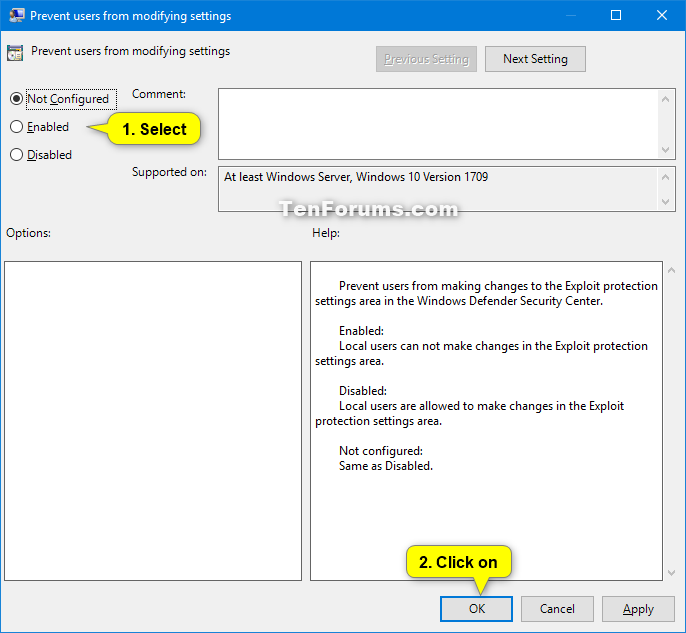
3. In the right pane of App and browser protection in Local Group Policy Editor, double click/tap on the Prevent users from modifying settings policy to edit it. (see screenshot above)
4. Do step 5 (enable) or step 6 (disable) below for what you would like to do.
A) Select (dot) Not Configured or Disabled, click/tap on OK, and go to step 7 below. (see screenshot below)
7. Close the Local Group Policy Editor.
HKEY_LOCAL_MACHINE\SOFTWARE\Policies\Microsoft\Windows Defender Security Center\App and Browser protection
DisallowExploitProtectionOverride DWORD
(delete) = Enable
1 = Disable
1. Do step 2 (enable) or step 3 (disable) below for what you would like to do.
A) Click/tap on the Download button below to download the file below, and go to step 4 below.
Enable_changing_Exploit_protection_settings.reg
Download
A) Click/tap on the Download button below to download the file below, and go to step 4 below.
Disable_changing_Exploit_protection_settings.reg
Download
4. Save the .reg file to your desktop.
5. Double click/tap on the downloaded .reg file to merge it.
6. When prompted, click/tap on Run, Yes (UAC), Yes, and OK to approve the merge.
7. Restart the computer to apply.
8. You can now delete the downloaded .reg file if you like.
That's it,
Shawn
Related Tutorials
- How to Open Windows Defender Security Center in Windows 10
- How to Change Windows Defender Exploit Protection Settings in Windows 10
- How to Export and Import Windows Defender Exploit Protection Settings in Windows 10
- How to Enable or Disable Windows Defender Exploit Guard Network Protection in Windows 10
- Hide or Show App and Browser Control in Windows Defender Security Center in Windows 10
Enable or Disable Windows Defender Exploit Protection Settings
-
New #1
Does this actually turn off exploit protection or does it just prevent changes from being made? I just have all of my settings set to "Off." Is that the same thing?
-
-
-

Enable or Disable Windows Defender Exploit Protection Settings
How to Enable or Disable Windows Defender Exploit Protection Settings in Windows 10Published by Shawn BrinkCategory: Security System
27 Jan 2019

 Quote
Quote
Tutorial Categories

Related Discussions
