

How to Enable or Disable Diagnostic Data Viewer in Windows 10
Microsoft uses Windows diagnostic data to focus their decisions and efforts to provide you with the most robust and valuable platform possible. By participating in the diagnostic data programs, you have a voice in the operating systems development, improving the overall product experience and quality through your insights.
Starting with Windows 10 build 17083, Microsoft has added the Diagnostic Data Viewer feature to provide you with increased control over that data. The Diagnostic Data Viewer is a Windows app that lets you review the diagnostic data your device is sending to Microsoft, grouping the info into simple categories based on how its used by Microsoft.
Through the viewer, you can see the different categories of diagnostic data which includes:
- Common Data like the OS name, version, device ID, Device Class, and diagnostic level selection
- Device Connectivity and Configuration such as device properties, preferences, settings, and network information
- Product and Service Performance such as device health, performance and reliability, and device file queries (this is not meant to capture user patterns or habits)
- Browsing History such as frequently visited sites
- Product and Service Usage data like applications and services used
- Software Setup and Inventory such as installed apps and device update information.
Starting with Windows 10 build 17704, users can now directly view Problem Reports that have or will be sent to Microsoft. Problem Reports help Microsoft identify crashes and other disruptions on your device so they can improve your Windows experience. On the Diagnostic Data Viewer, users can view specific details about each report collected such as when it was sent and what application or component caused the report to be created. The Diagnostic Data Viewer comes with new changes to the UI as well. For example, the filter feature to view data points by category is now directly to the right of the search bar, and the export data feature now exists at the top right of the tool.
When Diagnostic Data Viewer is enabled, users will be able to click/tap on the Diagnostic Data Viewer button to launch the app.
View your diagnostics events: In the left column, you can review your diagnostic events. Selecting an event opens the detailed event view, which shows the exact data uploaded to Microsoft. Microsoft uses this info to continually improve the Windows operating system.
Search your diagnostic events: The search box at the top of the screen lets you search all of the diagnostic event data. The returned search results include any diagnostic event that contains the matching text. Selecting an event opens the detailed event view, with the matching text highlighted.
Filter your diagnostic event categories: The apps Menu button opens the detailed menu. In here, youll find a list of diagnostic event categories, which define how the events are used by Microsoft. Selecting a category lets you filter between the diagnostic events. More details about these categories can be found here.
Provide diagnostic event feedback: The Feedback icon opens the Feedback Hub app, letting you provide feedback about the Diagnostic Data Viewer and the diagnostic events.
This tutorial will show you how to enable or disable Diagnostic Data Viewer for all users in Windows 10.
You must be signed in as and administrator to turn on or off Diagnostic Data Viewer.
Contents
- Option One: Turn On or Off Diagnostic Data Viewer in Settings
- Option Two: Turn On or Off Diagnostic Data Viewer using a REG file
- Option Three: Enable or Disable Diagnostic Data Viewer in Local Group Policy Editor
- Option Four: Enable or Disable Diagnostic Data Viewer using a REG file
1 Open Settings, and click/tap on the Privacy icon.
2 Do step 3 (off) or step 4 (on) below for what you would like to do.
This is the default setting.
A) Click/tap on Diagnostics & feedback on the left side, turn off View diagnostic data on the right side, and go to step 5 below. (see screenshot below)
A) Click/tap on Diagnostics & feedback on the left side, turn on Diagnostic Data Viewer on the right side, and go to step 5 below. (see screenshot below)
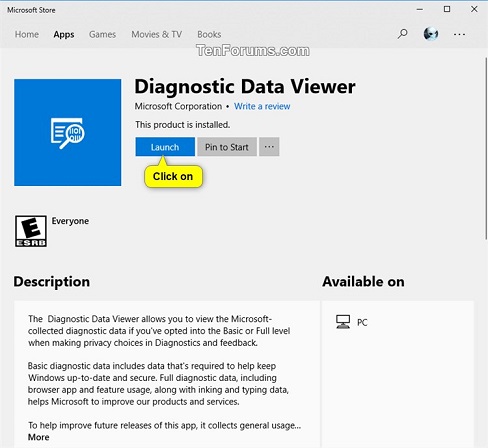
The first time users click/tap on the Diagnostic Data Viewer button to open the app, the Microsoft Store app will open for them to click/tap on Get to download and install the app for their account.

5 You can now close Settings if you like.
The downloadable .reg files below will modify the DWORD in the registry key below.
HKEY_LOCAL_MACHINE\SOFTWARE\Microsoft\Windows\CurrentVersion\Diagnostics\DiagTrack\EventTranscriptKey
EnableEventTranscript DWORD
0 = Off
1 = On
1 Do step 2 (off) or step 3 (on) below for what you would like to do.
This is the default setting.
A) Click/tap on the Download button below to download the file below, and go to step 4 below.
Turn_off_Diagnostic_data_viewer.reg
Download
A) Click/tap on the Download button below to download the file below, and go to step 4 below.
Turn_on_Diagnostic_data_viewer.reg
Download
4 Save the .reg file to your desktop.
5 Double click/tap on the downloaded .reg file to merge it.
6 When prompted, click/tap on Run, Yes (UAC), Yes, and OK to approve the merge.
7 If you like, you can delete the downloaded .reg file if you like.
If disabled, this option will override and gray out Option One and override Option Two.
The Local Group Policy Editor is only available in the Windows 10 Pro, Enterprise, and Education editions.
All editions can use Option Four below.
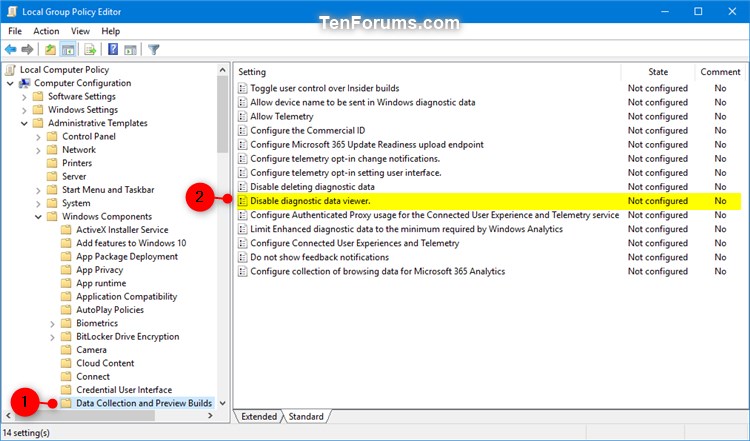
1 Open the Local Group Policy Editor.
2 In the left pane of Local Group Policy Editor, navigate to the location below. (see screenshot below)
Computer Configuration\Administrative Templates\Windows Components\Data Collection and Preview Builds
3 In the right pane of Data Collection and Preview Builds in Local Group Policy Editor, double click/tap on the Disable diagnostic data viewer policy to edit it. (see screenshot above)
4 Do step 5 (enable) or step 6 (disable) below for what you would like to do.
A) Select (dot) Not Configured or Disabled, click/tap on OK, and go to step 7 below. (see screenshot below)
Not Configured is the default setting.
7 When finished, you can close the Local Group Policy Editor.
If disabled, this option will override and gray out Option One and override Option Two.
The downloadable .reg files below will add and modify the DWORD value in the registry key below.
HKEY_LOCAL_MACHINE\SOFTWARE\Policies\Microsoft\Windows\DataCollection
DisableDiagnosticDataViewer DWORD
(delete) = Enable
1 = Disable
1 Do step 2 (enable) or step 3 (disable) below for what you would like to do.
This is the default setting.
A) Click/tap on the Download button below to download the file below, and go to step 4 below.
Enable_Diagnostic_Data_Viewer.reg
Download
A) Click/tap on the Download button below to download the file below, and go to step 4 below.
Disable_Diagnostic_Data_Viewer.reg
Download
4 Save the .reg file to your desktop.
5 Double click/tap on the downloaded .reg file to merge it.
6 When prompted, click/tap on Run, Yes (UAC), Yes, and OK to approve the merge.
That's it,
Shawn
Related Tutorials
- How to Change Diagnostic and Usage Data Settings in Windows 10
- How to Delete Diagnostic Data in Windows 10
- How to Enable or Disable Delete Diagnostic Data in Windows 10
- How to Turn On or Off Tailored experiences with diagnostic data in Windows 10
- How to Turn On or Off Improve Inking & Typing Recognition in Windows 10
Enable or Disable Diagnostic Data Viewer in Windows 10
-
New #1
Tutorial updated to add Option 3 and 4 to enable/disable Diagnostic Data Viewer using group policy.
-
-
-
-
-
-
New #7
it's wrong. there isn't even an EnableEventTranscript DWORD in default setting. its without this value
-
-

Enable or Disable Diagnostic Data Viewer in Windows 10
How to Enable or Disable Diagnostic Data Viewer in Windows 10Published by Shawn BrinkCategory: Apps & Features
30 Apr 2021


 Quote
Quote
Tutorial Categories

Related Discussions
