
New
#11
O&O Shutup10 - privacy freeware
-
-
-
New #13
How do I get the settings back to "initial state" which I tried months ago...... but I made some changes a week ago a friend suggested. Now when a download completes I no longer get the audio chime a download is completed, which is handy if you are in another window or away from the computer.
I assume it only puts my computer settings back, and not indo Windows10 Updates??
I have a word pad file with a long string of letters and numbers going left to right across the screen, actually about 68 to 70 combinations long. Like this>>> " Initial State=S001 -|S002 -|S003 -|S004 -|S005 -|S008 -|S009 -|S0............... "
Any help welcomed as I need my download completed chime working. Instructions not too technical will be useful. Thank You
-
-
New #15
I don't think ShutUp10 is the cause of your 'download completed' chime issue. There's just no setting in ShutUp10 that affects sounds (as they don't pertain to data leakage).
The file you've quoted from (i.e. "Initial State=S001 -|S002 -|S003 -|S004 -|S005 -|S008 -|S009 -|S0............... ") is the OOSU10.INI file used to save the status of settings.
To get ShutUp10 settings back to "initial state" you can use ShutUp10's Actions > Undo all changes ("factory settings") option.
If this doesn't work then you can make changes using a .CFG file (not the .INI file), by doing the following:
1. Right-click on ShutUp10 and choose Run as administrator.
2. Use File > Export settings... to create a ShutUp10 .CFG file.
If you open the .CFG file in Notepad you will see that each of the settings (shown as a) ends with either a - or + sign (shown as b and c) to indicate the toggle state :

A - sign means that the setting is at its default state whilst a + sign shows that the setting has been changed.
3. Make a copy of this .CFG file, name it something like shutup10default.cfg and, for ease of use, save it in the same folder as ShutUp10.
4. Open the new .CFG file in Notepad then, in the Edit menu (d), choose Replace... .
5. In the Replace dialog, enter + in the top text box, - in the bottom text box then click on the Replace All button (e).
6. Save the change.
7. Use File > Import settings... to import the newly-changed ShutUp10 .CFG file.
The change is dynamic and you should now be back at the initial state you wanted. You can close ShutUp10 now... but be aware that some changes do not take effect until the system is restarted. Don't be surprised if you see the following:
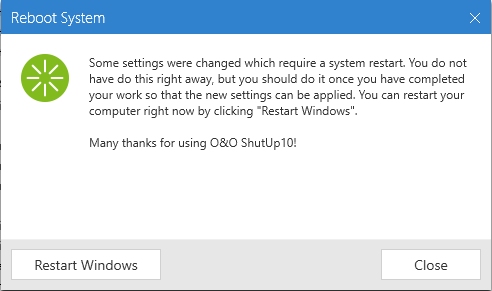
Hope this helps...Last edited by RickC; 25 Mar 2018 at 18:08.
-
New #16
Hi RickC
Thank You for taking the time to give such a great explanation. It makes me understand O&O much better now, and how to use it. The diagram was super! Thank You so much. ron3033
-
New #17
No problem... happy to help.

 Quote
Quote

Related Discussions
