DISM Error 0x80f001f...Use Source Option to repair Image

Page 1 of 2 12 LastLast

  1. Posts : 42
    Windows 10 x64 Version 2004
       #1

    DISM Error 0x80f001f...Use Source Option to repair Image


    Hi,

    I just completed a clean install of Windows 10 Pro...all was going fine, but I wanted to run both scf and DISM...

    If SFC was not able to repair some or all of the files there are a few options including a repair install from the OS dvd, and DISM (win 8 & UP)
    DISM
    If you are on win 8 and up you can (and should) run DISM if SFC found errors it could not fix
    From an DISM /Online /Cleanup-Image /RestoreHealth /source:WIM:X:elevated command prompt*
    Type DISM /Online /Cleanup-Image /RestoreHealth . (please note the space after "dism", & "online" & "image")
    If the repair is successful you may want to re-run SFC just to check.
    http://answers.microsoft.com/en-us/windows/wiki/windows_10-update/system-file-check-sfc-scan-and-repair-system-files/bc609315-da1f-4775-812c-695b60477a93>

    Have never had this issue before...but I can't seem to be able to direct DISM elevated command to a .iso file:
    To run a system file check (SFC)
    Go to start
    Type CMD
    Right click and run as Administrator
    (called an elevated command prompt)
    If you want to verify and repair the OS type sfc /scannow (note the space between sfc and "/")
    If you just want to check (verify only) the OS type sfc /verifyonly (no changes will be made using verify only)
    If you get the error message "cannot find source files"you need to have an ISO file mounted and need to specify where it is located with the below command
    DISM /Online /Cleanup-Image /RestoreHealth /source:WIM:X:* Where "X" is the drive letter where the ISO is located.* \Sources\Install.wim:1 /LimitAccessSimply change the "X" to the correct drive letter
    If you do not have an ISO you can make one.* The instructions are here
    *You may have to run this up to 3 times to fix all the problems

    When you have finished it will say one of three things
    Windows did not find any integrity violations (a good thing)
    Windows Resource Protection found corrupt files and repaired them (a good thing)
    Windows Resource Protection found corrupt files but was unable to fix some (or all) of them (not a good thing)* If you get this message run DISM as described below..

    Thanks, and I also have the DISM log file which I would be more then happy to upload:

    DISM Error 0x80f001f...Use Source Option to repair Image-dism_errors.png
      My Computer


  2. Posts : 42
    Windows 10 x64 Version 2004
    Thread Starter
       #2

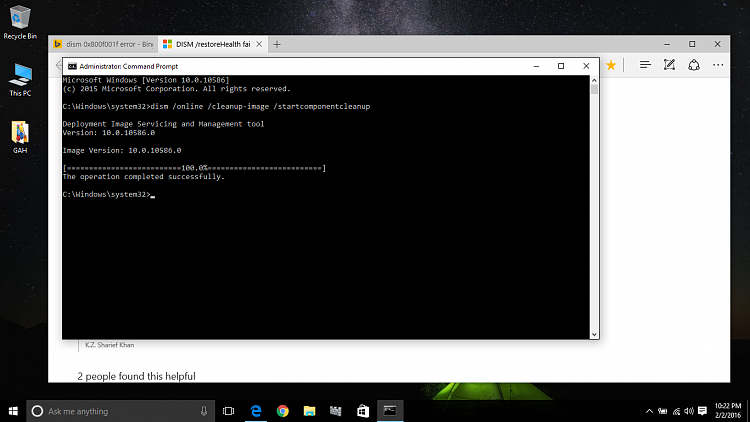
    Ok just tried this DISM command and it was successful....I should probably reboot and then run SFC again...but am too tired..lol

    Hi,
    - Why did you run the Deployment Image Servicing and Management tool?
    Generally, we will get this error 0x800F081F when there is any corruption in the system file. Let’s run the system file checker scan and check if there are any corrupt system files.
    SFC (System File Checker) is a tool which scans system files and replaces incorrect versions of the system files by using the correct versions.
    Refer the following article for more information on using SFC tool to troubleshoot missing or corrupted system files:
    http://support.microsoft.com/kb/929833
    You may also try this command and see if it makes any difference.
    dism /online /cleanup-image /startcomponentcleanup
    Keep us posted on the status of the issue.
    DISM Error 0x80f001f...Use Source Option to repair Image-dism_success.png
      My Computer


  3. Posts : 42
    Windows 10 x64 Version 2004
    Thread Starter
       #3

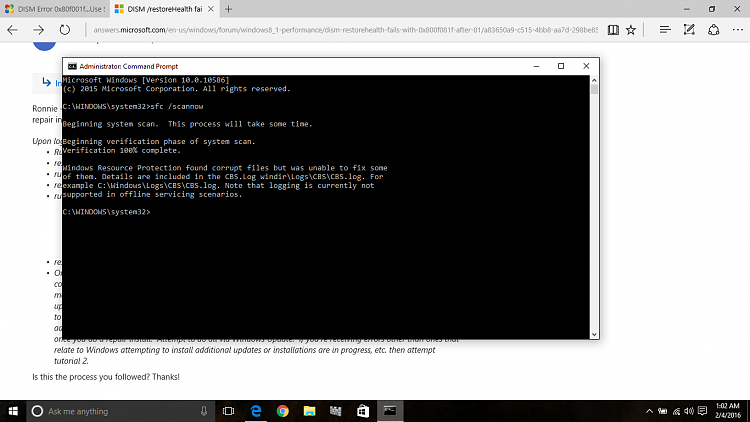
    I knew that this would be the case....as I have done a ton of online research....with the mysterious DISM (hidden buggy issues) false results..
    Any suggestions would be greatly appreciated! I was under the impression that performing a clean install would indeed rectify the Win/SXS issues with corrupted system files..?
    Thanks

    DISM Error 0x80f001f...Use Source Option to repair Image-sfc.png
      My Computer


  4. Posts : 4,142
    Windows 3.1 to Windows 11
       #4

    Try Option 1 - using the "Image-Health Repair Corrupt Files" link in my sig below..
    then select option 0 to create details text file..

    please attach that txt file to a post, before doing anything else
      My Computer


  5. Posts : 42
    Windows 10 x64 Version 2004
    Thread Starter
       #5

    http://answers.microsoft.com/en-us/w...page=9&auth=1>
    Kyhi said:
    Try Option 1 - using the "Image-Health Repair Corrupt Files" link in my sig below..
    then select option 0 to create details text file..

    please attach that txt file to a post, before doing anything else
    Hi Kyhi,

    Prior to getting your kind (and I'm sure very knowledgeable reply) I ended up doing another clean install of Windows 10 Pro, on my laptop...had some time to kill....lol) but would be more then willing to run your command and will post/attach text file....this is killin' moi..lol!
    This MS Answer Community thread had a ton of theories....on 'Corrupted SFC scan results even after clean installs ......mostly on Windows 10 OS....Heck I know that Shaun (Brink) would know the 'real story here!!!!'

    http://answers.microsoft.com/en-us/windows/forum/windows8_1-performance/dism-restorehealth-fails-with-0x800f081f-after-81/a83650a9-c515-4bb8-aa7d-298be85e7bc3?page=9&auth=1>
    Last edited by gahbmwm5; 04 Feb 2016 at 16:35.
      My Computer


  6. Posts : 42
    Windows 10 x64 Version 2004
    Thread Starter
       #6

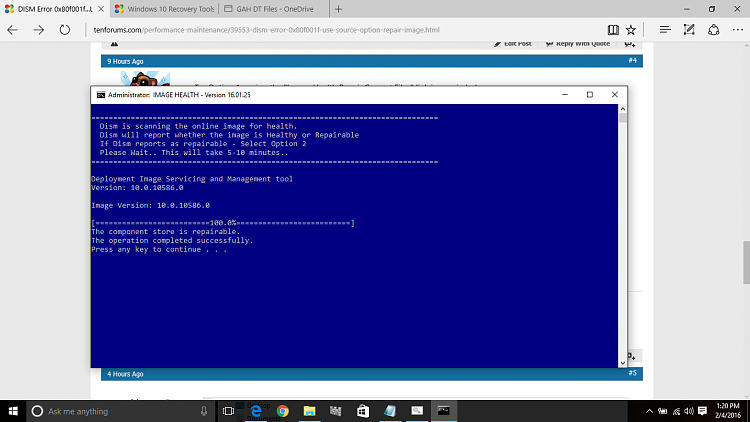
    Ok, I didn't see any text files on my desktop however have attached a .png stating corruption is repairable..
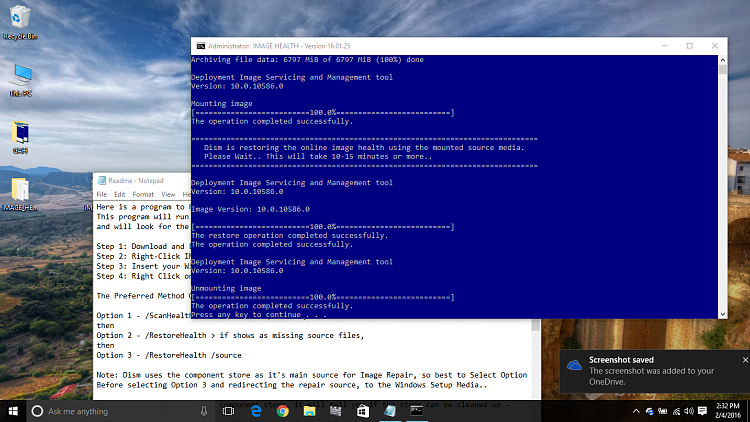
    Option 2: If DISM reports repairable choose option 2....

    Very nice program and thanks m8! Kindly advise my next step to settle my 'troubled mind..lol

    DISM Error 0x80f001f...Use Source Option to repair Image-dism-report.png

    Apologies, but I just reviewed your READ ME again...and I have to extract Image_Health.zip to root drive....lol
    I will get you my DISM text results uploaded shortly and thanks again..
      My Computer


  7. Posts : 42
    Windows 10 x64 Version 2004
    Thread Starter
       #7

    Kyhi,

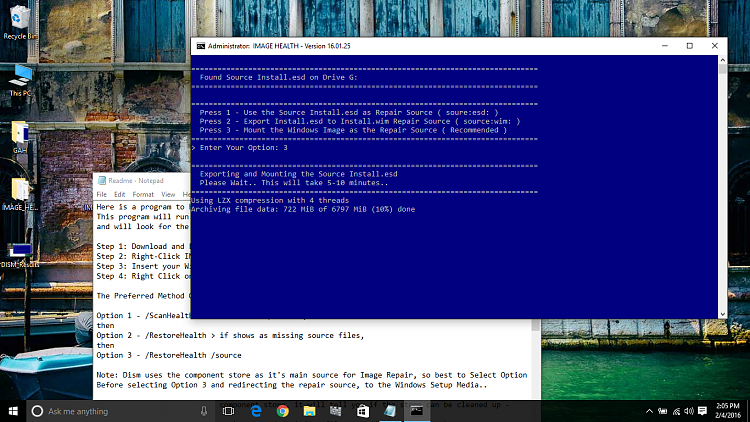
    Very, very nice as I see success...lol!
    DISM Error 0x80f001f...Use Source Option to repair Image-dism_results.png

    DISM Error 0x80f001f...Use Source Option to repair Image-fantastic_m8.png


    DISM Error 0x80f001f...Use Source Option to repair Image-yes_lol.png
    Last edited by gahbmwm5; 04 Feb 2016 at 17:38.
      My Computer


  8. Posts : 42
    Windows 10 x64 Version 2004
    Thread Starter
       #8

    Whoops here is the attached txt file, and once again Kyhi, nice work here and thanks!!
    I then ran sfc /scannow and it reported that it found corrupted files, and they were successfully repaired.

    Reviewing the DISM.txt file, I see :

    (p) CSI Payload Corrupt wow64_microsoft-windows-r..xwddmdriver-wow64-c_31bf3856ad364e35_10.0.10586.0_none_3dae054b56911c22\opencl.dll

    Outstanding my friend!
    DISM Error 0x80f001f...Use Source Option to repair Image Attached Files
    Last edited by gahbmwm5; 04 Feb 2016 at 18:24.
      My Computer


  9. Posts : 1,579
    Windows 10 Pro
       #9

    gahbmwm5 said:
    Hi,

    I just completed a clean install of Windows 10 Pro...all was going fine, but I wanted to run both scf and DISM...

    If SFC was not able to repair some or all of the files there are a few options including a repair install from the OS dvd, and DISM (win 8 & UP)
    DISM
    If you are on win 8 and up you can (and should) run DISM if SFC found errors it could not fix
    From an DISM /Online /Cleanup-Image /RestoreHealth /source:WIM:X:elevated command prompt*
    Type DISM /Online /Cleanup-Image /RestoreHealth . (please note the space after "dism", & "online" & "image")
    If the repair is successful you may want to re-run SFC just to check.
    http://answers.microsoft.com/en-us/windows/wiki/windows_10-update/system-file-check-sfc-scan-and-repair-system-files/bc609315-da1f-4775-812c-695b60477a93>

    Have never had this issue before...but I can't seem to be able to direct DISM elevated command to a .iso file:
    To run a system file check (SFC)
    Go to start
    Type CMD
    Right click and run as Administrator
    (called an elevated command prompt)
    If you want to verify and repair the OS type sfc /scannow (note the space between sfc and "/")
    If you just want to check (verify only) the OS type sfc /verifyonly (no changes will be made using verify only)
    If you get the error message "cannot find source files"you need to have an ISO file mounted and need to specify where it is located with the below command
    DISM /Online /Cleanup-Image /RestoreHealth /source:WIM:X:* Where "X" is the drive letter where the ISO is located.* \Sources\Install.wim:1 /LimitAccessSimply change the "X" to the correct drive letter
    If you do not have an ISO you can make one.* The instructions are here
    *You may have to run this up to 3 times to fix all the problems

    When you have finished it will say one of three things
    Windows did not find any integrity violations (a good thing)
    Windows Resource Protection found corrupt files and repaired them (a good thing)
    Windows Resource Protection found corrupt files but was unable to fix some (or all) of them (not a good thing)* If you get this message run DISM as described below..

    Thanks, and I also have the DISM log file which I would be more then happy to upload:

    DISM Error 0x80f001f...Use Source Option to repair Image-dism_errors.png
    The "/source" attempt would have been much more likely to have succeeded if you had downloaded the ISO from Tech Bench - I'm assuming yours came from MCT. The Tech Bench ISO has install.wim in the sources folder rather than the install.esd on the ISO you get from MCT. The failure of install.esd based ISOs to succeed with DISM /source is well known here at TenForums. All this assumes you had the build of ISO that matches the build you currently have installed.

    None of this, of course, is intended to take away from the convenience and efficacy of Kyhi's tool.
      My Computer


  10. Posts : 4,142
    Windows 3.1 to Windows 11
       #10

    (p) CSI Payload Corrupt (Fixed)
    wow64_microsoft-windows-r..xwddmdriver-wow64-c_31bf3856ad364e35_10.0.10586.0_none_3dae054b56911c22\opencl.dll

    That file is a KNOWN issue
    and until it is addressed by MS and Nvidia, it remains...

    PS.
    Install.esd is supported by Image-Health
      My Computer


  Related Discussions
Our Sites
Site Links
About Us
Windows 10 Forums is an independent web site and has not been authorized, sponsored, or otherwise approved by Microsoft Corporation. "Windows 10" and related materials are trademarks of Microsoft Corp.

© Designer Media Ltd
All times are GMT -5. The time now is 00:36.
Find Us


Windows 10 Forums