Win 10 USB install Fails, Linux has no problem

Page 2 of 3 FirstFirst 123 LastLast

  1. Posts : 8
    Win 10
    Thread Starter
       #11

    Win 10 USB install Fails, Linux has no problem-error_2.jpg

    I have added the Batch file again but removed the cls lines so you can see how it takes the E: and prints it out after quitting disk part as E:\ . But right after that Tries to use D:\ anyhow.

    I also removed the drive letters of the A-E on both partitions so it wouldn't grab something already in use.
    Thumb Drive looks like it's being built. Your script is working =)
    - - - Updated - - -
    Attached Thumbnails Attached Thumbnails Win 10 USB install Fails, Linux has no problem-error_2.jpg  
      My Computer


  2. Posts : 4,187
    Windows 11 Pro, 22H2
       #12

    Not sure why it wants to assign the same drive letter to both parturitions. Let me see if I can figure out what is going on there. Apologies for the problem.
      My Computers


  3. Posts : 4,187
    Windows 11 Pro, 22H2
       #13

    Weird. I just tried it on 3 thumb drives, an SD card, an external HDD, and an external SSD and it worked fine on all of them.

    So here is what I am doing:

    I first mount my Windows ISO image by double-clicking it. It get mountes as K:
    I run the batch file and choose the "Wipe" option. It creates the thumb drive, HDD, etc. with the two partitions assigned G: and H: on my particular system.

    What's odd is that if it was able to successfully assign D: to the first partition on your system, it should have found D: as being in use the second time through and continued searching for another drive letter for that second partition.

    Apologies for the difficulties. The intention was to try this method thatI've found to work on systems where I simply could not get any other method to work properly. The idea is that the boot process begins from the FAT32 partition and then it gets "handed over" to the NTFS partition. I have one system that will simply not boot from any external drive unless it is FAT32 and another that will start the boot process but then fail partially in if it is not FAT32 and this method works for both.

    I hate to get you too far off on a tangent if this is not going to work, but below are the raw steps that this batch file is basically taking if you want to try it manually. If not, I completely understand

    Note: The steps below are simplified to handle only x86 or x64 Windows images. The batch file is actually a bit more sophisticated in that it can handle Windows images that have both x64 and x86 editions in the same image. I've cut those steps from below to simplify this because it's probably extremely rare that anyone will be using a dual architecture image.

    Manual Steps:

    1) Run diskpart.

    2) From the diskpart> prompt, run this command:

    list disk

    3) From the size of the disks, try to determine which disk ID is your thumb drive. If that is not enough information, run these commands to get more detail on the disk. In this example, I want more info on disk 4:

    select disk 4
    detail disk

    Here is some sample output:

    DISKPART> list disk

    Disk ### Status Size Free Dyn Gpt
    -------- ------------- ------- ------- --- ---
    Disk 0 Online 476 GB 0 B *
    Disk 1 Online 3726 GB 0 B *
    Disk 2 Online 465 GB 1024 KB *
    Disk 3 Online 7452 GB 0 B *
    Disk 4 Online 238 GB 0 B

    DISKPART> select disk 4

    Disk 4 is now the selected disk.

    DISKPART> detail disk

    SanDisk Extreme Pro USB Device
    Disk ID: DC727760
    Type : USB
    Status : Online
    Path : 0
    Target : 0
    LUN ID : 0
    Location Path : UNAVAILABLE
    Current Read-only State : No
    Read-only : No
    Boot Disk : No
    Pagefile Disk : No
    Hibernation File Disk : No
    Crashdump Disk : No
    Clustered Disk : No

    Volume ### Ltr Label Fs Type Size Status Info
    ---------- --- ----------- ----- ---------- ------- --------- --------
    Volume 7 Z My Software NTFS Removable 238 GB Healthy
    C:\MountPoints\My Software\


    4) When you determine the correct disk, run these commands. I am assuming disk 4 in the following example:

    select disk 4
    clean
    convert mbr
    create partition primary size=2000
    active
    format fs=fat32 quick
    assign
    create partition primary
    format fs=ntfs quick
    assign
    exit

    NOTE: The assign commands will assign the next available drive letter. If you want to assign specific drives letters, for example E:, use the command assign letter=E.

    5) We will now copy files from the source to the FAT32 and NTFS partitions on the thumb drive. To be clear, all the files and folders that you are being asked to copy come from your source folder such as a folder on your hard disk that contains all the Windows files, or from a mounted Windows ISO image.

    Start by checking to see if your original source has a file called ei.cfg in \sources. If that file is already present, skip to step 6.

    NOTE: My research indicates that the ei.cfg file my no longer be needed, however, it will not hurt anything to follow these steps and create it.

    Create a text file called ei.cfg. We will use that below. Place the following 2 lines into that file:

    [Channel]
    Retail

    Notes about ei.cfg: Let's say that you have a computer that shipped with Windows 10 Home, but you upgraded to Pro. You may find that when you try to perform a clean install, Windows simply starts installing Home and doesn't even show you the menu from which you can select other editions. By placing this file in the sources folder, we prevent that from happening.

    Note that when doing an unattended install, this file is not needed because the autounattend.xml specifies the edition of Windows to install, but you can leave the ei.cfg in place as it won't hurt anything.

    6) Follow these steps to copy files to your thumb drive:

    • Copy all files and folders EXCEPT \sources to the FAT32 partition.

    • If you are planning to use an autounattend.xml answer file, place it in the root of either the FAT32 or the NTFS partition.

    • Create a folder called sources on the FAT32 partition.

    • Copy the file \sources\boot.wim to the FAT32 partition \sources folder.

    • Create a folder called sources on the NTFS partition.

    • Copy all files and folders from the \sources folder EXCEPT boot.wim to the \sources folder on the NTFS partition.

    • If you created an ei.cfg file, copy it to the \sources folder of the NTFS partition.

    At this point, you should have a bootable thumb drive that can be booted from both BIOS and UEFI based systems.

    NOTE: When booting on a UEFI based system, you may be presented with an option to boot either the FAT32 or the NTFS partition. Choose the FAT32 partition.
      My Computers


  4. Posts : 8
    Win 10
    Thread Starter
       #14

    hsehestedt said:
    Weird. I just tried it on 3 thumb drives, an SD card, an external HDD, and an external SSD and it worked fine on all of them.

    So here is what I am doing:

    I first mount my Windows ISO image by double-clicking it. It get mountes as K:
    I run the batch file and choose the "Wipe" option. It creates the thumb drive, HDD, etc. with the two partitions assigned G: and H: on my particular system.

    What's odd is that if it was able to successfully assign D: to the first partition on your system, it should have found D: as being in use the second time through and continued searching for another drive letter for that second partition.

    Apologies for the difficulties. The intention was to try this method thatI've found to work on systems where I simply could not get any other method to work properly. The idea is that the boot process begins from the FAT32 partition and then it gets "handed over" to the NTFS partition. I have one system that will simply not boot from any external drive unless it is FAT32 and another that will start the boot process but then fail partially in if it is not FAT32 and this method works for both.

    I hate to get you too far off on a tangent if this is not going to work, but below are the raw steps that this batch file is basically taking if you want to try it manually. If not, I completely understand

    Note: The steps below are simplified to handle only x86 or x64 Windows images. The batch file is actually a bit more sophisticated in that it can handle Windows images that have both x64 and x86 editions in the same image. I've cut those steps from below to simplify this because it's probably extremely rare that anyone will be using a dual architecture image.

    Manual Steps:

    1) Run diskpart.

    2) From the diskpart> prompt, run this command:

    list disk

    3) From the size of the disks, try to determine which disk ID is your thumb drive. If that is not enough information, run these commands to get more detail on the disk. In this example, I want more info on disk 4:

    select disk 4
    detail disk

    Here is some sample output:

    DISKPART> list disk

    Disk ### Status Size Free Dyn Gpt
    -------- ------------- ------- ------- --- ---
    Disk 0 Online 476 GB 0 B *
    Disk 1 Online 3726 GB 0 B *
    Disk 2 Online 465 GB 1024 KB *
    Disk 3 Online 7452 GB 0 B *
    Disk 4 Online 238 GB 0 B

    DISKPART> select disk 4

    Disk 4 is now the selected disk.

    DISKPART> detail disk

    SanDisk Extreme Pro USB Device
    Disk ID: DC727760
    Type : USB
    Status : Online
    Path : 0
    Target : 0
    LUN ID : 0
    Location Path : UNAVAILABLE
    Current Read-only State : No
    Read-only : No
    Boot Disk : No
    Pagefile Disk : No
    Hibernation File Disk : No
    Crashdump Disk : No
    Clustered Disk : No

    Volume ### Ltr Label Fs Type Size Status Info
    ---------- --- ----------- ----- ---------- ------- --------- --------
    Volume 7 Z My Software NTFS Removable 238 GB Healthy
    C:\MountPoints\My Software\


    4) When you determine the correct disk, run these commands. I am assuming disk 4 in the following example:

    select disk 4
    clean
    convert mbr
    create partition primary size=2000
    active
    format fs=fat32 quick
    assign
    create partition primary
    format fs=ntfs quick
    assign
    exit

    NOTE: The assign commands will assign the next available drive letter. If you want to assign specific drives letters, for example E:, use the command assign letter=E.

    5) We will now copy files from the source to the FAT32 and NTFS partitions on the thumb drive. To be clear, all the files and folders that you are being asked to copy come from your source folder such as a folder on your hard disk that contains all the Windows files, or from a mounted Windows ISO image.

    Start by checking to see if your original source has a file called ei.cfg in \sources. If that file is already present, skip to step 6.

    NOTE: My research indicates that the ei.cfg file my no longer be needed, however, it will not hurt anything to follow these steps and create it.

    Create a text file called ei.cfg. We will use that below. Place the following 2 lines into that file:

    [Channel]
    Retail

    Notes about ei.cfg: Let's say that you have a computer that shipped with Windows 10 Home, but you upgraded to Pro. You may find that when you try to perform a clean install, Windows simply starts installing Home and doesn't even show you the menu from which you can select other editions. By placing this file in the sources folder, we prevent that from happening.

    Note that when doing an unattended install, this file is not needed because the autounattend.xml specifies the edition of Windows to install, but you can leave the ei.cfg in place as it won't hurt anything.

    6) Follow these steps to copy files to your thumb drive:

    • Copy all files and folders EXCEPT \sources to the FAT32 partition.

    • If you are planning to use an autounattend.xml answer file, place it in the root of either the FAT32 or the NTFS partition.

    • Create a folder called sources on the FAT32 partition.

    • Copy the file \sources\boot.wim to the FAT32 partition \sources folder.

    • Create a folder called sources on the NTFS partition.

    • Copy all files and folders from the \sources folder EXCEPT boot.wim to the \sources folder on the NTFS partition.

    • If you created an ei.cfg file, copy it to the \sources folder of the NTFS partition.

    At this point, you should have a bootable thumb drive that can be booted from both BIOS and UEFI based systems.

    NOTE: When booting on a UEFI based system, you may be presented with an option to boot either the FAT32 or the NTFS partition. Choose the FAT32 partition.
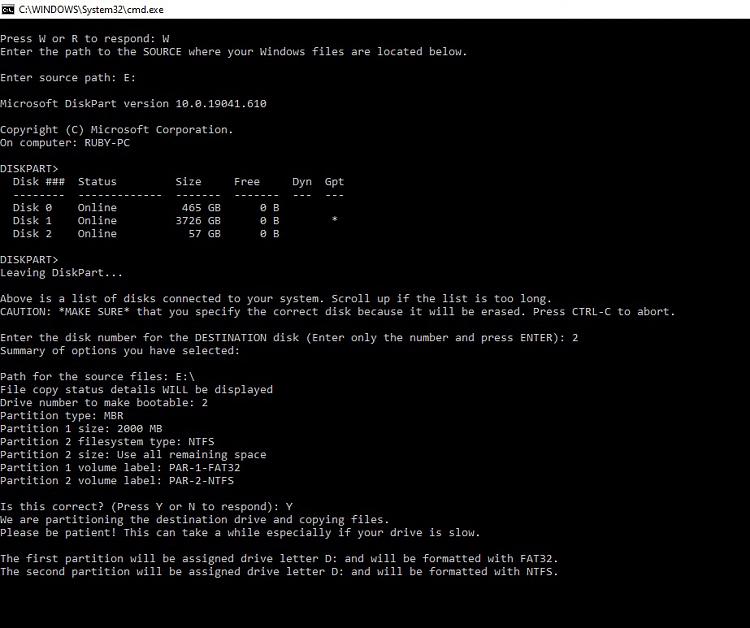
    After the quick change on batch the USB drive was created as intended. I did however still get the blue screen as with everything else Windows related (verbal "Doh!" was repeatedly said this morning).

    Other things I've tried booting to help narrow down where the issue would be.
    * Windows 2019 Server STD (2019 and a 2021 build) install USB gave same issue
    * A simple Windows 10 recovery USB also gave same issue
    * Acronis boots fine, able to put image on drive.

    I'm giving up for now and just going to install linux and use a VM.
    Thanks for the help guys/gals
      My Computer


  5. Posts : 7,606
    Windows 10 Home 20H2
       #15

    @hsehestedt
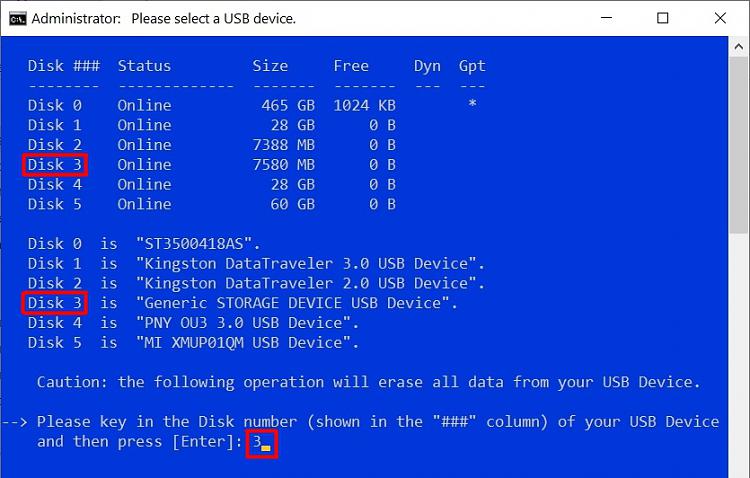
    Do you want your script to display a list of devices like the following one?


    Source: Create Bootable USB Flash Drive to Install Windows 10
      My Computer


  6. Posts : 4,187
    Windows 11 Pro, 22H2
       #16

    Matthew Wai said:
    @hsehestedt
    Do you want your script to display a list of devices like the following one?
    Thanks. That is extremely helpful!
      My Computers


  7. Posts : 7,606
    Windows 10 Home 20H2
       #17

    hsehestedt said:
    Code:
    echo If you are using an ISO image, mount it before you continue by double-clicking the ISO image and note the drive
    echo letter to which it is mounted.
    You can use PowerShell to automatically mount an ISO file and get the drive letter as I did in the batch script below:

    Create Bootable USB Flash Drive to Install Windows 10
      My Computer


  8. Posts : 4,187
    Windows 11 Pro, 22H2
       #18

    Thanks, Matthew. Yeah, there's definitely things that could be improved in the batch file to make it friendlier. I actually wrote a program in another language that does all this for me that automounts and unmounts the ISO image, but that program does so much more. It injects Windows updates and drivers into my ISO images, combines x64 and x86 images into a single image, created bootable drives with the option to add additional partitions and BitLocker encrypt them, etc. My point is simply that my efforts are focused there and the batch file has been badly neglected .

    But thanks for your help. I'll see if I can incorporate that. I'm just not a huge fan of batch files as I find the syntax and oddities of batch file programming a little bit daunting. Sometimes it feels like it takes me an hour to figure out how to do the simplest things in a batch file
      My Computers


  9. Posts : 6,299
    Windows 11 Pro - Windows 7 HP - Lubuntu
       #19

    Bytebait, did you read my post# 6?
      My Computers


  10. Posts : 8
    Win 10
    Thread Starter
       #20

    Megahertz said:
    Bytebait, did you read my post# 6?
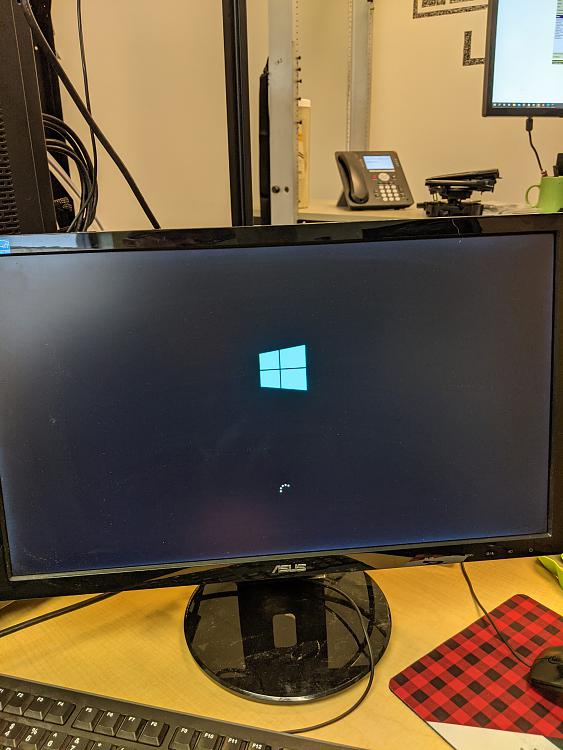
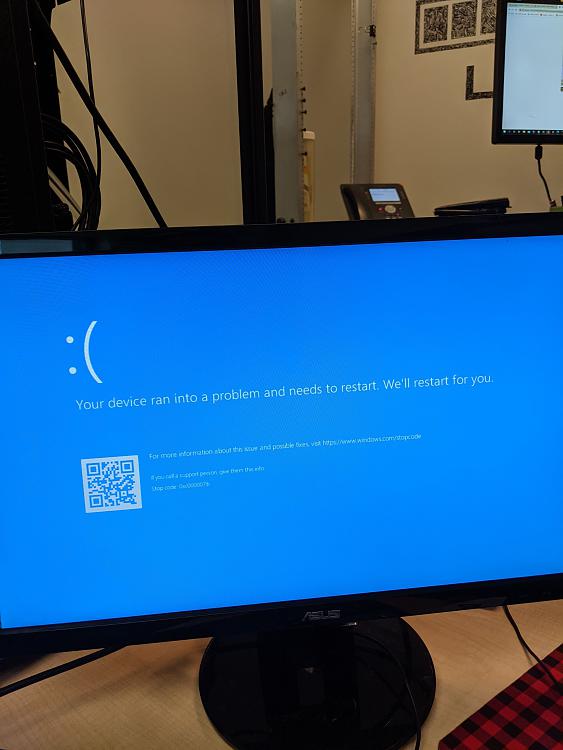
    I did this step this morning just in case it wanted to act differently. Same issue though. error 0xc000007b and 0xc0000021a
    Win 10 USB install Fails, Linux has no problem-pxl_20210420_143006434.jpg
    Win 10 USB install Fails, Linux has no problem-pxl_20210420_143014954.jpg

    Thank you all for the suggestions and support, this forum is amazing.
      My Computer


  Related Discussions
Our Sites
Site Links
About Us
Windows 10 Forums is an independent web site and has not been authorized, sponsored, or otherwise approved by Microsoft Corporation. "Windows 10" and related materials are trademarks of Microsoft Corp.

© Designer Media Ltd
All times are GMT -5. The time now is 03:57.
Find Us


Windows 10 Forums