
New
#11
Yes, on sevenforums. I have made a thing for the job. You will need to give the machine details in case anything extra is required.
Update your Win 7 installation media - Windows 7 Help Forums
Yes, on sevenforums. I have made a thing for the job. You will need to give the machine details in case anything extra is required.
Update your Win 7 installation media - Windows 7 Help Forums
HELLO...thanks again for your help...i used Win7-USB3.0-Creator-V3-Win7Admin from dell & i put inside the driver folder the NVMe drivers...but i dont think they were added...CANT I JUST ADD THE DRIVERS INTO THE CORRECT PLACES IN THE WIN 7 INSTALL MANUALLY??...if so which directories do i need to move the files into?
- - - Updated - - -
hello & thanks for your help...
its a DELL XPS 8910 that ive inserted a SAMSUNG 970 NVMe card into....ive partitioned it into 2 parts...
C: Win 10
D: Win 7
ive already used the DELL Win7-USB3.0-Creator-V3-Win7Admin to insert the USB 3 drivers into the image....but maybe the samsung drivers didnt make it in even tho i modified the program to do that...i checked inside the SYSTEM32\DRIVERS directory....cant i just put the driver files into the correct places inside the Win 7 installation?
To add a driver to a Windows installation image, you actually have to mount the image you want to add the driver to, add the driver to the mounted image, then unmount the image committing the changes made:
https://docs.microsoft.com/en-us/win...-windows-image
I just wrote up a pretty long procedure for another user, so I thought I would include it here if interested in some very detailed instructions. I hope that this is helpful:
Adding or Removing Drivers from an Offline Image
This procedure is only needed if you want to add or remove drivers to or from an image. You can do this with a plain Windows installation image or a customized image that you have created as detailed in Kari's tutorial
Get Drivers
Use one or both methods below to first obtain drivers.
Get drivers: Download Method
Download required drivers from manufacturer's site.
Extract the drivers in order to be able to access the .inf file.
The following is an example of extracting the contents of a driver called "driver.cab". Start by opening an elevated command prompt and changing to the directory where the driver is located, then run these commands:
Note that these commands will create a subdirectory called "extracted" and will extract the driver to that folder.Code:md .\extracted expand .\driver.cab -f:*.* .\extracted
Get drivers: Export Method (3 ways to export)
Create a new folder for exported drivers, in this example I'll use D:\Drivers
1) Using DISM: To export all hardware drivers from an existing Windows 10 installation, use the following command in elevated command prompt or PowerShell, replacing path D:\Drivers with your actual path:
2) Using PNPUTIL: Run from an elevated command prompt or PowerShell:Code:dism /Online /Export-Driver /Destination:D:\Drivers
3) Using PowerShell: This method provides more detail on the extracted drivers then just the cryptic directory names provided by the DISM or PNPUTIL methods.Code:pnputil /export-driver * D:\Drivers
Run these commands in the elevated PowerShell:
You can use any variable in place of $Drivers and you can sort however you want.Code:$Drivers = Export-WindowsDriver -Online -Destination D:\Drivers $Drivers | Select-Object ClassName, ProviderName, Date, Version | Sort-Object ClassName
End of Get Drivers Sub-Section
Mount Offline Image
Create a folder to which you will extract your Windows ISO image, for example, d:\ISO_Files. If you already have this folder from the steps above, you can use those files. Otherwise, extract the files from your ISO image to that folder now.
Create a folder to mount the offline image. For example, D:\Mount.
Open an elevated command prompt. Enter the following command to check what editions are included in image:
Note the index number of your selected edition. In this example we are using an index number of 8.Code:Dism /Get-WimInfo /WimFile:D:\ISO_Files\Sources\install.wim
Mounting an Image Located on HD, Thumb Drive, Flash Media
Mount the image of your preferred Windows 10 edition using its index number, index 8 in this example:
Skip to Adding or Removing Drivers below.Code:Dism /Mount-Image /ImageFile:D:\ISO_Files\Sources\install.wim /Index:8 /MountDir:D:\Mount
NOTE: If you followed Kari's tutorial to create a sysprep image, that image has only a single edition of Windows so you should use index number 1 (the only one available).
Mounting an Image Located on Virtual HD (VHD / VHDX)
When mounting a VHD file, the index number is always 1. Set /ImageFile as path to virtual hard disk file, for instance mounting a VHDX file named W10PROx64.vhdx which is stored in folder F:\VHD_Files, you would use the following mount command:
This will take some time. Please notice, the drive where the Mount folder is located needs some free space. Make sure that you have enough space available!Code:Dism /Mount-Image /ImageFile:F:\VHD_Files\W10PROx64.vhdx /Index:1 /MountDir:D:\Mount
Mounting a VHD / VHDX file requires at least as much free space on the drive where the Mount folder is located as the size of the virtual hard disk. If you mount a dynamically expanding 64 GB virtual hard disk to be serviced, you need at least 70 GB free space.
Optional: Checking for Drivers Already Present
Optional: You can always check which drivers are already present in an offline image with the following command:
Code:dism /Image:D:\Mount /Get-Drivers
Adding or Removing Drivers
Adding Individually Downloaded Drivers
If you downloaded individual drivers, you could add them now to offline mounted image with following command:
For signed drivers, use this command:
For unsigned drivers, use this command:Code:dism /Image:D:\Mount /Add-Driver /Driver:X:\Drivers\DriverName.inf
Replace the mounted folder path D:\Mount in above sample command with the actual path to your mount folder, and driver path and name X:\Drivers\DriverName.inf with the actual path to downloaded driver.Code:dism /Image:D:\Mount /Add-Driver /Driver:X:\Drivers\DriverName.inf /ForceUnsigned
Adding Multiple Drivers by Recursing a Folder
If you have a folder that contains multiple drivers in subfolders, like when exported from an existing installation as described above, you can add all drivers with one simple command, replacing the mount folder and drivers folder paths with your actual paths:
The /Recurse switch will cause the folder and all subfolders to be processed, adding all drivers found.Code:dism /Image:D:\Mount /Add-Driver /Driver:D:\Drivers /Recurse
Removing Drivers
If you want to remove a driver from offline image, use the following command:
With /Add-Driver and /Remove-Driver you can add or remove multiple drivers:Code:dism /Image:D:\Mount /Remove-Driver /Driver:X:\Drivers\DriverName.inf
Code:dism /Image:D:\Mount /Add-Driver /Driver:X:\Drivers\DriverName.inf /Driver:X:\Drivers\Driver2Name.inf
Unmount Offline Image
You can now save changes and unmount offline image with following command:
The /Commit switch is the important one, it commits (saves) all changes to the image.Code:dism /Unmount-Image /MountDir:D:\Mount /Commit
End of Procedure for Adding and Removing Drivers
ive done that now...i think lol..THANKS
- - - Updated - - -
ill have to do this again but with the index 4 it seems...
this is getting confusing i think because these terms aren't being defined & just thrown around with no explanation...
what shud have been a very easy thing has turned into a mess so id like to have ONE simple set of instructions to make this work...ive followed 15 different options but they all failed...
LET ME EXPLAIN WHAT IVE DONE SO FAR so we can take things from that point if we agree those steps were correct...
if not maybe we can start over...id just like to solve this already as its getting very frustrating
1) i downloaded the ISO file & created the USB drive ill be using for the install using Windows7-USB-DVD-Download-Tool-Installer-en-US
2) i updated (supposedly) the wim file with dell's usb 3 driver updater Win7-USB3.0-Creator-V3-Win7Admin and by adding to their drivers the samsung drivers into the x64 directory inside the programs directory
the usb drivers seemed to work fine because i was able to run the setup file on the flash drive (usb 3.0) just fine & start the copy process of the setup files but at about 6% into the expanding phase it came back with a missing driver message
If you pay attention to your question on sevenforums:ive already used the DELL Win7-USB3.0-Creator-V3-Win7Admin to insert the USB 3 drivers into the image....but maybe the samsung drivers didnt make it in even tho i modified the program to do that...i checked inside the SYSTEM32\DRIVERS directory....cant i just put the driver files into the correct places inside the Win 7 installation?
You need usb3 drivers, and nvme updates.
ShArKy, despite the very good and skilled people on TenForums, you are on the wrong forum to get help on Win 7.
I myself use Win 7 on a M.2 drive. I had to add USB3.x, SATA and MVMe drivers to the win 7 installation drive.
I already did what you want to do many times.
SIW2 has made a tutorial and a script to add those drivers, not only to the Install.wim but also to the Boot.wim and WinRE.
Please, open a thread at Installation & Setup - Windows 7 Help Forums and we will guide you.
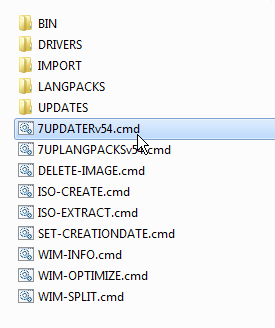
You can download the 7upv54.zip
7UPv54.zip
Scripts are in there. They call stuff from the BIN folder.
Thank you! Very much appreciate that.

 Quote
Quote
