How to sign Powershell profile w/ self-signed certificate?
-
![]()
How to sign Powershell profile w/ self-signed certificate?
I currently have my execution-policy set to AllSigned. I don't want to change it or bypass that restriction.
When I created my profile script--or whatever it's called--I wanted to do so in order to set permanent aliases.
For whatever reason, Microsoft has made it an ever increasingly difficult endeavor just to create permanent aliases.
The problem now is that it won't run the script because it isn't digitally signed.
I attempted to make a self-signed certificate to sign the blasted thing but I never got anywhere.
I've looked at a few guides online but they all assume I'm in a server environment or something (which means the steps keep changing or involve unnecessary steps).
In the end, I wound up with a code-signing cert and the thing is in my current-user cert store.
I'm trying to get this to work on my Windows 10 Pro desktop but I haven't a clue as to what I'm actually supposed to be doing.
Is it even possible to get what I'm asking for? 
P.S. - I have no experience with either Powershell or certificates. The only reason I know what I've mentioned so far is because I spent 2-3 minutes glossing over the help files. My knowledge of PKI has me understanding that you need a private key to sign something, but I can't even get the certificate to validate my own key so it's kind of getting me flustered at this point.
-
-
-
?
I currently have my execution-policy set to AllSigned. I don't want to change it or bypass that restriction.
That's what I said.
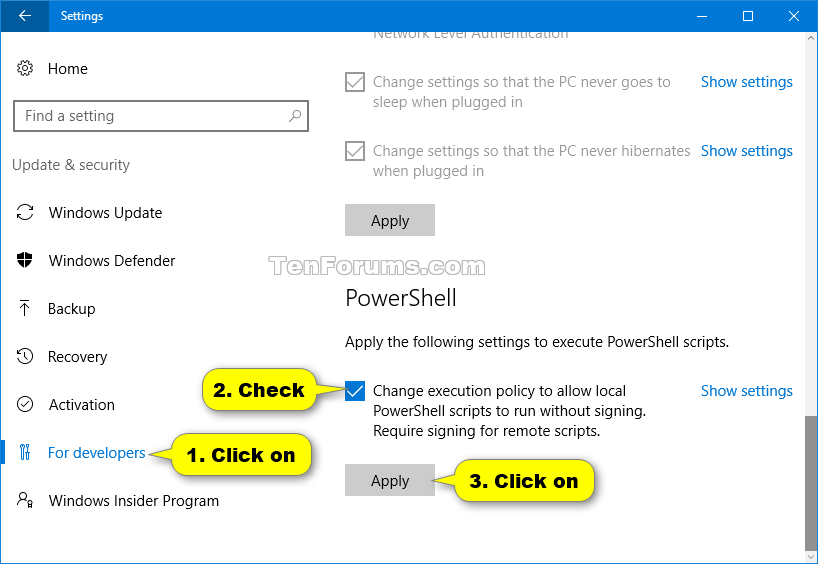
See Option Two in this tutorial to allow local scripts to run without signing:
And that's what you said.
Is there any way to run the script without bypassing the execution-policy restriction? I'd rather not change it.
-
-
That's what I said.
And that's what you said.
Is there any way to run the script without bypassing the execution-policy restriction? I'd rather not change it.
You seem not to understand what different execution polices are and do? RemoteSigned is exactly as AllSigned, only exception being that your own local scripts will not need to be signed.
it is of course up to you to choose between the easy way which does what you want, or the more difficult way and try to find a valid method to sign your own scripts.
You can even keep AllSigned for all other user accounts and only allow your own user account to run your local scripts:
Set-ExecutionPolicy RemoteSigned -Scope CurrentUser
With -Scope CurrentUser you can set different execution policy for each user, including built-in admin.
Kari
-
@Kari
I get what the RemoteSigned execution policy does but I want to sign my script and keep the AllSigned restriction.
Is that even possible? I'd like to think it does but every tutorial I come across keeps telling me a different story.
I'll keep trying on my end but I'll eventually have to put up something.
-
@
Kari
I get what the RemoteSigned execution policy does but I want to sign my script and keep the AllSigned restriction.
Is that even possible? I'd like to think it does but every tutorial I come across keeps telling me a different story.
I'll keep trying on my end but I'll eventually have to put up something.
It is possible! Hold on to your hat...this will take a while to explain...
...to be continued...
STATUS UPDATE: Writing step by step tutorial with pictures and verifying that everything I say works. Will post here once it's done.
Last edited by slicendice; 10 Apr 2018 at 15:49.
-
![]()
How to self-sign your own PowerShell scripts
How to self-sign your own PowerShell scripts
Introduction
Since security has become more and more of a concern around the globe and more and more people have started to develop all kinds of applications and scripts, this tutorial will explain how you can sign scripts you have developed, and also briefly explain what PowerShell execution policies are and how to change it so that only signed scripts and binaries can be run on your machine.
A word about PowerShell execution policies
There are four different execution policy levels, and I will explain them briefly here.
- Restricted
Can not run any scripts. Default execution policy. Can run PS commands interactive only.
- AllSigned
Can run scripts. All scripts and configuration files must be signed by a publisher that you trust. Opens you to the risk of running signed (but possibly malicious) scripts, after confirming that you trust the publisher.
- RemoteSigned
Can run scripts. All scripts and configuration files downloaded from communication applications such as Microsoft Outlook, Internet Explorer and Outlook Express, must be signed by a publisher that you trust. Opens you to the risk of running malicious scripts not downloaded from these applications, without any warning prompts.
- Unrestricted
Can run scripts. All scripts and configuration files downloaded from communication applications run after confirming that you understand the file originated from the Internet. No digital signature is required. Opens you to the risk of running unsigned, possibly malicious scripts.
Getting the necessary tools for creating a self-signed certificate
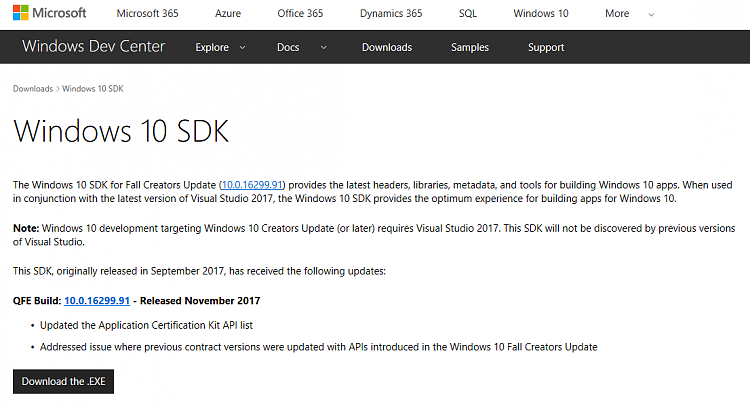
You will either need to have Visual Studio installed or manually download the Windows SDK. In order to save space and bandwidth, this section will explain how to get the latest SDK, download the minimal required files and only install one package from that download.
Steps to take for the download and installation:
- Using your web-browser navigate to:
- Download the latest SDK installer for Windows (as of writing it is 10.0.16299.91 - Released November 2017)
- Execute the installer
- Select Download the Windows Software Development Kit and take note of the path and click next

- On Privacy page, click NO and then next

- On Select the features you want to download page unselect everything, and then only select "Windows SDK for UWP managed apps". 2 other boxes will automatically be selected. Click Download.

- Once the download completes, navigate to the "Windows Kits" folder where you just downloaded the installers.
- Navigate deeper into the folder structure ( \10\WindowsSDK\Installers)
- Locate the file "Windows SDK for Windows Store Apps Tools-x86_en-us.msi" and install it. Note, you will not get any prompts when the installer has completed.

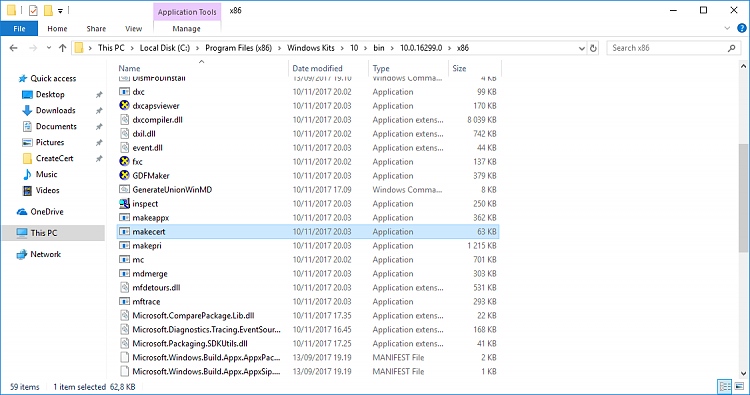
- Now you should have the required file installed (C:\Program Files (x86)\Windows Kits\10\bin\10.0.16299.0\x86\makecert.exe)
Creating the Certificate
Steps to take:
- Open up Command Prompt with Elevated privileges.

- Create a working directory
- Navigate to the working directory
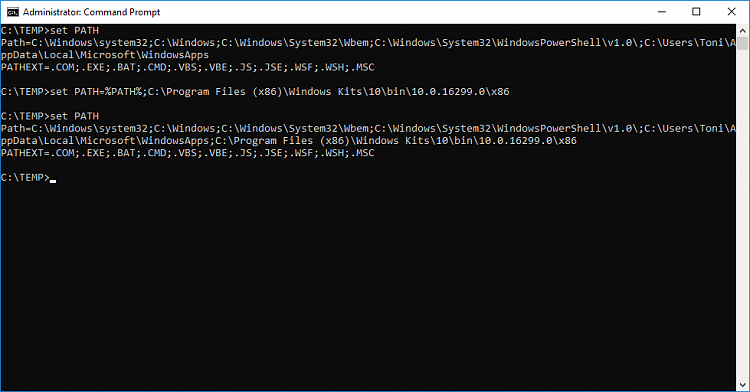
- Check path variables and take note of the last character.
- Create a temporary path to the folder where the required certificate tool ( makecert.exe ) is located.
If the last character in your path was a semicolon then enter this code:
Code:
set PATH=%PATH%C:\Program Files (x86)\Windows Kits\10\bin\10.0.16299.0\x86
else enter this code:
Code:
set PATH=%PATH%;C:\Program Files (x86)\Windows Kits\10\bin\10.0.16299.0\x86
You can also make the path stick permanently by using setx instead of set.
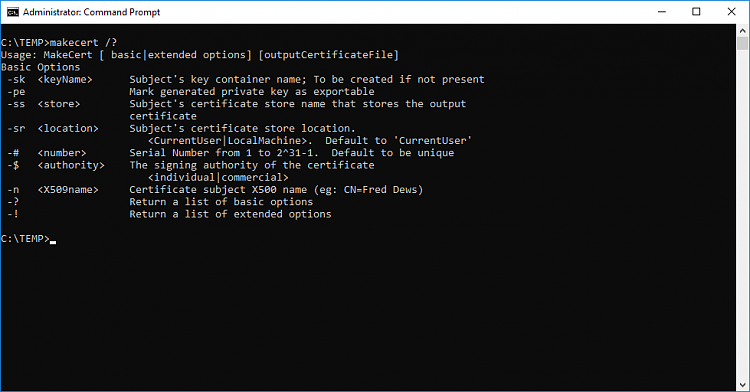
- Verify that makecert.exe works
- Open Microsoft Management Console.

- Click Add/Remove Certificate Snap-in from File-menu
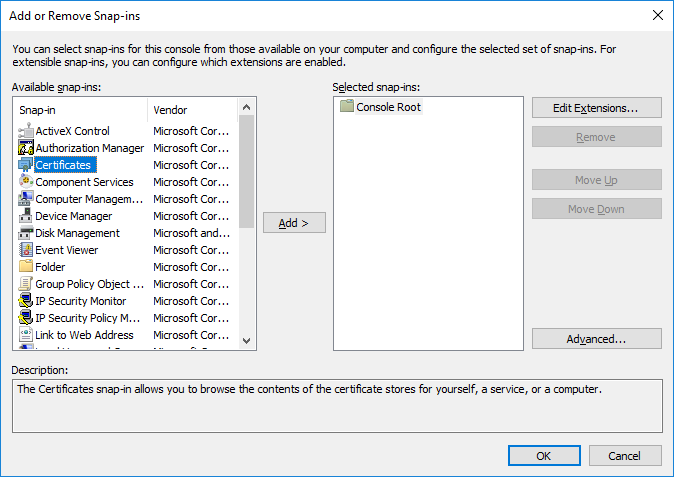
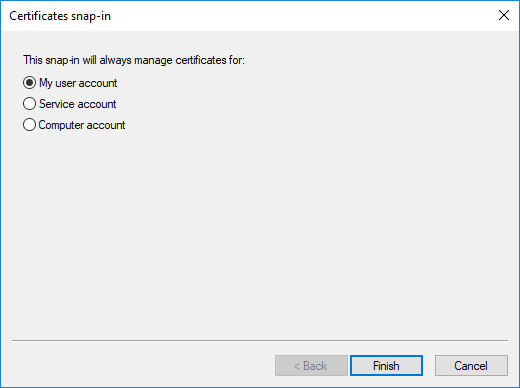

- Now your MMC should look like this

- Create a Certificate Authority using CMD
Code:
makecert -n "CN=PowerShell Local Certificate Root" -a sha1 -eku 1.3.6.1.5.5.7.3.3 -r -sv root.pvk root.cer -ss Root -sr localMachine
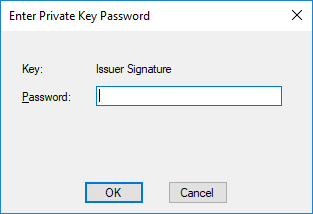
- Give it a password

- Verify your password

- Now your MMC looks like this (may have to refresh by using F5-key)

- Create Personal Certificate
Code:
makecert -pe -n "CN=PowerShell User" -ss MY -a sha1 -eku 1.3.6.1.5.5.7.3.3 -iv root.pvk -ic root.cer
- Enter your password
- View of your console after entering the 2 commands

- Now your MMC looks like this (may have to refresh by using F5-key)

Verifying that we can sign PS scripts
Steps to take:
- Open elevated PowerShell ISE
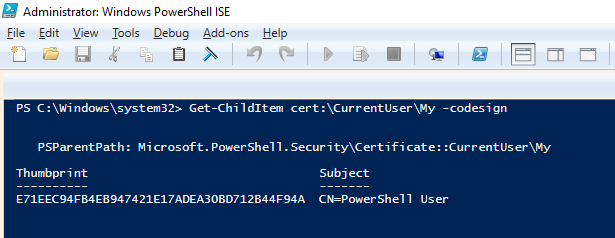
- Checking that we can access our certificate
Code:
Get-ChildItem cert:\CurrentUser\My -codesign
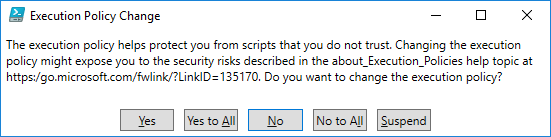
- Changing execution policy to AllSigned
Code:
Set-ExecutionPolicy AllSigned
- Answer Yes at the prompt
- Verifying that everything got set properly
Code:
Get-ExecutionPolicy

- Navigate to our working folder
- Next we create a script that we will test, sign and test again
- In PSISE select File>New
- Enter the following code and press enter
Code:
Write-Host "Hello Certified Script"
- Save the script as HelloCert.ps1
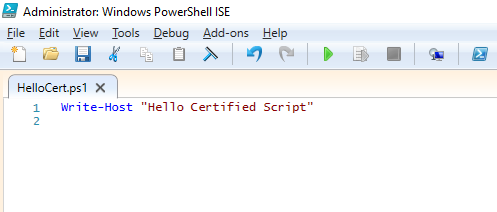
- Test the script (notice you will get an error)

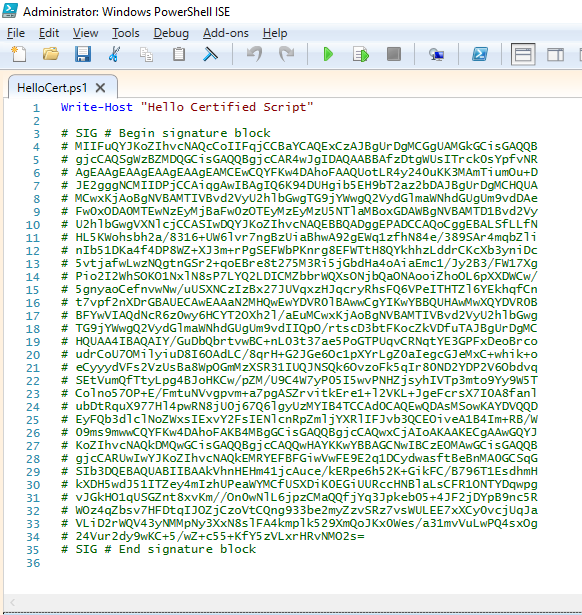
- Sign the script
Code:
Set-AuthenticodeSignature HelloCert.ps1 @(Get-ChildItem cert:\CurrentUser\My -codesign)[0]

- Close the current HelloCert.ps1 you were earlier editing and open the file again (note the difference)
- Run the script

- Press Always run to add the certificate to Trusted Publishers


- All should work now as expected and you have maximum security enabled that still allows you to run scripts.
CONGRATULATIONS! You are now officially a PS-script signing guru! 
Last edited by slicendice; 11 Apr 2018 at 10:09.
Reason: Added deprecation information
-
Nice work, SliceNDice! Can't wait for the "next thrilling installment."
--Ed--
-
-
Nice work, SliceNDice! Can't wait for the "next thrilling installment."
--Ed--
Thanks a lot! :)
-
@slicendice
Yep, that would do it. Ditto on the work well done--you cooked 'em!
I initially wanted to avoid using makecert and just use Powershell but all of my other attempts failed, so....
Thank-you! :)


 Quote
Quote