Can I change the icon displayed in Devices and Printers?

Page 1 of 3 123 LastLast

  1. Posts : 195
    Windows 10
       #1

    Can I change the icon displayed in Devices and Printers?


    Hi,

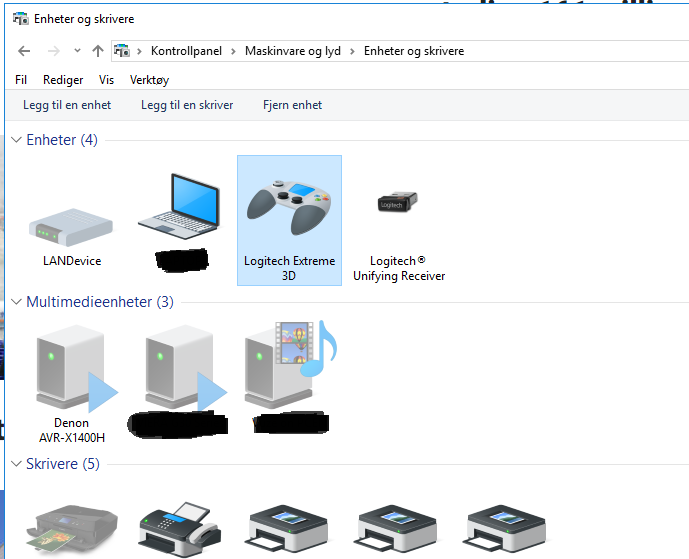
    I was wondering if I can change the icon for my Logitech Extreme 3D Pro joystick to either an image of the actual joystick or at least to something that looks like a joystick?

    Can I change the icon displayed in Devices and Printers?-skjermbilde-2018-03-30-13.01.01.png
      My Computer


  2. Posts : 14,005
    Win10 Pro and Home, Win11 Pro and Home, Win7, Linux Mint
       #2

    The icons in Devices and Printers are not shortcuts, right-clicking and Properties does not give a choice to change the icon. I checked what I have and only assume [yeah, I know] that the icon is coded in the software for the devices. I could be generous and say maybe LogiTech programmers just chose the wrong icon for the joystick, they do have a lot of devices for computing.
      My Computers


  3. Posts : 195
    Windows 10
    Thread Starter
       #3

    I see!

    Your assumption might be correct... I have another computer with another identical joystick, and it too display the same icon...
      My Computer


  4. Posts : 2
    Windows 10 Home x64
       #4

    Most device icons are located in the DDORes.dll file. You an use Resource Tuner 2 to open and change the icons but since it's just pulling the default icon for a game controller if you change that icon it will change it for every game controller you connect that doesn't have it's own icon. Maybe in the files of your joystick there may be a DLL file that would allow you to change the specific icon for that joystick and not everyone that is connected to the system

    The other issue with using a program like Resource Tuner 2 is the file that you edit will no longer be digitally signed so Windows will be very upset that it's in the system and will likely just replace it using the backups it has
      My Computer


  5. Posts : 18
    10 (& hopefully 7) Pro64
       #5

    Looking for exactly the same answer... MS support is useless.
      My Computer


  6. Posts : 68,881
    64-bit Windows 11 Pro for Workstations
       #6

    I haven't tested this in Windows 10, but you might see if the method below may still work.

    Devices and Printers - Change Device Icons with Custom Icons - Windows 7 Help Forums
      My Computers


  7. Posts : 1
    Windows
       #7

    Brink said:
    I haven't tested this in Windows 10, but you might see if the method below may still work.

    Devices and Printers - Change Device Icons with Custom Icons - Windows 7 Help Forums
    I tried it but I don't know how to make the Icon every time I get an error because 16x16 trasparency is missing can someone help?
      My Computer


  8. Posts : 9
    Windows 10
       #8

    I know it's a bit late, but for anyone who might be looking back at this thread: I spent about 3 hours trying to figure everything out and I found (in my opinion) the best solution. Thanks to Brink for providing the link to Microsoft's Authoring Wizard! It was a huge help. Looking back at the length of my reply, it may seem intimidating and look like a lot of effort, but I promise you it's not as much as it seems! I just explained things a little more so more people (regardless of computer knowledge) should be able to follow these directions. It should be a breeze for anyone who's already familiar with Windows.

    So, before we begin, make sure the image you want to apply is perfectly square. It could be a weird size like 271x271 (mine was 466x466 and it worked perfectly), just as long as it's square.


    1. Install Magick. You'll need their convert tool to generate the ICOs.

    2. Install Devices and Printers Metadata Authoring Wizard. This will allow you to add the ICOs to a Metadata file, which then applies to a device.

    3. Open CMD in the directory that your source image is in (it works best if you have at least a 256x256 image, but we can work around it in the next step if you don't). To do this, either [Shift + Right-Click] in the directory and click "Open command window here" or search for "cmd" in the Start Menu and hit Enter then type "cd [path to your folder]".

    4. Type "magick convert source_file.png -define icon:auto-resize output_file_32bit.ico" and press Enter. If your source image is less than 256x256 pixels, replace "icon:auto-resize" with "icon:auto-resize=256,192,128,96,64,48,40,32,24,16", removing any numbers that are larger than your source image. You can also just remove sizes that you don't want to be added to the .ico file (Note: using "icon:auto-resize" by itself automatically creates all of the listed sizes), but keep in mind that the Authoring Wizard needs to have 16, 24, 32, and 48 at the very minimum (or it'll complain and give you a headache trying to figure out why it's not working, speaking from experience).

    5. Now we have one .ico file that contains multiple resolutions of your source image, but it's only in 32bit color depth (which isn't good enough for the Authoring Wizard), so let's make 16bit and 256bit .ico files. Type "magick convert output_file_32bit.ico -colors 16 output_file_16bit.ico" and press Enter. That'll give us a 16bit .ico, only one more.

    6. Type "magick convert output_file_32bit.ico -colors 256 output_file_256bit.ico" and press Enter. You should now have 3 different .ico files now, 16bit, 32bit, and 256bit.

    7. Go to Icollator Forever. This website will combine all 3 .ico files into one .ico file that contains each respective resolution and bit depth, which is exactly what we need for the Authoring Wizard. Click "Add File(s)..." and select your 3 .ico files or drag+drop them into the website.

    ***Skip step 8 if you chose to remove the 256 option in step 4***
    8. After it processes the images, scroll to the very bottom and pay attention to the last 3 images. They should be the same size (256x256). Although, they will all look different in quality. Click on the lowest quality image and click "Delete" at the bottom-left corner. Do the same for the other low-quality image. If you can't tell which one is lower quality, look at the file name directly to the right of the image and delete the one that says something like output_file_256bit.ico. (Side note: it seems a bit weird that the 256bit image is lower quality than the 32bit one, which makes me think I might've made a mistake while naming my own icons, so if it looks to you like the 256bit image is higher-quality, definitely delete the 32bit one instead.)

    9. Click "Save to .ico" in the top-right corner. I named my file to "icon.ico", but I believe you can name it whatever you like.

    10. Open "Control Panel > Hardware and Sound > Devices and Printers" and Right-Click on whichever device you want to change the icon of. There should be a new option called "Create metadata package" made by the Authoring Wizard. Click on it. If you get an error saying "Unhandled exception has occurred in your application...", so did I. I just clicked "Continue" and it worked anyway.

    11. Drag+drop your new downloaded .ico file into the Authoring Wizard's black box labeled "(Drop Device Icon Here)". If it gives you an error saying icons are missing, make sure you followed steps 4-9 correctly. If you believe you did follow the steps correctly, you can reply and I'll help out as much as I can.

    12. Click "Next" in the bottom-right corner. Name your device what it's called in Control Panel or name it whatever else you want. Type the manufacturer's name (I did "Xbox Wireless Controller" and "Microsoft"). Click "Next".

    13. Check the boxes that are relevant to your device (click the plus icons to expand the categories). Then on the right panel, select its 'primary' category. Not sure what that is, exactly, but I selected "Input > Gaming > Controller, Gamepad, Generic" for my categories, and I think either "Input.Gaming.Controller" or "Input.Gaming.Gamepad" for my Xbox controller. Click "Next".

    14. You only need a Hardware ID for this one. You can find it by (again) Right-Clicking the same device in Control Panel and selecting "Properties > Hardware > [if there are multiple devices, then click the most relevant to yours e.g. mine has XINPUT and Xbox Wireless Controller, so I chose Xbox Wireless Controller] > Properties > Details > [Under Property, click the drop-down menu] > Hardware Ids".

    15. Right-Click the ID under "Value" and click "Copy". (If you have multiple IDs, repeat steps 15-16 for each one.)

    16. Inside of the Authoring Wizard, click the plus icon on the top-right corner across from "Hardware ID". Paste the value you just copied and click "OK".

    17. Click "Next". These options are up to you. I checked "Show device in disconnected state", but you can leave that unchecked if you like. That just determines whether or not you see a gray version of your device in Control Panel while it's unplugged/disconnected. Click "Next".

    (We're almost done! )

    18. The Authoring Wizard will automatically create a backup of your new Metadata file in your Documents folder by default. If you'd like to change where it's created, click "Change" and select a new directory. I'm not completely sure what "Copy package to your system's local metadata store" does, but I'd make sure it's checked just to be sure it works. If everything's done correctly, the "Finish" button on the bottom right should be clickable, so go ahead and click that.

    19. As of now, your new icon should be in place! Don't worry if it doesn't show it right away, it took a few minutes for mine to show up, but refreshing Control Panel should do the trick. Inside of Control Panel (still in "Devices and Printers", make sure you navigate there if you closed the window already), Right-Click on an empty space (where there aren't any graphics like icons or text). Click "Refresh". If that didn't work, try restarting your computer.


    Whoo, that took a long time to write. Hope it helped someone out there! :)
      My Computer


  9. Posts : 3
    Windows 10
       #9

    BlackKnightNick said:
    Whoo, that took a long time to write. Hope it helped someone out there! :)
    Not late, in that there are people like me STILL in search of some kind of response from MS to this. As such I just registered in part to thank you for such a well thought-out and written tutorial on how to achieve what we need, but to also say: NO. Lol. WAY too much work for me. :)

    Since I already create my own icons, I tried taking a shortcut and of course it did not work ... yet have no desire to do all these steps just to change my iPhone icon (no matter how crazy it drives me that it doesn't match my other icons).

    Seriously though, thanks for sharing. Others may be more motivated than I am.
      My Computer


  10. Posts : 9
    Windows 10
       #10

    Thanks, this means a lot to me! :)

    I hope that Microsoft does add support to customize this; I can send a feature request. Until then, hopefully someone finds an easier way to accomplish it, maybe a script to automate the process? Either way, thanks for the feedback! It is a lot of steps for something so simple as changing an icon, and I really hope a much more simple option becomes available soon.
      My Computer


  Related Discussions
Our Sites
Site Links
About Us
Windows 10 Forums is an independent web site and has not been authorized, sponsored, or otherwise approved by Microsoft Corporation. "Windows 10" and related materials are trademarks of Microsoft Corp.

© Designer Media Ltd
All times are GMT -5. The time now is 03:52.
Find Us


Windows 10 Forums