Image Windows 10 laptops with DISM (or other free tool)

Page 2 of 7 FirstFirst 1234 ... LastLast

  1. Posts : 18,432
    Windows 11 Pro
       #11

    xy677 said:
    By preactivate I mean, when I unbox the new laptop, it has Windows 10 already activated (OEM install). That's what I am asking, how can I keep this activation for all laptops once they get imaged using DISM?
    @Kari will correct me if I am mistaken, but Windows 10 should read the product key that is stored in the computer's UEFI placed there by the manufacturer and use that product key to activate Windows 10 with assuming the same edition of Winodws 10 is placed on the computer that was there from the manufacturer (Home or Pro). In this situation, the user should not even be asked to enter a product key.

    At least that is what happens on a clean install - from the sound of it, that is also what should happen with the installation by image method, as long as no product key is provided in the answer file.
      My Computer


  2. Posts : 17,661
    Windows 10 Pro
       #12

    xy677 said:
    By preactivate I mean, when I unbox the new laptop, it has Windows 10 already activated (OEM install). That's what I am asking, how can I keep this activation for all laptops once they get imaged using DISM?
    NavyLCDR said:
    At least that is what happens on a clean install - from the sound of it, that is also what should happen with the installation by image method, as long as no product key is provided in the answer file.
    It should work just fine, although I have to mention I have a few times had issues with this, forcing me to restore factory image when clean install on brand new laptop failed to activate when clean install was done on first boot, before laptop had never been booted to its pre-installed OS.

    After factory reset, booting once to desktop in pre-installed Windows and checking it was activated, clean install could be done with automatic activation.

    Not wanting to tell any horror stories, just telling what I have experienced.

    Kari
      My Computer


  3. Posts : 64
    Windows 10
    Thread Starter
       #13

    Thanks Kari but keeping the Windows Activated is key for rolling out these machines. I can't even enter a product key as there is none (I assume its one of these new UEFI, keys in the BIOS machines). I'll have to test this to see how it behaves.

    So far the steps I mentioned earlier have been working well in my test VM!

    The one extra item I did add (since it annoys me so much and is such a time waster) is to disable that silly animation when you first sign into Windows after installation. You can disable it as follows in the local group policy:

    Computer - Admin Templates - System - Logon - Show first sign-in animation (set to disable)
      My Computer


  4. Posts : 64
    Windows 10
    Thread Starter
       #14

    Another cool thing I did was replace the install.wim file on a bootable USB key I created using the official Microsoft Windows 10 media with my own wim file so now when I do an install using the "official" media I get my very own custom install with Office...awesome!!
      My Computer


  5. Posts : 64
    Windows 10
    Thread Starter
       #15

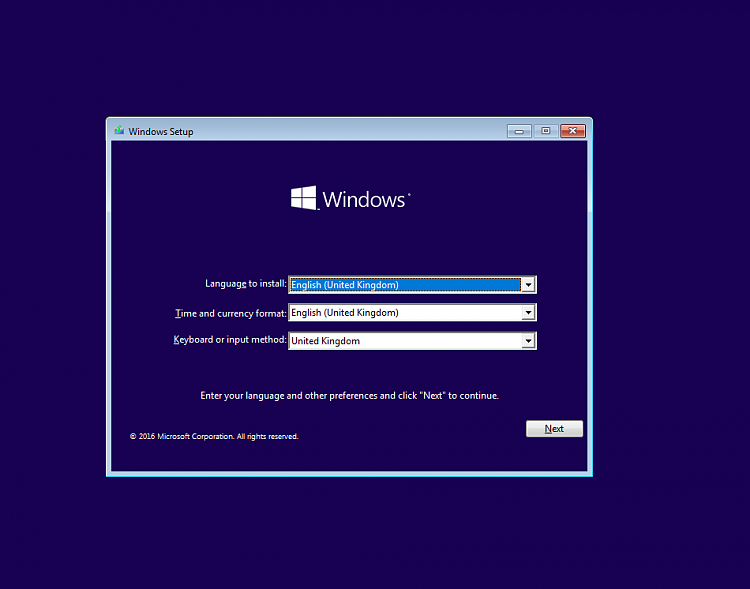
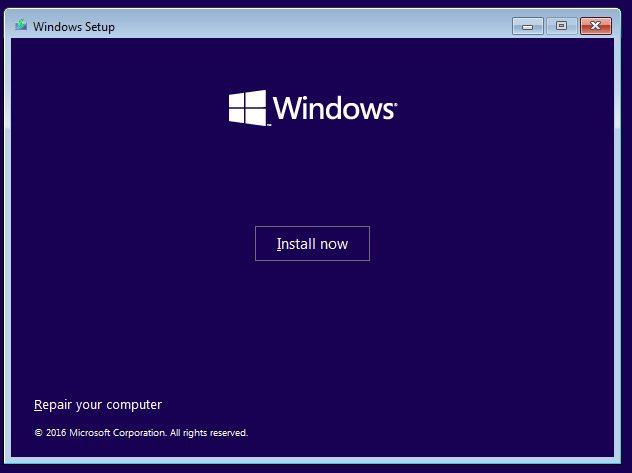
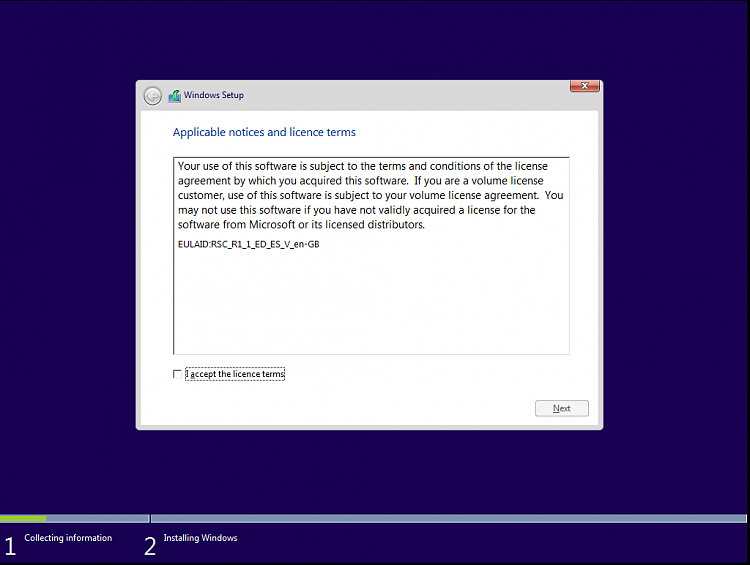
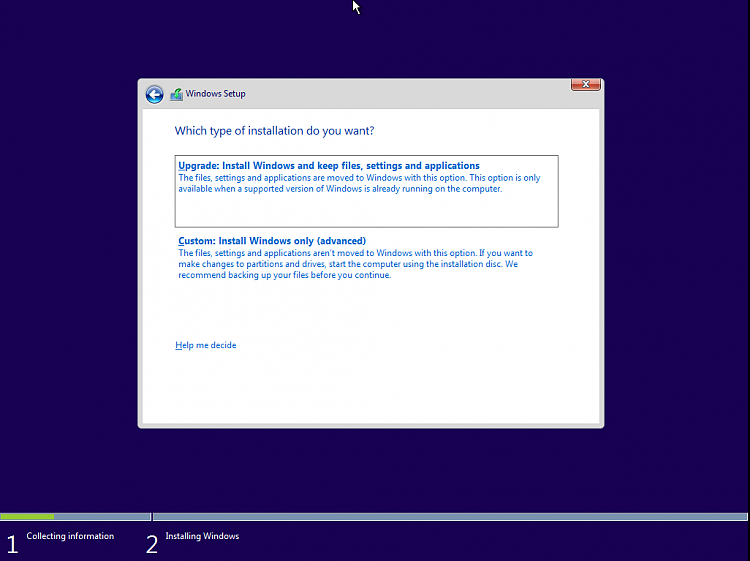
    So I've created my image and have started to try and do an unattended install but I am still getting prompted for user input at the following screens:

    Image Windows 10 laptops with DISM (or other free tool)-image.png.

    Image Windows 10 laptops with DISM (or other free tool)-image.png

    Image Windows 10 laptops with DISM (or other free tool)-image.png

    Image Windows 10 laptops with DISM (or other free tool)-image.png

    How do I automate these screens using the unattend.xml answer file?
      My Computer


  6. Posts : 17,661
    Windows 10 Pro
       #16

    In answer file, add component Microsoft-Windows-International-Core to Pass 7 OobeSystem, set InputLocale, SystemLocale, UILanguage and UserLocale.

    Add component Microsoft-Windows-Shell-Setup > OOBE to Pass 7 OobeSystem, set HideEULAPage and HideOEMRegistrationScreen to TRUE. Additionally, if your end users are not allowed to create a Microsoft Account in OOBE set HideOnlineAccountScreens to TRUE.

    That about covers it.

    Kari
      My Computer


  7. Posts : 64
    Windows 10
    Thread Starter
       #17

    Kari said:
    In answer file, add component Microsoft-Windows-International-Core to Pass 7 OobeSystem, set InputLocale, SystemLocale, UILanguage and UserLocale.

    Add component Microsoft-Windows-Shell-Setup > OOBE to Pass 7 OobeSystem, set HideEULAPage and HideOEMRegistrationScreen to TRUE. Additionally, if your end users are not allowed to create a Microsoft Account in OOBE set HideOnlineAccountScreens to TRUE.

    That about covers it.

    Kari
    The funny thing is I already have those items set:

    Image Windows 10 laptops with DISM (or other free tool)-image.png

    Image Windows 10 laptops with DISM (or other free tool)-image.png

    but I'm still being prompted for these items when I begin the install?

    My answer file is saved to: C:\Windows\System32\Sysprep\unattend.xml

    Am I doing something wrong?

    The one thing that confused me is, when do you use unattend.xml and when do you use autounattend.xml?
      My Computer


  8. Posts : 17,661
    Windows 10 Pro
       #18

    xy677 said:
    The funny thing is I already have those items set...
    ... and then some that should not be set.

    First look at your screenshots shows that you have used a few deprecated components not working anymore, not being compatible with Windows 10.
    • HideLocalAccountScreen can only be used in Windows Server editions
    • Network location is deprecated, can't be used in Windows 10 answer file
    • SkipMachineOOBE is deprecated, can't be used in Windows 10 answer file
    • SkiprUserOOBE is deprecated, can't be used in Windows 10 answer file


    xy677 said:
    The one thing that confused me is, when do you use unattend.xml and when do you use autounattend.xml?
    This from https://technet.microsoft.com/en-us/...(v=ws.10).aspx (article written for WIndows 7 deployment but applies to Windows 10, too):

    As a rule, only answer files named Unattend.xml are used. However, because some answer files include destructive actions such as disk partitioning, you must rename your Unattend.xml file to Autounattend.xml in the windowsPE and offlineServicing configuration passes. These passes run when you first run Windows PE or Setup.exe. You typically use the Autounattend.xml file when you use the Windows Setup DVD boot method and supply an answer file on a USB flash drive (UFD) or floppy disk.

    Kari
      My Computer


  9. Posts : 64
    Windows 10
    Thread Starter
       #19

    Ok, thanks! I have removed the incorrect values from the answer file that are not compatible with Windows 10.

    Since I am booting from an ISO (that has my new/customised install.wim file) does that mean I shouldn't have an unattend.xml file in c:\windows\system32\sysprep and should ONLY have the Autounattend.xml in the root of the ISO?
      My Computer


  10. Posts : 17,661
    Windows 10 Pro
       #20

    If you have no components added to Pass 1 WindowsPE, you do not need autounattend.xml.
      My Computer


  Related Discussions
Our Sites
Site Links
About Us
Windows 10 Forums is an independent web site and has not been authorized, sponsored, or otherwise approved by Microsoft Corporation. "Windows 10" and related materials are trademarks of Microsoft Corp.

© Designer Media Ltd
All times are GMT -5. The time now is 23:55.
Find Us


Windows 10 Forums