

How to Import a Task to Task Scheduler in Windows
The Task Scheduler enables you to automatically perform routine tasks on a chosen computer. The Task Scheduler does this by monitoring whatever criteria you choose to initiate the tasks (referred to as triggers) and then executing the tasks when the criteria is met.
You can import an exported task, which will add the imported task to a task folder and allow you to use and run the task. A task's properties, triggers, actions, conditions, and settings are represented in an XML file.
This tutorial will show how to import a task to Task Scheduler from an exported task .xml file in Vista, Windows 7, Windows 8, and Windows 10.
Contents
- Option One: To Import a Task in Task Scheduler
- Option Two: To Import a Task in Command Prompt
1 Press the Win + R keys to open the Run dialog, type taskschd.msc into Run, and click/tap on OK to open Task Scheduler.
2 Navigate to the task folder location (ex: "Task Scheduler Library") in the left pane for where you want to import the task to, and click/tap on Import in the far right Actions pane. (see screenshot below)
3 Browse to the location you saved the exported task, select the .xml file, and click/tap on Open. (see screenshot below)
4 Click/tap on OK. (see screenshot below)
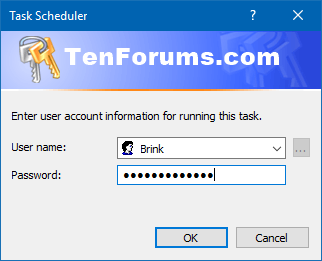
5 If you have Run whether user is logged on or not checked above, then you will be prompted to enter your credentials for running the task with. Click/tap on OK. (see screenshot below)
6 The task will now be imported into the task folder in Task Scheduler. (see screenshot below)
You must be logged in as an administrator to use this option.
For more usage details about the schtasks and schtasks /Create commands, see: Schtasks.exe | Microsoft Docs
1 Open an elevated command prompt.
2 Type the command below into the elevated command prompt, and press Enter. (see screenshot below step 3)
schtasks /Create /XML "full path of .xml file" /TN "task folder location\task name" /RU "Computer name\User name" /RP *
Substitute full path of .xml file in the command above with the actual full path of the task's exported .xml file.
Substitute task folder location in the command above with the actual task's folder location (ex: "") like in Task Scheduler below.
Substitute task name in the command above with the actual task's name (ex: "Create Restore Point on Schedule") like in Task Scheduler below.
Substitute Computer name in the command above with the actual computer name (ex: "W10BrinkDesktop").
Substitute User name in the command above with the actual user name (ex: "Brink") of the account you want to run the task as.
For example:schtasks /Create /XML "%UserProfile%\Desktop\taskname.xml" /TN "%UserProfile%\Desktop\taskname.xml" /RU "W10BrinkDesktop\Brink" /RP *
3 Type the password of the account you specified to run the task as, and press Enter. (see screenshot below)
4 When finished, you can close the elevated command prompt if you like.
5 The task will now be imported to the specified task folder in Task Scheduler. (see screenshot below)
That's it,
Shawn
Related Tutorials
- How to Enable or Disable Scheduled Task in Windows 10
- How to Export a Task from Task Scheduler in Windows
- How to Create Task to Run App or Script at Logon in Windows 10
- How to Delete Scheduled Task in Windows 10
Import Task to Task Scheduler in Windows
-
New #1
here is how you can bulk export all tasks:
create a folder named "all tasks" on desktop
run that in powershell as admin (change the path bellow)
Code:Get-ScheduledTask | foreach {Export-ScheduledTask -TaskName $_.TaskName -TaskPath $_.TaskPath |Out-File (Join-Path "C:\Users\Me\Desktop\all tasks" "$($_.TaskName).xml")}
credit
Anyone knows how to import all tasks from this folder?
-
New #2
It odd that with the "*" /RP *, it failed to work BUT when i removed the * it Worked..... surprised.... by myself
How do you do it with PowerShall and not just the CMD
Also i dont use a Password and it asked for a Password so for Multi import i only press ENTER but after fifth or sisth import it closed itself i think because of Password [as i said i dont use Password] is there other way to skip Password so the multi can continues importLast edited by Start Menu; 21 Feb 2022 at 09:04.
-
New #3
How do I move my scheduled task from a backup to a new windows instance or a new computer.
Besides the fact that the built in export import feature is impractical it also doesn't preserve the folders I created within. So how do I move them myself?
I tried copying the xml files from \System32\Tasks\ to the exact same place on a newly installed Windows system, but it just ignores them. So what now?
-
New #4
Copy the files to anywhere except \System32\Tasks\ {because TS can interpret that as a hacking attempt}.
Then import them.
- Even though they have no file extension in your original \System32\Tasks folders, they are .xml files and you can add that extension to your backup copies to be able to read & edit them more easily.
- I always delete the whole line<UserId>...</UserId> from the .xml file and that lets them get imported into the current user account in the new computer.
I have also replied to a TS question of yours in the another TS thread.
Best of luck,
Denis
-
New #5
hello dear friend @Try3
First of all, I hope you and your family are doing well.
Could you tell me which part exactly do you delete in the task's xml? I'll post the task I want to import and several machines manually so you can tell me which lines I should delete...
Code:<?xml version="1.0" encoding="UTF-16"?> <Task version="1.2" xmlns="http://schemas.microsoft.com/windows/2004/02/mit/task"> <RegistrationInfo> <Date>2023-02-11T16:15:41.9669974</Date> <Author>SSDESKTOP\Dummy</Author> <URI>\Network_Controls\Redes - Desativar e Reativar</URI> </RegistrationInfo> <Triggers /> <Principals> <Principal id="Author"> <RunLevel>HighestAvailable</RunLevel> <UserId>Dummy</UserId> <LogonType>InteractiveToken</LogonType> </Principal> </Principals> <Settings> <MultipleInstancesPolicy>IgnoreNew</MultipleInstancesPolicy> <DisallowStartIfOnBatteries>true</DisallowStartIfOnBatteries> <StopIfGoingOnBatteries>true</StopIfGoingOnBatteries> <AllowHardTerminate>true</AllowHardTerminate> <StartWhenAvailable>false</StartWhenAvailable> <RunOnlyIfNetworkAvailable>false</RunOnlyIfNetworkAvailable> <IdleSettings> <StopOnIdleEnd>true</StopOnIdleEnd> <RestartOnIdle>false</RestartOnIdle> </IdleSettings> <AllowStartOnDemand>true</AllowStartOnDemand> <Enabled>true</Enabled> <Hidden>false</Hidden> <RunOnlyIfIdle>false</RunOnlyIfIdle> <WakeToRun>false</WakeToRun> <ExecutionTimeLimit>P3D</ExecutionTimeLimit> <Priority>7</Priority> </Settings> <Actions Context="Author"> <Exec> <Command>%WinDir%\Setup\OEM\Network_Controls\SCRIPT-DESATIVAR_E_REATIVAR_TODAS_AS_REDES.BAT</Command> </Exec> </Actions> </Task>
Thanks in advanced!
Best Regards
@JeepWillys58
-
-
New #7
-
New #8
There is no point in deleting the Author line.
It is of no significance whatsoever.
And thanks for the rep,
Denis
-

Import Task to Task Scheduler in Windows
How to Import a Task to Task Scheduler in WindowsPublished by Shawn BrinkCategory: Backup & Restore
07 Feb 2021


 Quote
QuoteTutorial Categories

Related Discussions
