

How to Convert FAT32 to NTFS without Data Loss in Windows
Information
FAT32 (File Address Table 32) and NTFS (New Technology File System) are two different file systems that can be used to format a volume on a disk in Windows.
This tutorial will show you different ways on how to convert NTFS to FAT32 volumes without data loss in Windows 7, Windows 8, and Windows 10.
You must be signed in as an administrator to convert FAT32 to NTFS.
Note
FAT32 vs NTFS Basic Comparison:
FAT32 NTFS Introduced in 1977. Introduced in July 1993. Supports maximum file size of 4 GB. File size only limited by size of volume. Supports maximum volume size of 32 GB. Supports maximum volume size of 2 TB. Does not support file compression. Supports file compression. Does not support file access permissions. Supports file access permissions. Does not support Encrypting File System (EFS). Supports Encrypting File System (EFS). Does not support System Restore. Supports System Restore. Does not support Previous Versions. Supports Previous Versions. Does not support disk quotas. Supports disk quotas. Does not support reparse points. Supports reparse points. Does not support sparse files. Supports sparse files.
CONTENTS:
- Option One: Convert FAT32 to NTFS using Command Prompt without Data Loss
- Option Two: Convert FAT32 to NTFS using AOMEI NTFS to FAT32 Converter without Data Loss
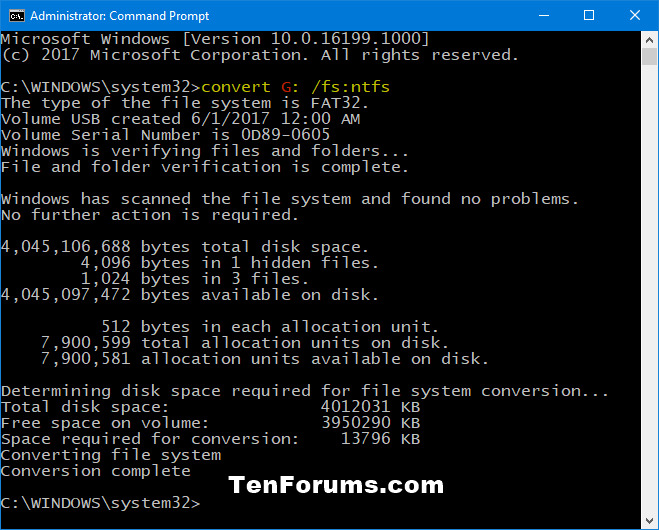
1. Open an elevated command prompt.
2. Type the command below, and press Enter. (see screenshot below)
convert <drive letter>: /fs:ntfs
Substitute <drive letter> in the command above with the actual drive letter (ex: "G") of the FAT32 volume you want to convert to NTFS.
For example:convert G: /fs:ntfs
3. When finished, you can close the elevated command prompt if you like.
1. If you haven't already, you will need to download and install the free AOMEI NTFS to FAT32 Converter.
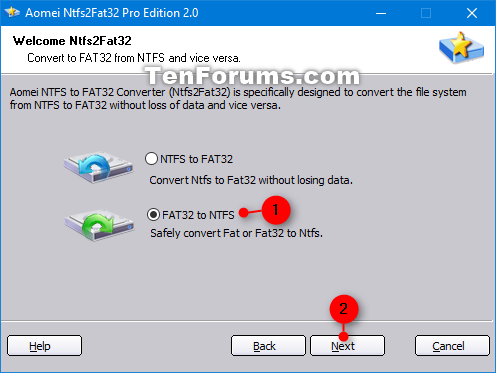
2. Open Aomei Ntfs2Fat32 Pro Edition.
3. Select (dot) the FAT32 to NTFS option, and click/tap on Next. (see screenshot below)
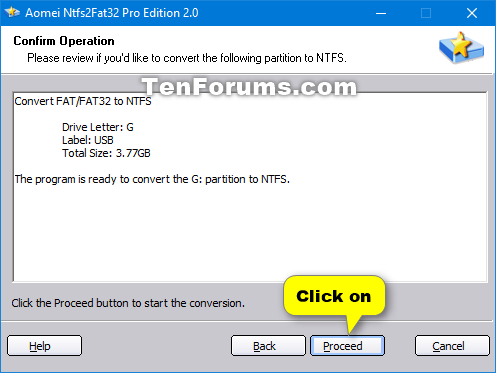
4. Select the FAT32 volume you want to convert to NTFS, and click/tap on Next. (see screenshot below)
5. Click/tap on Proceed to start the conversion. (see screenshot below)
6. Click/tap on Yes to confirm. (see screenshot below)
7. The conversion will now start. (see screenshot below)
8. Click/tap on OK when the conversion has completed successfully. (see screenshot below)
9. Click/tap on Finish. (see screenshot below)
10. You can now close Aomei Ntfs2Fat32 Pro Edition if you like.
That's it,
Shawn
Related Tutorials
- How to Convert NTFS to FAT32 without Data Loss in Windows
- How to Convert MBR Disk to GPT Disk in Windows 10
- How to Convert GPT Disk to MBR Disk in Windows 10
- How to Enable or Disable to Format with ReFS File System in Windows 8.1 and Windows 10
Convert FAT32 to NTFS without Data Loss in Windows
Convert FAT32 to NTFS without Data Loss in Windows
How to Convert FAT32 to NTFS without Data Loss in WindowsPublished by Shawn BrinkCategory: Hardware & Drivers
01 Jun 2017


 Quote
Quote
Tutorial Categories

Related Discussions
