

How to Add or Remove Accounts Settings context menu in Windows 10
You need a user account to use Windows, and if you share a single PC with other people, each person should have their own account. Each person can customize their account with their own settings and preferences, like a desktop background or screen saver. User accounts also help control which files and apps each person can use and what changes they can make to the PC.
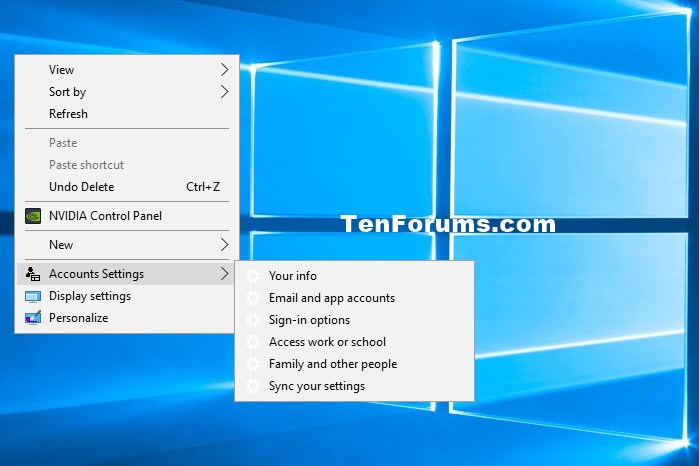
This tutorial will show you how to add or remove an Accounts Settings desktop context menu for all users to quickly view their info, email & app accounts, sign-in options, family & other people, and sync settings in Windows 10.
While you must be signed in as an administrator to be able to add or remove the Accounts Settings context menu, all users will be able to use the context menu.
EXAMPLE: Accounts Settings context menu
Here's How:
1 Do step 2 (add) or step 3 (remove) below for what you would like to do.
A) Click/tap on the Download button below to download the file below, and go to step 4 below.
Add_Accounts_Settings_to_desktop_context_menu.reg
Download
This is the default setting.
A) Click/tap on the Download button below to download the file below, and go to step 4 below.
Remove_Accounts_Settings_from_desktop_context_menu.reg
Download
4 Save the .reg file to your desktop.
5 Double click/tap on the downloaded .reg file to merge it.
6 When prompted, click/tap on Run, Yes (UAC), Yes, and OK to approve the merge.
7 You can now delete the downloaded .reg file if you like.
That's it,
Shawn
Related Tutorials
- How to Open Settings in Windows 10
- How to Create an 'Account Picture' Settings Shortcut in Windows 10
- How to Create a 'Sync your settings' Shortcut in Windows 10
Add Accounts Settings context menu in Windows 10

Add Accounts Settings context menu in Windows 10
How to Add or Remove Accounts Settings context menu in Windows 10Published by Shawn BrinkCategory: Customization
18 Jul 2020


 Quote
Quote
Tutorial Categories

Related Discussions
