

How to Find and Save Windows Spotlight Background Images in Windows 10
Windows Spotlight is an option for the lock screen background that displays different background images and occasionally offers suggestions on the lock screen from Bing. Windows Spotlight is available in all desktop editions of Windows 10.
For example, Windows Spotlight will display different backgrounds daily that you can select that you like or don't like to help train the service to show you images you like. You could also see and try previews of other Windows features and experiences to help let you know about them.
You may wish to save and keep these Windows Spotlight images in a folder on your computer, and use them as your desktop background, sign-in screen background, etc...
See also: Configure Windows Spotlight on the lock screen | Microsoft Docs
This tutorial will show you how to find and save the Windows spotlight background images displayed on your lock screen in Windows 10.
For a Windows 11 version of this tutorial, see:
Find and Save Windows Spotlight Images in Windows 11
Contents
- Option One: Find and Save Windows Spotlight Background Images using PowerShell Script
- Option Two: Manually Find and Save Windows Spotlight Background Images
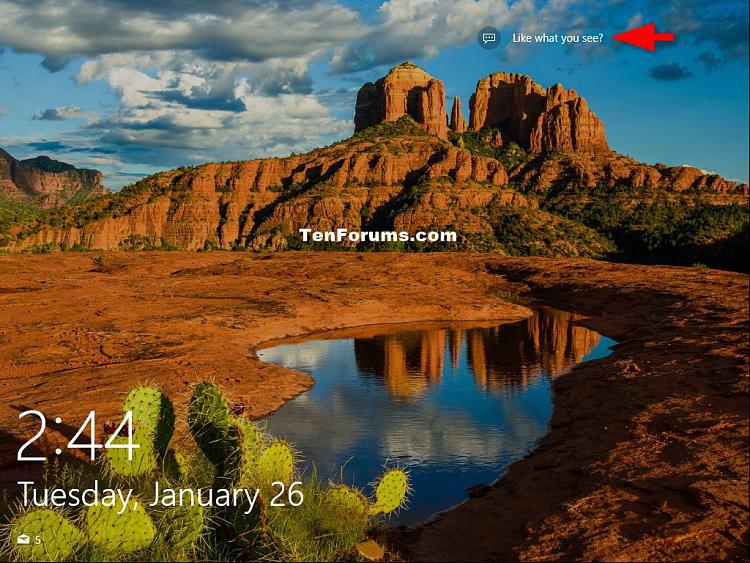
EXAMPLE: Windows spotlight on lock screen
Thank you to Dimitri for providing the PowerShell .ps1 script file.
1 Click/tap on the Download button below to download the PowerShell script.
Find_Windows_Spotlight_images.ps1
Download
Code:$WindowsSpotlightFolder = "$env:USERPROFILE\AppData\Local\Packages\Microsoft.Windows.ContentDeliveryManager_cw5n1h2txyewy\LocalState\Assets" $WindowsSpotlightImages = "$env:USERPROFILE\Desktop\SpotlightImages\" if (Test-Path $WindowsSpotlightImages) { $FolderTimestamp = Get-Date (Get-Item $WindowsSpotlightImages).LastWriteTime -Format "yyyyMMdd.HHmmss" Rename-Item -Path $WindowsSpotlightImages -NewName ('SpotlightImages-' + $FolderTimestamp) -Force Remove-Variable FolderTimestamp # Cleanup } New-Item -Path $WindowsSpotlightImages -ItemType Directory | Out-Null Add-Type -AssemblyName System.Drawing $ImagesToCopy = @() $(Get-ChildItem -Path $WindowsSpotlightFolder).FullName | ForEach-Object { $Image = [System.Drawing.Image]::Fromfile($_) $Dimensions = "$($Image.Width)x$($Image.Height)" If ($Dimensions -eq "1920x1080") { $ImagesToCopy += $_ } $Image.Dispose() } $ImagesToCopy | Copy-Item -Destination $WindowsSpotlightImages $FileNumber = 0 Get-ChildItem -Path $WindowsSpotlightImages | Sort-Object LastWriteTime | foreach { $FileNumber += 1 Rename-Item -Path $_.FullName -NewName ("1920x1080_" + $FileNumber.ToString("000") + '.jpg') } # Report $NewSpotlgihtImages = Get-ChildItem -Path $WindowsSpotlightImages if ($NewSpotlgihtImages) { Write-Host ($NewSpotlgihtImages).Name Write-Host `n($NewSpotlgihtImages).Count "new images were copied into $WindowsSpotlightImages`n" -ForegroundColor Green } else { Write-Host "`nNo new images were copied.`n" -ForegroundColor Red Remove-Item $WindowsSpotlightImages -Force } # Cleanup Remove-Variable WindowsSpotlightFolder, WindowsSpotlightImages, ImagesToCopy, Image, Dimensions, FileNumber, NewSpotlgihtImages
2 Save the .ps1 file to your desktop.
3 Unblock the .ps1 file.
4 Right click or press and hold on the .ps1 file, and click/tap on Run with PowerShell.
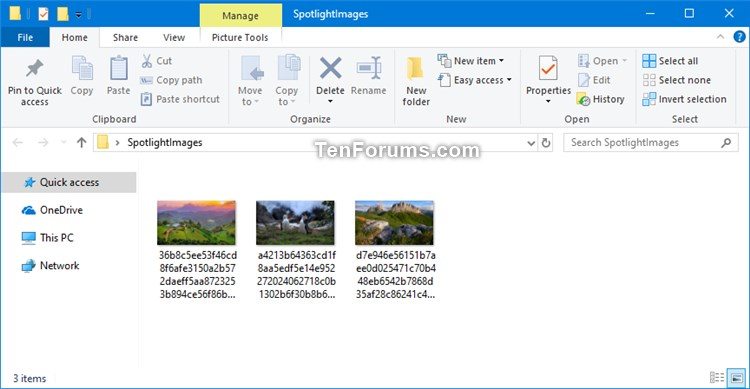
5 You will now have a SpotlightImages folder on your desktop with your 1920 x 1080 Windows Spotlight images saved in it. (see screenshot below)
1 Copy and paste the folder location below in the address bar of File Explorer, and press Enter to open the Assets folder.
The folder location below is revealed in the LandscapeAssetPath string value in the registry key below.
HKEY_CURRENT_USER\SOFTWARE\Microsoft\Windows\CurrentVersion\Lock Screen\Creative
%LocalAppData%\Packages\Microsoft.Windows.ContentDeliveryManager_cw5n1h2txyewy\LocalState\Assets
2 Select all items in the Assets folder, and copy them all to another folder (ex: %UserProfile%\Pictures) of your choice. (see screenshot below)
If you like, you can also right click on a file, click/tap on Open with, and select Windows Photo Viewer to view a listed Windows spotlight image.
3 Open the folder (ex: %UserProfile%\Pictures) you save the items into, click/tap on the File tab, click/tap on Open Windows PowerShell, and click/tap on Open Windows PowerShell. (see screenshot below)
4 Type the commands below into PowerShell one at a time, press Enter after each command, and close PowerShell when finished. This will rename all items in the folder to add the .jpg file extension. (see screenshot below)
cmd
ren * *.jpg
5 Add the Dimensions column to the folder (ex: %UserProfile%\Pictures) you saved the items to. Change the folder view to sort by the Dimensions detail in descending order. (see screenshot below step 6)
6 You will notice that the Windows spotlight images will have a different dimension for PC and mobile. You can delete the ones you don't want to keep saved. (see screenshot below)
7 Here are only the PC 1920 x 1080 Windows spotlight images shown in Extra large icons layout view. (see screenshot below)
That's it,
Shawn Brink
Related Tutorials
- How to Change your Lock Screen Background in Windows 10
- How to Reset and Re-register Windows Spotlight in Windows 10
- How to Rate Windows Spotlight Background Images on Lock Screen in Windows 10
- How to Get More Information about a Windows Spotlight Image in Windows 10
- How to Find and Save Custom Lock Screen Background Images in Windows 10
Find and Save Windows Spotlight Background Images in Windows 10
-
-
-
-
-
New #5
I forgot to copy the files to a different folder and now it's just a dark screen for me ( I tried to delete everything in the folder but no hope. Could you please tell me how to convert the files back to normal?
-
New #6
Hello bathong, and welcome to Ten Forums. :)
If you mean that you renamed them inside the "Assets" folder instead, then you could just delete the contents inside the "Assets" folder to clear them all. Afterwards, toggle to use a picture for your lock screen background and apply, then set to use Windows Spotlight again. It should start fresh again.
-
New #7
-
New #8
If you like, you might see if doing a system restore using a restore point dated before making the mistake may be able sort it for you.
System Restore Windows 10
-
-
New #9
Find and Save Windows Spotlight Background Images in Windows 10
How to Find and Save Windows Spotlight Background Images in Windows 10Published by Shawn BrinkCategory: Customization
29 Dec 2022


 Quote
Quote
Tutorial Categories

Related Discussions
