

How to Create a Windows To Go Workspace USB in Windows 10
Windows To Go was announced as deprecated in Windows 10 version 1903 and is now removed in version 2004.
Features being removed or deprecated in Windows 10 version 2004
Windows To Go is a feature available only in the Windows 10 Pro, Windows 10 Enterprise and Windows 10 Education editions that enables the creation of a Windows To Go workspace that can be booted from a USB-connected external drive on PCs (hosts). The portable Windows To Go workspace will run using the hardware and resources of the host PC.
PCs that meet the Windows 7 or later certification requirements can run Windows Enterprise in a Windows To Go workspace, regardless of the operating system running on the PC. Windows To Go workspaces can use the same image enterprises use for their desktops and laptops and can be managed the same way. Windows To Go is not intended to replace desktops, laptops or supplant other mobility offerings. Rather, it provides support for efficient use of resources for alternative workplace scenarios.
For additional information and details about Windows To Go, see:
- Windows To Go feature overview (Windows 10)
- Windows To Go frequently asked questions (Windows 10)
- Best practice recommendations for Windows To Go (Windows 10)
- Tips for configuring your BIOS settings to work with Windows To Go - TechNet Articles
- Windows To Go FAQs - Why isnt my computer booting from USB?
Host PC considerations for Windows To Go
When assessing the use of a PC as a host for a Windows To Go workspace you should consider the following criteria:
- Hardware that has been certified for use with Windows 7 or later operating systems will work well with Windows To Go.
- Running a Windows To Go workspace from a computer that is running Windows RT is not a supported scenario.
- Running a Windows To Go workspace on a Mac computer is not a supported scenario.
The following table details the characteristics that the host computer must have to be used with Windows To Go:
Item Requirement Boot process Capable of USB boot Firmware USB boot enabled. (PCs certified for use with Windows 7 or later can be configured to boot directly from USB, check with the hardware manufacturer if you are unsure of the ability of your PC to boot from USB) Processor architecture Must support the image on the Windows To Go drive External USB Hubs Not supported; connect the Windows To Go drive directly to the host machine Processor 1 Ghz or faster RAM 2 GB or greater Graphics DirectX 9 graphics device with WDDM 1.2 or greater driver USB port USB 2.0 port or greater
In addition to the USB boot support in the BIOS, the Windows 10 image on your Windows To Go drive must be compatible with the processor architecture and the firmware of the host PC as shown in the table below.
Host PC Firmware Type Host PC Processor Architecture Compatible Windows To Go Image Architecture Legacy BIOS 32-bit 32-bit only Legacy BIOS 64-bit 32-bit and 64-bit UEFI BIOS 32-bit 32-bit only UEFI BIOS 64-bit 64-bit only
This tutorial will show you how to create a Windows To Go workspace USB flash drive in Windows 10.
You must be signed in as an administrator to be able to create a Windows To Go workspace.
Here's How:
1. If you haven't already, you will need to download a Windows 10 Enterprise ISO file. You can click on the Download button below to download an official Windows 10 Enterprise ISO from the Microsoft Windows Evaluation Center.
2. Mount the Windows 10 Enterprise ISO file.
3. Connect a Windows To Go certified USB flash drive to a USB 3.0 port.
4. Open the Control Panel (icons view), and click/tap on the Windows To Go icon.
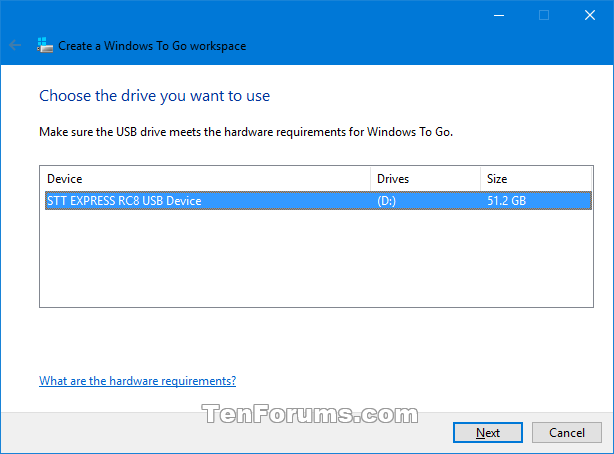
5. Select the USB flash drive from step 3 above, and click/tap on Next. (see screenshot below)
6. Click/tap on the Add search location button. (see screenshot below)
7. Select the DVD drive for the mounted ISO from step 2 above, and click/tap on Select Folder. (see screenshot below)
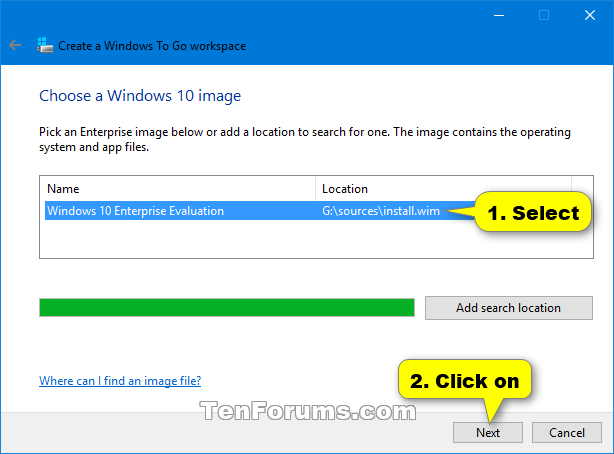
8. Select the Windows 10 Enterprise install.wim, and click/tap on Next. (see screenshot below)
9. Do step 10 (No BitLocker) or step 11 (BitLocker) below depending on if you would like to encrypt this Windows To Go workspace USB with BitLocker or not.
It is recommend that you use BitLocker with your Windows To Go drives to protect the drive from being compromised if the drive is lost or stolen. When BitLocker is enabled, the user must provide a password to unlock the drive and boot the Windows To Go workspace, this helps prevent unauthorized users from booting the drive and using it to gain access to your network resources and confidential data. Because Windows To Go drives are meant to be roamed between computers, the Trusted Platform Module (TPM) cannot be used by BitLocker to protect the drive. Instead, you will be specifying a password that BitLocker will use for disk encryption and decryption. By default, this password must be eight characters in length and can enforce more strict requirements depending on the password complexity requirements defined by your organizations domain controller.
You can enable BitLocker while using the Windows To Go Creator wizard as part of the drive provisioning process before first use; or it can be enabled afterward by the user from within the Windows To Go workspace.
See also: Windows To Go FAQs - Why cant I enable BitLocker from Windows To Go Creator?
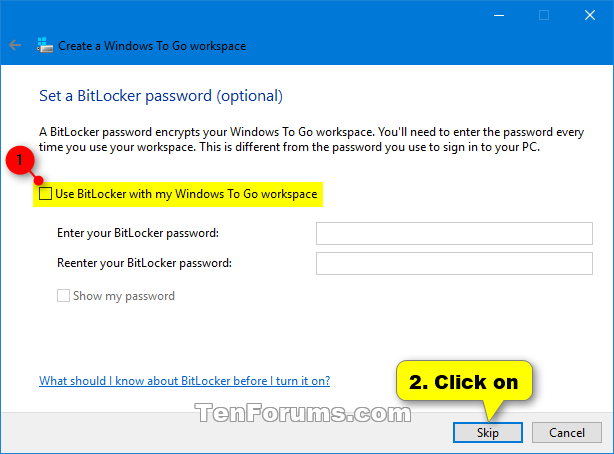
A) Uncheck the Use BitLocker with my Windows To Go workspace box, click/tap on Skip, and go to step 12 below. (see screenshot below)
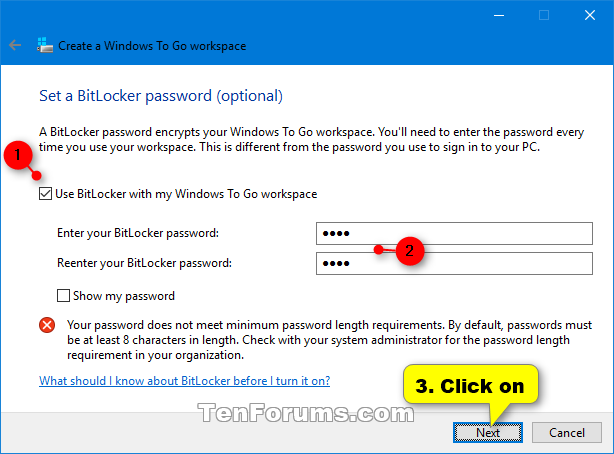
A) Check the Use BitLocker with my Windows To Go workspace box.
B) Enter and reenter a BitLocker password to use, click/tap on Next, and go to step 12 below.(see screenshot below)
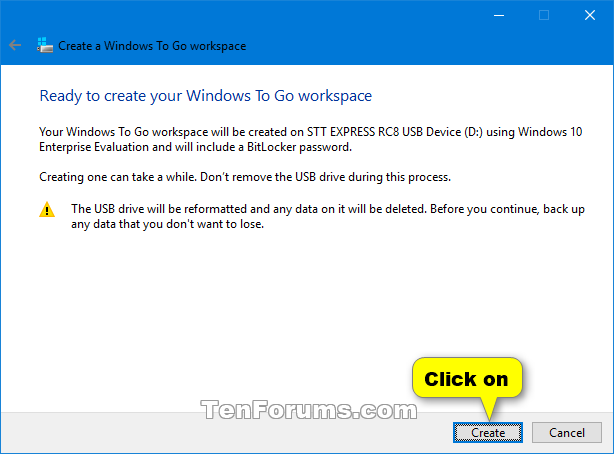
12. Click/tap on Create when ready to create your Windows To Go workspace. (see screenshot below)
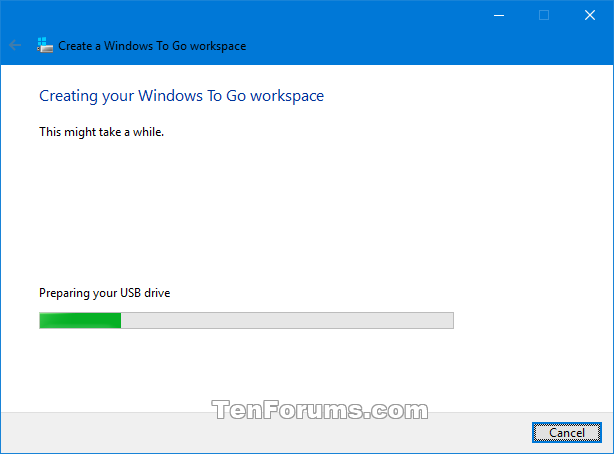
13. Windows will now start creating your Windows To Go workspace. This can take around 10 minutes or more. (see screenshot below)
14. When it has finished, select (dot) Yes or No to have this PC automatically boot from your Windows To Go workspace when connected and you restart the PC, and click/tap on Save and restart to boot from the Windows To Go workspace to finish setting up Windows 10 Enterprise on it. (see screenshot below)
15. When your PC has finished booting from your Windows To Go workspace USB for the first time, select your Country or region, App language, Keyboard layout, and Time zone, then click/tap on Next. (see screenshot below)
16. Click/tap on Accept for the license terms. (see screenshot below)
17. You can now pick up at step 16 here (click on link) to finish setting up Windows 10 Enterprise on your Windows To Go workspace. (see screenshot below)
18. You will have up to 90 days to activate the Windows 10 Enterprise on your Windows To Go workspace.
Windows To Go allows organization to support the use of privately owned PCs at the home or office with more secure access to their organizational resources. With Windows To Go use rights under Software Assurance, an employee will be able to use Windows To Go on any company PC licensed with Software Assurance as well as from their home PC.
That's it,
Shawn
Related Tutorials
- How to Install and Run Windows on a USB Drive using WinToUSB
- How to Setup and Run Windows 10 on USB Flash Drive
- How to Change Windows To Go Startup Options in Windows 10
- How to Specify Windows To Go Default Startup Options in Windows 10
- How to Enable or Disable Windows To Go Workspace using Hibernate on Windows 10 PC
- How to Enable or Disable Windows To Go Workspace using Sleep on Windows 10 PC
Create Windows To Go Workspace USB in Windows 10
-
New #1
Howdy,
How to completely disable Windows to Go from Win 10 Pro/Ent x64 among with Hybernate and Bitlocker?
Thanks.
-
New #2
Here's this for Windows To Go with Hibernate.
 Enable or Disable Windows To Go using Hibernate on Windows 10 PC Performance Maintenance Tutorials

Create Windows To Go Workspace USB in Windows 10
How to Create a Windows To Go Workspace USB in Windows 10Published by Shawn BrinkCategory: Installation & Upgrade
29 May 2020


 Quote
QuoteTutorial Categories

Related Discussions
