

How to Enable or Disable Windows Defender Exploit Guard Network Protection in Windows 10
Network protection is a feature that is part of Windows Defender Exploit Guard starting with Windows 10 version 1709. It helps to prevent users from using any application to access dangerous domains that may host phishing scams, exploits, and other malicious content on the Internet.
If you enable Network Protection and it blocks a connection, a notification will be displayed from the Action Center.
You can also use audit mode to evaluate how Network Protection would impact your organization if it were enabled.
For more information, see also:
- Use Network protection to help prevent connections to bad sites | Microsoft Docs
- Conduct a demo to see how Network protection works | Microsoft Docs
- Turn Network protection on | Microsoft Docs
This tutorial will show you how to enable or disable Windows Defender Exploit Guard Network Protection for all users in Windows 10.
You must be signed in as an administrator to enable or disable Network Protection.
You can test Network Protection by visiting the fake malicious domain below provided by Microsoft.
SmartScreen Test
Contents
- Option One: Enable or Disable Windows Defender Exploit Guard Network Protection in Local Group Policy Editor
- Option Two: Enable or Disable Windows Defender Exploit Guard Network Protection using a REG file
- Option Three: Enable or Disable Windows Defender Exploit Guard Network Protection in PowerShell
EXAMPLE: Connection blocked by network protection
The Local Group Policy Editor is only available in the Windows 10 Pro, Windows 10 Enterprise, and Windows 10 Education editions.
All editions can use Option Two or Option Three below.
1 Open the Local Group Policy Editor.
2 In the left pane of Local Group Policy Editor, navigate to the location below. (see screenshot below)
Computer Configuration\Administrative Templates\Windows Components\Windows Defender Antivirus\Windows Defender Exploit Guard\Network protection
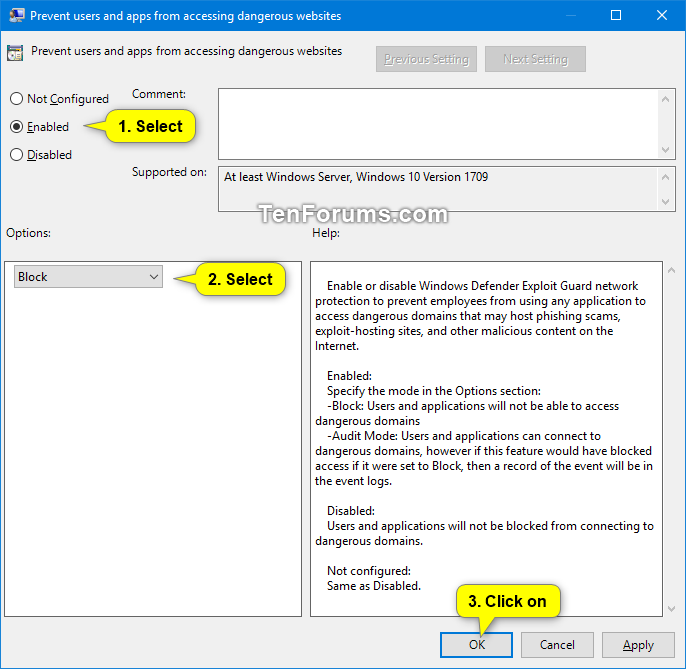
3 In the right pane of Network protection in Local Group Policy Editor, double click/tap on the Prevent users and apps from accessing dangerous websites policy to edit it. (see screenshot above)
4 Do step 5 (enable), step 6 (audit mode), or step 7 (disable) below for what you would like to do.
A) Select (dot) Enabled, select Block in the Options drop menu, click/tap on OK, and go to step 8 below. (see screenshot below)
A) Select (dot) Enabled, select Audit Mode in the Options drop menu, click/tap on OK, and go to step 8 below. (see screenshot below)
A) Select (dot) Not Configured or Disabled, click/tap on OK, and go to step 8 below. (see screenshot below)
Not Configured is the default setting.
8 When finished, close the Local Group Policy Editor.
The downloadable .reg files below will add and modify the DWORD value in the registry key below.
HKEY_LOCAL_MACHINE\SOFTWARE\Policies\Microsoft\Windows Defender\Windows Defender Exploit Guard\Network Protection
EnableNetworkProtection DWORD
(delete) = Disable
1 = Enable
2 = Audit Mode
1 Do step 2 (enable), step 3 (audit mode), or step 4 (disable) below for what you would like to do.
A) Click/tap on the Download button below to download the file below, and go to step 5 below.
Enable_Windows_Defender_Network_Protection.reg
Download
A) Click/tap on the Download button below to download the file below, and go to step 5 below.
Enable_Windows_Defender_Network_Protection_Audit_Mode.reg
Download
This is the default setting.
A) Click/tap on the Download button below to download the file below, and go to step 5 below.
Disable_Windows_Defender_Network_Protection.reg
Download
5 Save the .reg file to your desktop.
6 Double click/tap on the downloaded .reg file to merge it.
7 When prompted, click/tap on Run, Yes (UAC), Yes, and OK to approve the merge.
8 Restart the computer to apply.
9 You can now delete the downloaded .reg file if you like.
1 Open an elevated PowerShell.
2 Copy and paste the command below you want to use into the elevated PowerShell, and press Enter. (see screenshots below)
(Enable Windows Defender Exploit Guard Network Protection)
Set-MpPreference -EnableNetworkProtection Enabled
OR
(Enable Windows Defender Exploit Guard Network Protection using Audit Mode Only)
Set-MpPreference -EnableNetworkProtection AuditMode
OR
(Disable Windows Defender Exploit Guard Network Protection - DEFAULT)
Set-MpPreference -EnableNetworkProtection Disabled
3 Close the elevated PowerShell.
4 Restart the computer to apply.
That's it,
Shawn
Related Tutorials
- How to Change Windows Defender Exploit Protection Settings in Windows 10
- Hide or Show App and Browser Control in Windows Defender Security Center in Windows 10
- How to Enable or Disable Windows Defender Exploit Protection Settings in Windows 10
Enable Windows Defender Exploit Guard Network Protection in Windows 10
-
New #1
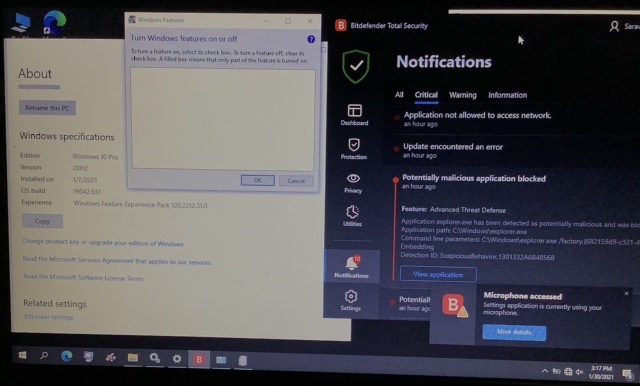
My Notebook can’t set Key Everyone is Special. My Windows 10 Home Version 20H2 OS 19042.746
-
-
New #3
Hi admin,
I didn't see this notification so I didn't reply. And sorry to confuse my posts, I tried to Set Disable by .Reg, but it prompted User Everyone to get the special permissions, so I can't set it. I have now deleted my windows. Not reinstalled I am checking for a hidden object in my old notebook with just installed Windows 10 OS build 19042.631 where I run into several issues. Of all files dated 12/7/2019, for example, Windows Features on or off, free space on the window.
-
New #4
Your screenshot shows you are using Bitdefender Total Security instead of what this tutorial is for.
It would be best to create a new thread in the AntiVirus, Firewalls and System Security forum area instead.
-
New #5
-
New #6
Feature looks like it has potential but it depends how it determines what site you visiting, hoping it uses dns instead of deep packet inspection.

Enable Windows Defender Exploit Guard Network Protection in Windows 10
How to Enable or Disable Windows Defender Exploit Guard Network Protection in Windows 10Published by Shawn BrinkCategory: Security System
24 Jan 2021


 Quote
Quote
Tutorial Categories

Related Discussions
