

Since Windows 10 version 1709, you can use DISM to capture and deploy FFU (Full Flash Update) images. FFU captures a disk sector by sector to a file container that holds an exact image of the disk. This means that whereas a WIM file can be applied to any size HDD or SSD, an FFU image may only be applied (deployed) to disk which is the same size or larger than the captured disk. How much storage capacity is used or free on that disk is irrelevant, only affecting the size of the captured FFU image file.
This is the only con I can think of; if your reference machine you used to build an image has a 512 GB disk, that captured FFU image can only be applied to destination machines with 512 GB or larger disks. The smaller the disk on your reference machine therefore, the better; images will be smaller and can be deployed to more destination machines.
DISM with FFU is also practical if you have to replace an HDD or SSD; just capture an FFU image, replace the disk, and apply image to new disk. FFU images are 100% exact copies of the disk, sector by sector. Capturing and deploying FFU images is fast, in fact much faster than using any third party software.
In this tutorial I will show how to capture and deploy an FFU image using DISM.
Notice please: FFU image can only be created from a GPT formatted disk. Equally, it can only be deployed to a GPT disk. FFU imaging does not work with MBR formatted disks.
Part One: Create WinPE ISO or USB Part Two: Capture FFU Image to a network share Part Three: Capture FFU Image to local disk Part Four: Apply FFU Image Part Five: Sample scenarios
Please notice that you can click / tap all screenshots in this tutorial to enlarge them.
1.1) Although FFU imaging has been possible since version 1709, the native Windows 10 DISM cannot capture nor apply FFU images:
1.2) To capture and apply FFU images, you will need to boot computer or virtual machine from Windows PE media. See this tutorial for creating WinPE: Create a WinPE USB or ISO
2.1) Boot computer or virtual machine you want to capture from WinPE.
2.2) Quite often when cloning a disk, it is the only disk present and therefore cannot be used to store the cloned image. In that case, your only option is to use a network share.
2.3) When WinPE Command Prompt starts, it will run commandwpeinitto initialize and enable networking (#1 in screenshot).
Map a shared network drive or folder with following command (#2):
net use W: \\PC_Name\ShareName
Drive letter W: in above command is just a suggestion, you can use any free letter. When prompted, enter username and password to access that share.
2.4) Enter following command to capture Disk 0 (PhysicalDrive0) to mapped network share as FFU image file (extension .ffu):
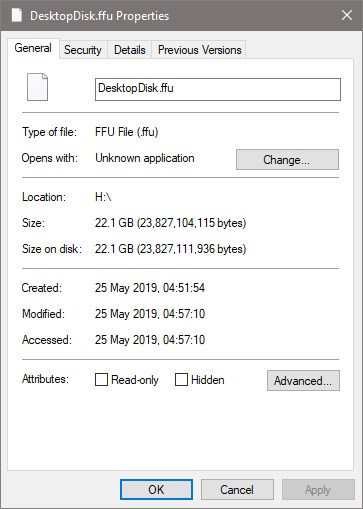
dism /capture-ffu /imagefile=W:\DesktopDisk.ffu /capturedrive=\\.\PhysicalDrive0 /name:DesktopDisk
Name of the captured FFU image can be whatever you'd prefer, but the extension must be .ffu.
3.1) Booting to WinPE might show the drive letters differently than what you are used to see when booting normally to Windows. To be sure we know correct drive letter for partition used to save the FFU image, we need DISKPART.
3.2) When WinPE Command Prompt is shown, enter following command to start Windows Disk Partitioning Utility (#1 in screenshot):
diskpart
3.3) Enter following command to check disk numbers for all connected internal and external hard disks (#2):
list disk
Note the disk numbers for both the disk you want to capture to FFU image, and disk used to store the image file. In this example I will capture disk 0 and save image on disk 1 (#3)
3.4) Select the disk where image will be saved with following command, replacing#with actual disk number (#4):
sel disk #
3.5) Check available partitions on selected disk with following command (#5):
list part
3.6) In this example case, I will save to Partition 4 (#6). I will select it with following command (#7):
sel part 4
3.7) To get its drive letter, I'll check partition details with following command (#8):
det part
I note the drive letter underLtrcolumn. In my case now, I will store the captured FFU image to drive F: (#9)
3.8) Quit DISKPART with following command (#10):
exit
3.9) Capture disk to FFU image with following command:
dism /capture-ffu /imagefile=F:\DesktopDisk.ffu /capturedrive=\\.\PhysicalDrive0 /name:DesktopDisk
In this example, above command captures disk 0 (PhysicalDrive0) to drive F: as DesktopDisk.ffu image file.
4.1) Boot from WinPE
4.2) Check the disk number for disk you want to apply image to. If image will be applied from local disk, also check the partition letter for partition where image is saved. See steps 3.2 though 3.9 for how to use DISKPART for this (#1& #2 in next screenshot).
4.3) In this example case, I will apply an image from network share, which contains the image file. I map that share as shown in step 2.3 (#3).
4.4) I will apply the FFU image DesktopDisk.ffu from mapped share W: to disk 0 with following command (#4):
dism /apply-ffu /ImageFile=W:\DesktopDisk.ffu /ApplyDrive:\\.\PhysicalDrive0
That's it! A sector by sector identical clone image has been applied to your disk. Booting PC from that disk, Windows will be exactly the same than it was when image was captured, apart from Windows needing to be re-activated if image was applied to different machine than from which it was captured, and that new machine does not have an existing digital license.
FFU imaging is a very practical way to deploy Windows 10. Build your deployment image in Audit Mode on a virtual machine, sysprep and generalize it making it hardware independent, boot VM from WinPE and capture it to an FFU image.
Image can now be deployed to any computer, to a disk same size or bigger than the VHD on the reference VM.
Another scenario is to use FFU imaging as backup tool. Capture an FFU image from your current Windows disk, apply it to "restore backup". The speed of both capturing an FFU image and applying it will amaze you!
And, of course, it's practical to have a recent FFU image in case your HDD / SSD dies, or you for any reason want to replace it.
Once again something that can be done in Windows 10 with no third party tools. Clone disks with WinPE and DISM.
Happy imaging, geeks!
Kari
DISM - Clone and Deploy using FFU Image
-
-
-
New #3
Dism is so powerfull !
a great tuto from Kari again
thanks
-
-
New #5
It depends of course on how much of the cloned disk is used. FFU file will be considerable larger than a WIM image captured from Windows drive. The same whatever program you use to clone a disk, clone files files can be quite big.
Just to give you an idea, I booted now my laptop from WinPE and captured my system disk. Because I have Users folder sysprepped to another disk, and I will also install most of my software on another disk, my system disk only contains relatively small Windows partition C:, in addition to UEFI system partitions.
Cloned disk in this example highlighted:

System disk size at the moment:

The FFU image created from that disk:
Capture took three minutes and 20 seconds.
Kari
-
New #6
Optane Enabled
Very detailed tutorial, I'm just wondering how this form of backup/imaging is affected on an Intel Optane enabled system since the Optane module is paired with the HDD so is presented to the OS as an SSD and apparently saves configuration settings in a portion of the HDD that is unallocated space.
According to Intel if either the HDD or Optane module fails the HDD is unusable by all except data recovery specialists because of the "pairing" process.
If the perceived wisdom is to disable Optane acceleration before taking a system image maybe you could include a warning note in your tutorials, both this one and the Macrium one.
-
-
New #8
I am going to try this for fun. I intend to try and clone to a virtual hard drive though - I see no reason why that should not work?
-
-
New #9
Well has some fun. Firstly I went to WinPE mode using Macrium Reflect Boot option and as I hoped, I could run dism capturing from its command prompt.
I made an FFU backup with no issues, and even managed to restore it to a vhdx file (as MS documents stated it was possible).
I mounted the vhdx file as a drive in normal Windows and it looked perfect. I created a boot entry using bcdboot so I could dual boot to the vhdx file.
That is when things just did not work. I tried to boot into restored image and it just booted to a black screen.
I restored a Macrium Image of main installation to a vhdx file and made boot entry for that, and it worked fine.
I see no reason why a restored ffu image should not work once a dual boot entry is made.

DISM - Clone and Deploy using FFU Image
How to use DISM to clone and deploy or restore a Full Flash Update imagePublished by Kari "Kalsarikänni" FinnCategory: Backup & Restore
24 Jul 2020


 Quote
QuoteTutorial Categories

Related Discussions
